


This video shows steps for making the Continuous delivery pipelines using ApexSQL DevOps toolkit – TeamCity plugin. The ApexSQL DevOps toolkit – TeamCity plugin enables users to create flexible Continuous delivery pipelines with highly customizable pipeline steps using native TeamCity user interface. These steps include: Schema sync, Data sync, and Deploy steps as well as two optional Document and Publish steps.
Transcript
Hello, and welcome to this ApexSQL DevOps toolkit TeamCity build agent plugin DEMO introduction for SQL Server database continuous delivery.
In this video we’ll create a pipeline for continuous delivery, as opposed to continuous integration. With continuous delivery we are starting with an approved build and validated database changes, comparing our interim build to production to create a synchronization script and deploy it to production and then provide notification of success or failure.
To start, we will create new Build Configuration in TeamCity and name it

The first step available for the CD configuration is the Schema sync step added with “ApexSQL DevOps toolkit – SchemaSync” runner. This step will compare schemas of the database that contain changes with the production database and create a synchronization script that can be executed later to update the production database.
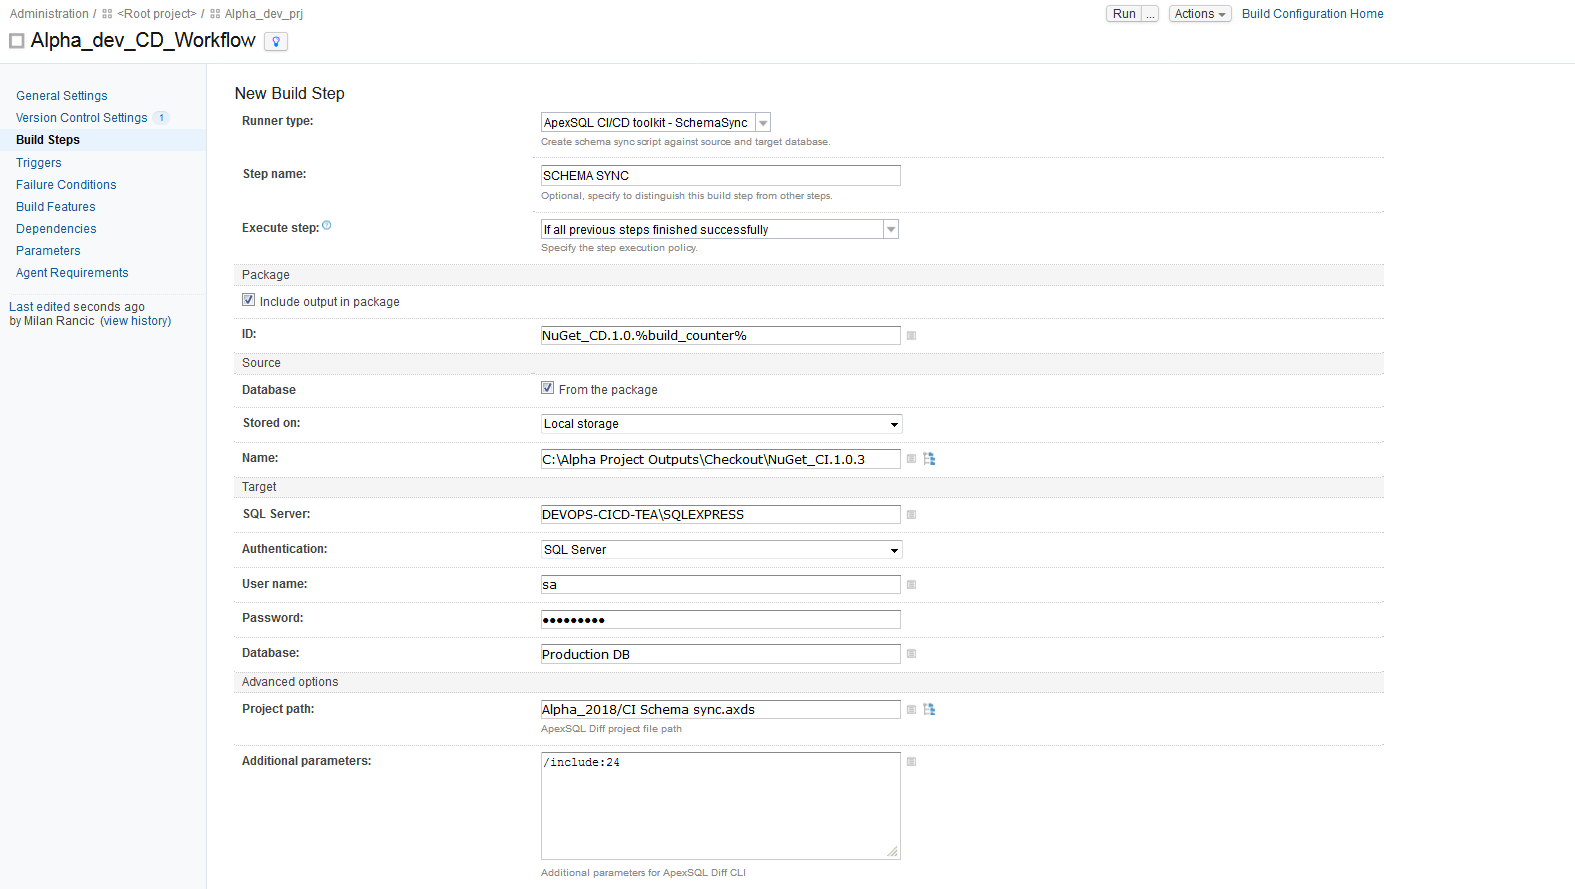
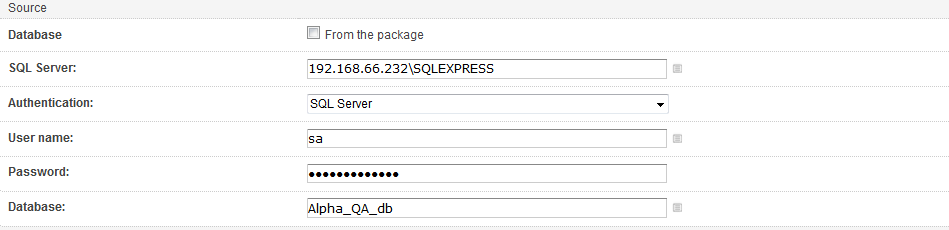
For the data source, that contains changes, there are two options to choose from. One option is to use the script folder contained in the NuGet package and the other is to use a direct SQL Server connection to the test, or temporary, database. Both sources were created previously with the Continuous integration pipeline.
For the first source type, where a package would be used, in the Source section select the “From the package” option and configure the Stored on location, which can be on local storage or on the NuGet feed placed with the PUBLISH step which we will come to later. Along with the location the Name of the package file is required to point to the desired NuGet package.

The second source type, the direct database connection, is configured when the “From the package” option remains unchecked. The SQL Server and the Database fields need to be filled to point to the test database and the authentication method needs to be chosen for the connection. Note that, even though the tSQLt framework objects are still in present in the test database they will not be considered during the comparison by default.
We will use the NuGet file created with from a previous CI pipeline execution step by pointing to the checkout folder location of the package in the Stored on field.
For the Target section the connection settings to the production SQL Server and database are required.

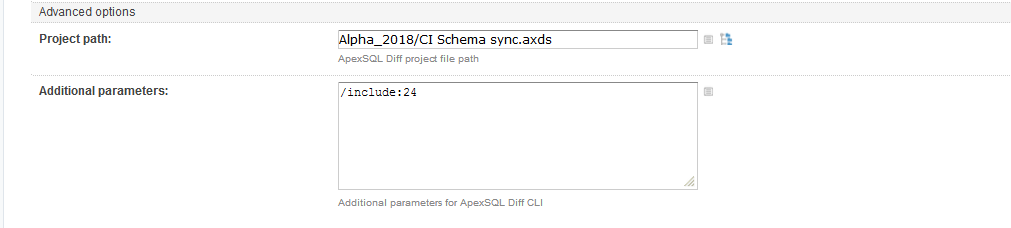
In the Advanced options section, an ApexSQL Diff project file can be included with options to ignore certain differences between the source and the target database schema objects or to exclude certain objects from the synchronization script.
In the Additional parameters field, the option switches can be set to override the options in the project or append to them. For example, we will use the settings from the project file to ignore certain differences and then add the switch to include only Stored procedures and Tables for comparison using the bitwise set which can be obtained from ApexSQL Diff’s main project settings view.
The output of the step will be a schema change report and the synchronization script. Both of those can be included in the package.
For the continuous delivery process a second NuGet package should be created to store the continuous delivery step outputs and used later for the deployment of changes.

The DATA SYNC step should be used only if there is static data in the repository and was included in the database build. It can be configured by choosing the “ApexSQL DevOps toolkit – DataSync” runner. This step will compare static data in the database with changes against the static data tables contained in the production database. If there are differences, the synchronization script will be created to update the static data in the production database. For the comparison, similar to the previous schema sync step, the database script folder from the NuGet package can be used as the source. Alternatively, the connection to the test database previously built can be used as the data source and in that case the synthetic test data will be excluded from comparison therefore not be pushed to production.
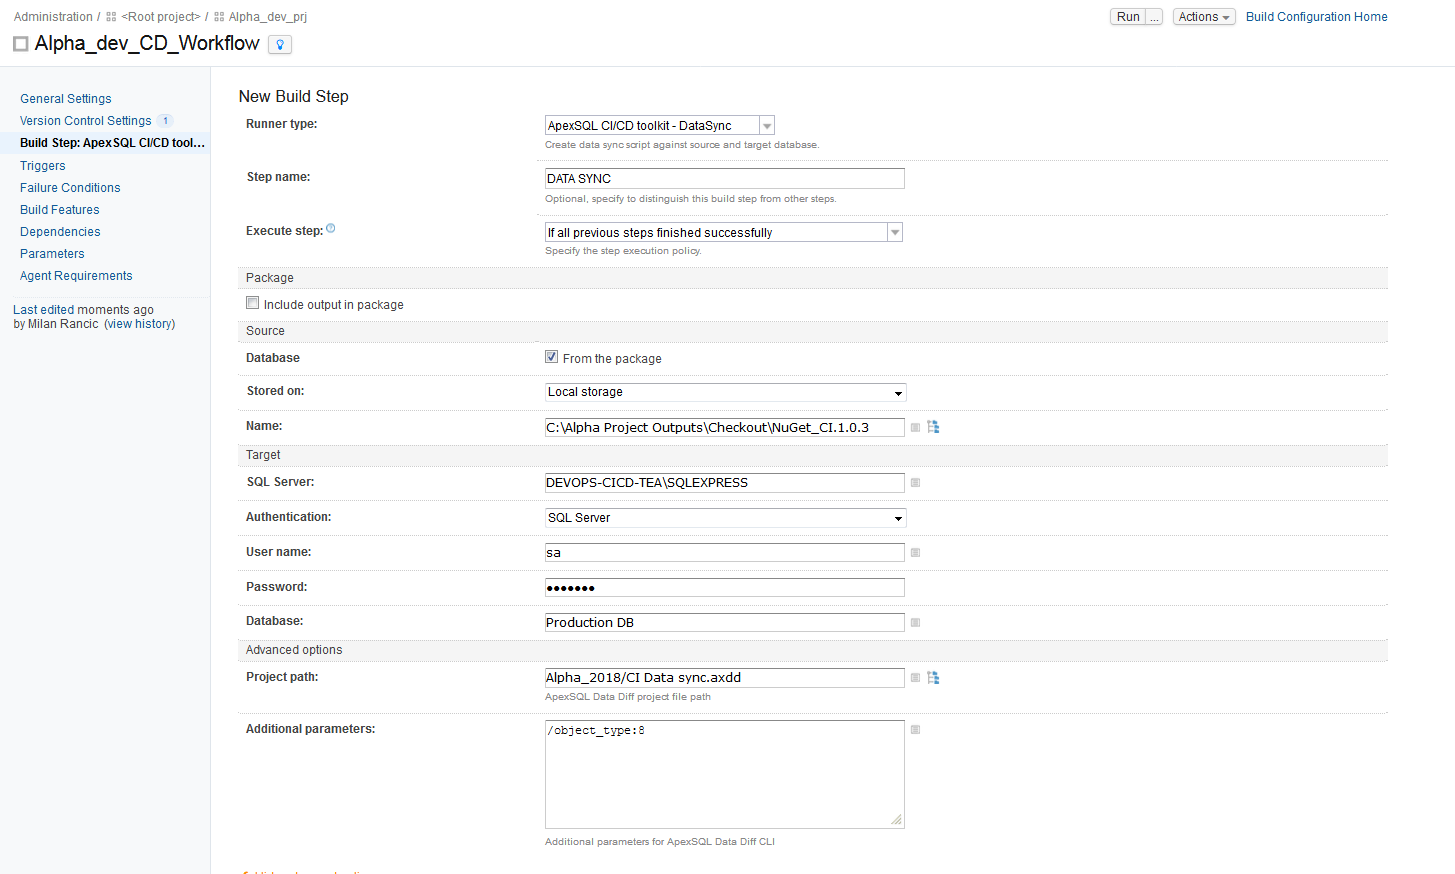
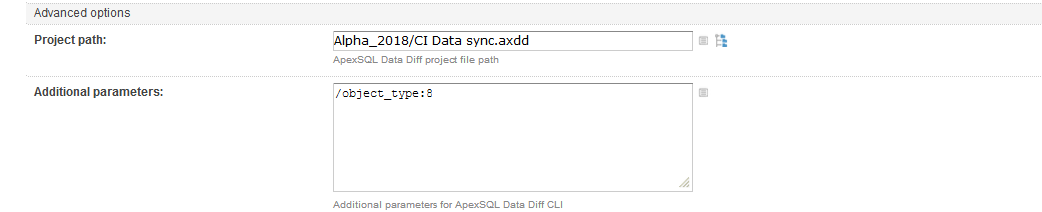
In the Project path field, add a project file created with ApexSQL Data Diff to import the settings to specifically include static data tables in the comparison. Otherwise they can be included via the additional parameters sections.
Again, if the set of options in the project file is not complete or you want to change or add to them, they can be updated with additional parameters. For example, we will use the row filters from the project file but exclude the views from comparison so we will insert the switch to compare only tables from the database.
The output created by this step will be the data comparison result and the synchronization script which can update the target database with static data changes when executed.
The DEPLOY step is used to update the changes on to production database. The step is configured with the “ApexSQL DevOps toolkit – Deploy” runner and uses as source the synchronization scripts created in Schema and Data sync steps. If the “From the package” option is checked, the sync scripts are expected to be in the NuGet package stored locally or on the NuGet feed and pointed to with the Name field.
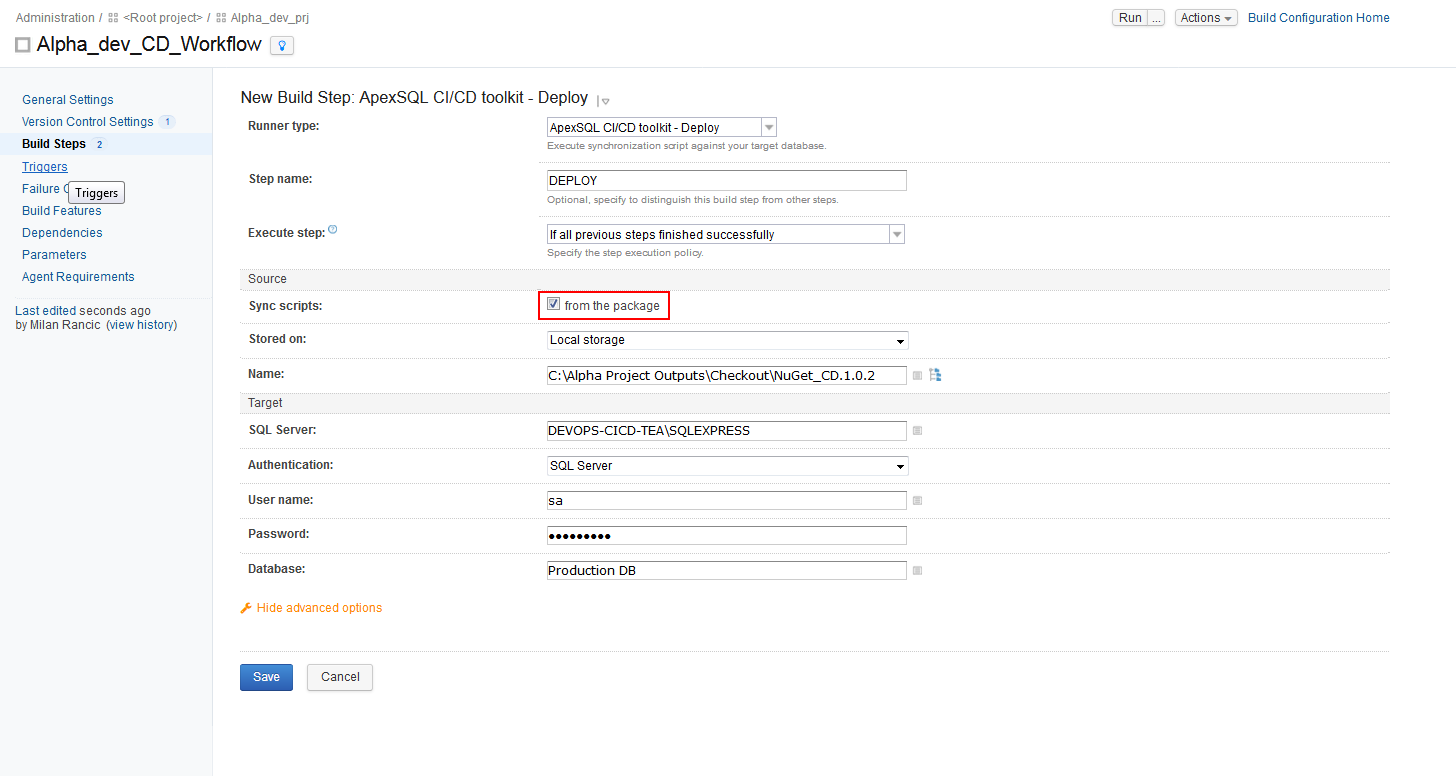
Alternately, if the “From the package” option is unchecked, the path to the checkout folder where the scripts are located has to be included.

The Schema and Data sync scripts will be executed against the database defined in the Target section and update the changes.
The DOCUMENT step can be added optionally to create documentation of the database or database changes. To insert this step, choose the “ApexSQL DevOps toolkit – Document” runner.
Among the standard configuration options similar to other steps, the DOCUMENT step has the “Changes only” select option. Check this option and the generated document will contain only changes that are waiting for the update so they can be reviewed easier and faster.
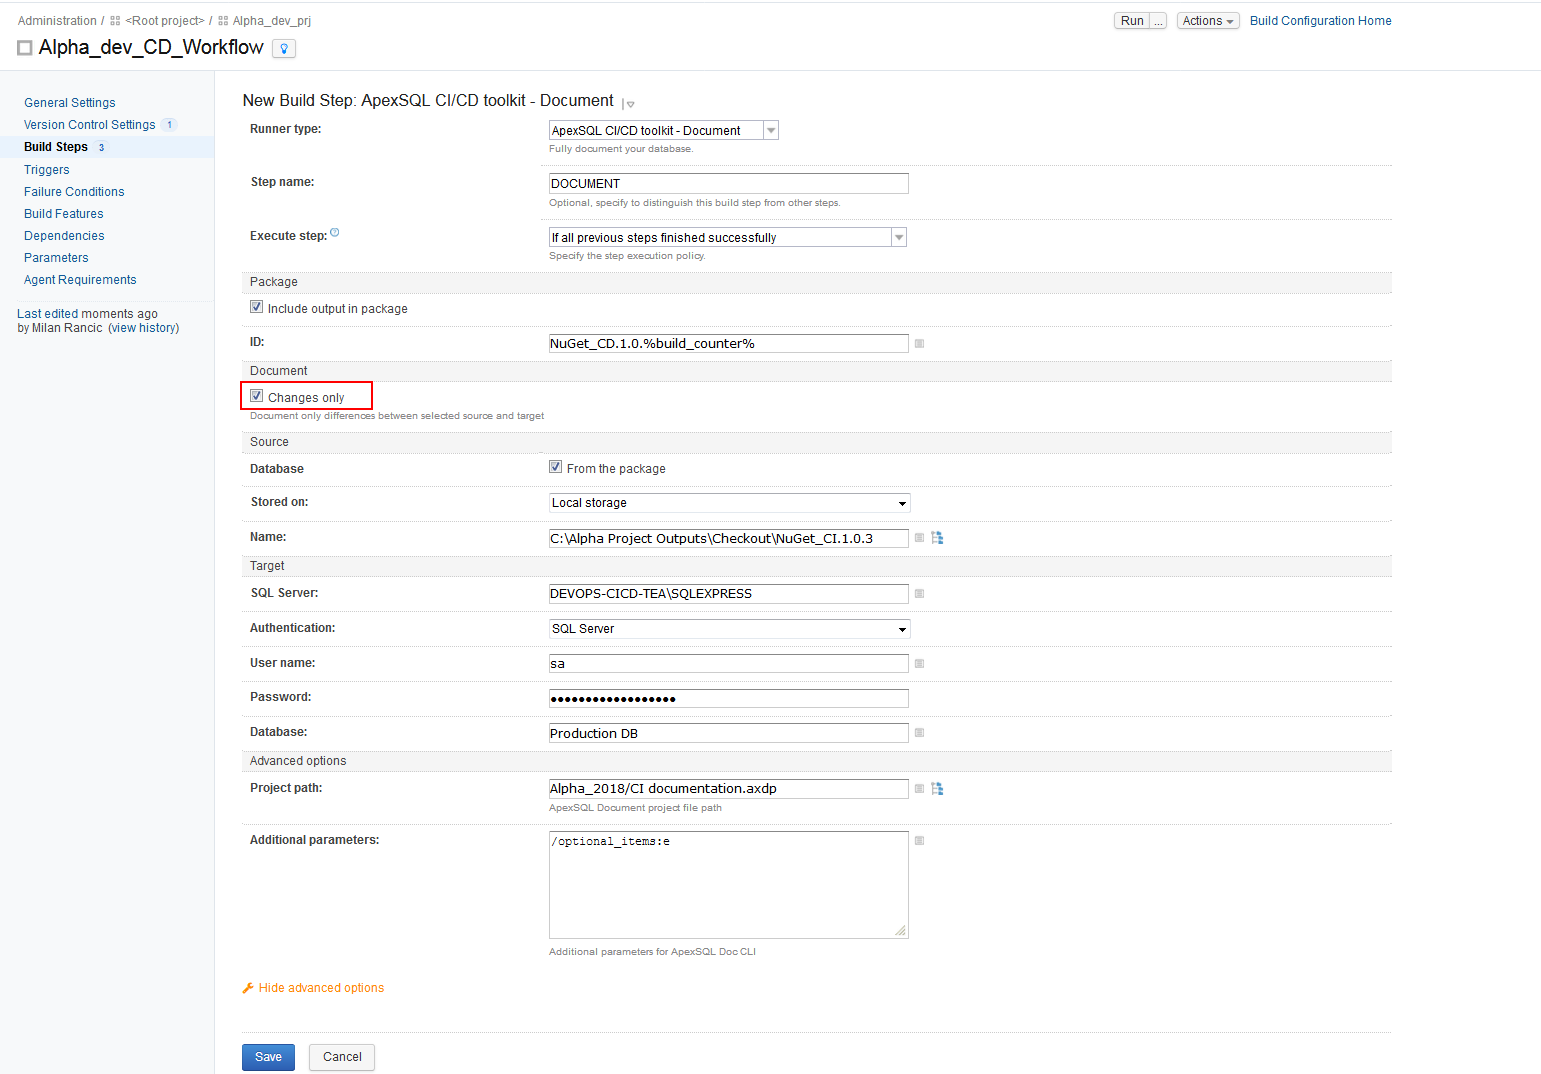
When the “Changes only” option is selected in the Source section there are two options to choose from. With the first option, when the option “From the package” is selected, this step will use the database script folder contained in the NuGet package created in previously executed package step as the data source, and this can be pulled from local storage or from a NuGet feed. In the Name field the proper NuGet package needs to be pointed to. The Script folder will be used for comparison with the production database defined in the Target section.

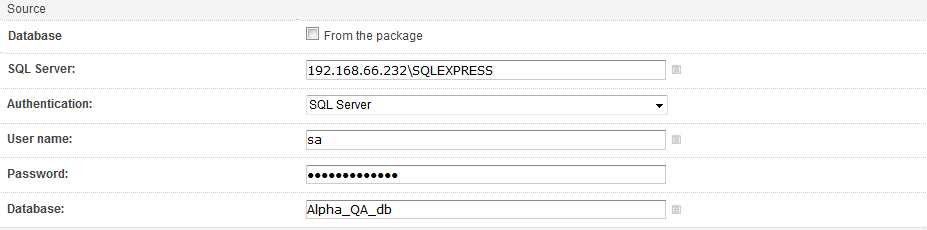
The second option would be to use a direct database connection with the built test database as the source. Uncheck the “From the package” option and fill in the connection parameters for the test database.
Depending on where the DOCUMENT step is positioned, the proper source type should be selected. That means if the step is used somewhere in the CI pipeline before the PACKAGE step, the NuGet source cannot be used because there is no database script folder created yet.
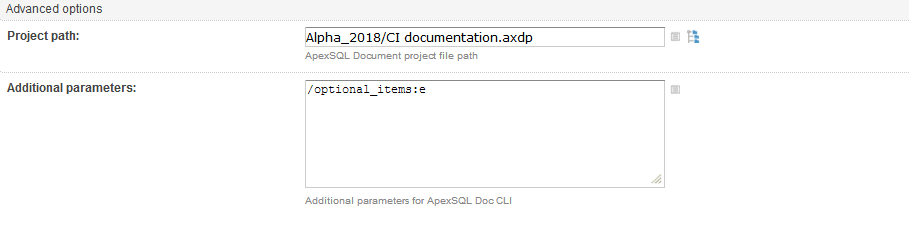
In the Project path field, we will insert the path to the project file that contains our customized documentation configuration options, created with ApexSQL Doc. For example, with the “Changes only” selected, only objects with changes will be documented but with the project file we will further narrow the specification and document only certain objects that contain changes.
Also, with Additional parameters we will make sure that extended properties are included in the generated documentation.
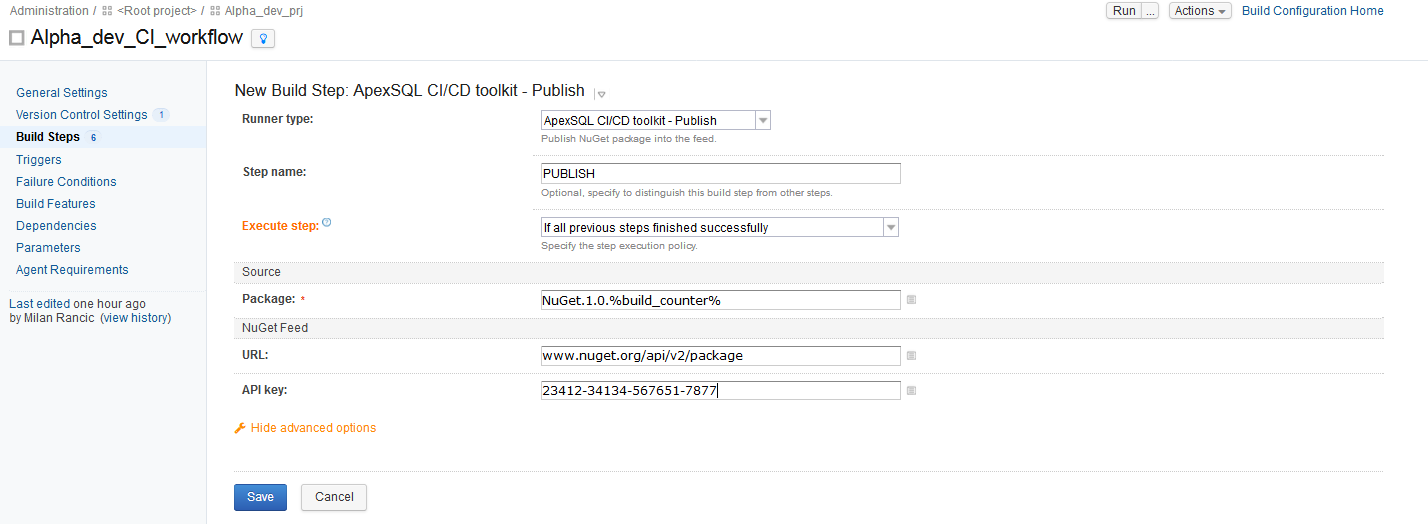
Another optional step is the PUBLISH step. For this step use “ApexSQL DevOps toolkit – Publish” runner. With the PUBLISH step it is possible to push the created NuGet package to a NuGet feed so it can be used later from a remote location. Configuration of this step requires the name of the NuGet package file to be inserted in the Package field of the Source section and in the corresponding fields the URL for the desired NuGet feed location and the API key for accessing it. This step can be used at any point where all needed step outputs are combined.
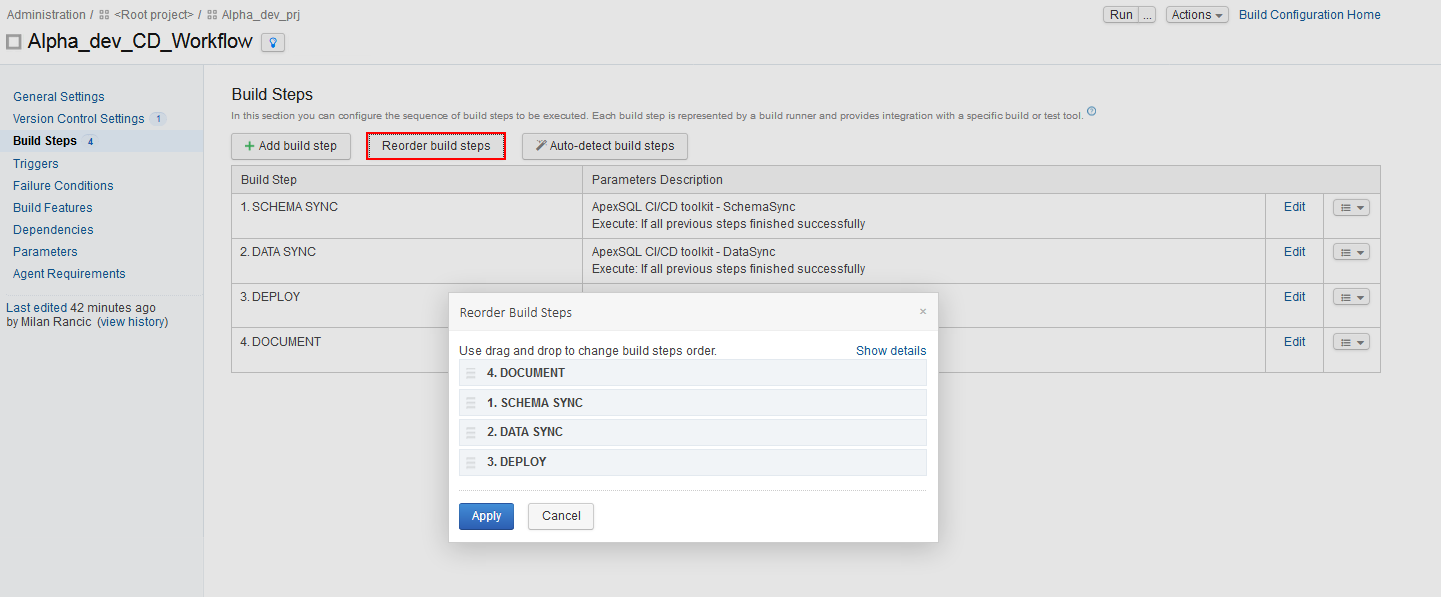
After insertion of the steps in the Build configuration, they can be reordered by clicking on Reorder build steps button in the Build steps view.
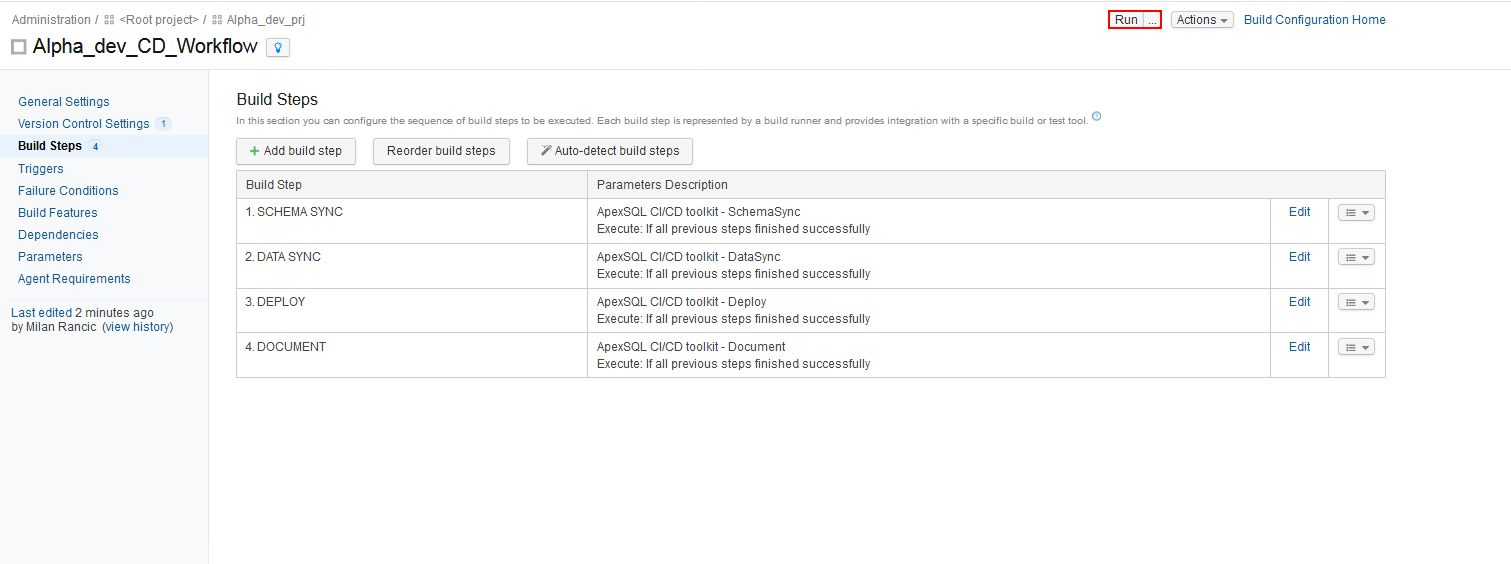
When Build configurations for CI and CD are prepared, they can be executed with the Run button.
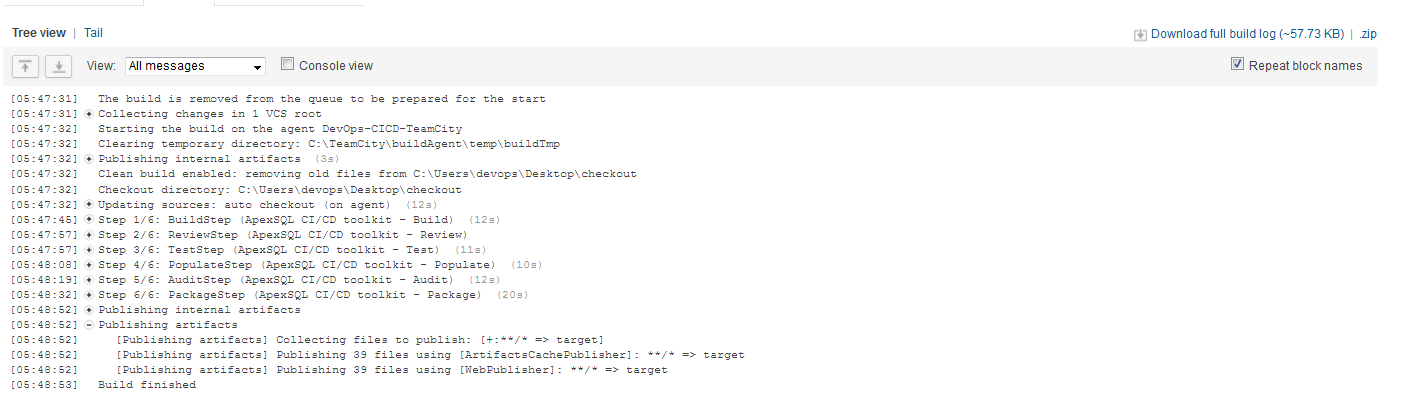
After a Build configuration execution, the summary can be found within TeamCity’s build Log view but the copies of the summaries will be stored in the checkout directory along with the NuGet package file if created during the process.
This concludes the video tutorial for SQL Server database continuous delivery with the ApexSQL DevOps toolkit – TeamCity plugin.
Thanks for watching. For more information, go to ApexSQL.com


