


This video shows steps for making the Continuous integration pipelines using ApexSQL DevOps toolkit – TeamCity plugin. The ApexSQL DevOps toolkit – TeamCity plugin enables users to create flexible Continuous integration pipelines with highly customizable pipeline steps using native TeamCity user interface. These steps include: Build, Populate, Audit, Test, Review, Package.
Transcript
Hello, and welcome to this ApexSQL DevOps toolkit TeamCity build agent plugin DEMO introduction for SQL Server database continuous integration.
The ApexSQL TeamCity plug-in enables users to create highly customizable and flexible build configurations within the popular TeamCity build server. The plugin contains build runners to create build steps for Continuous integration and Continuous delivery through the TeamCity user interface.
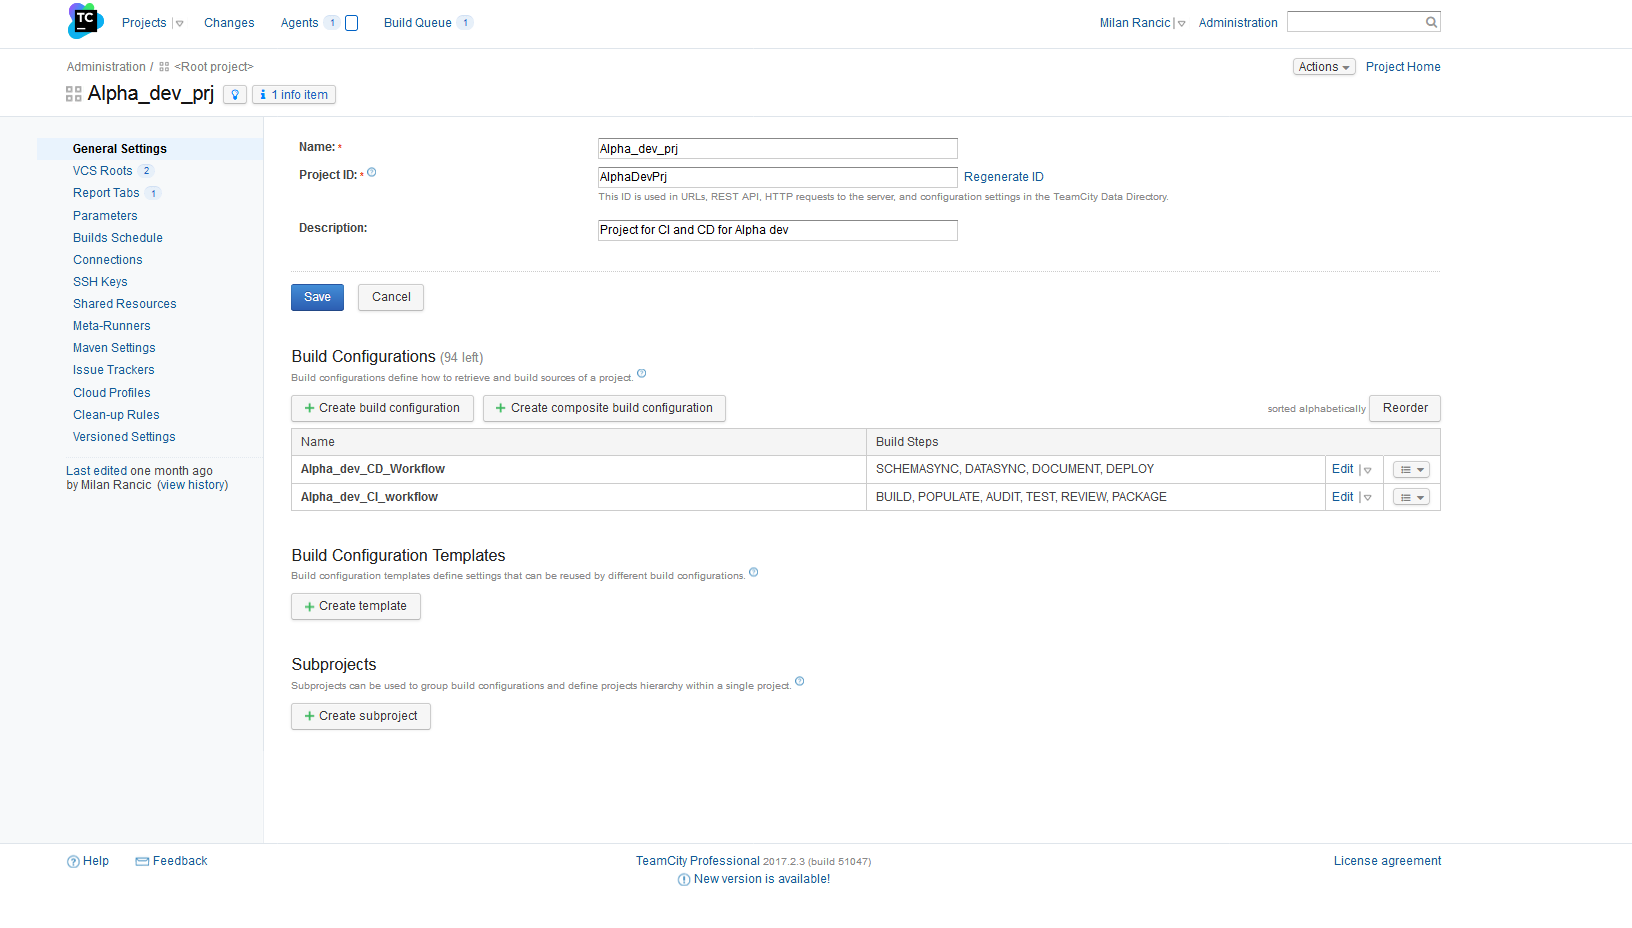
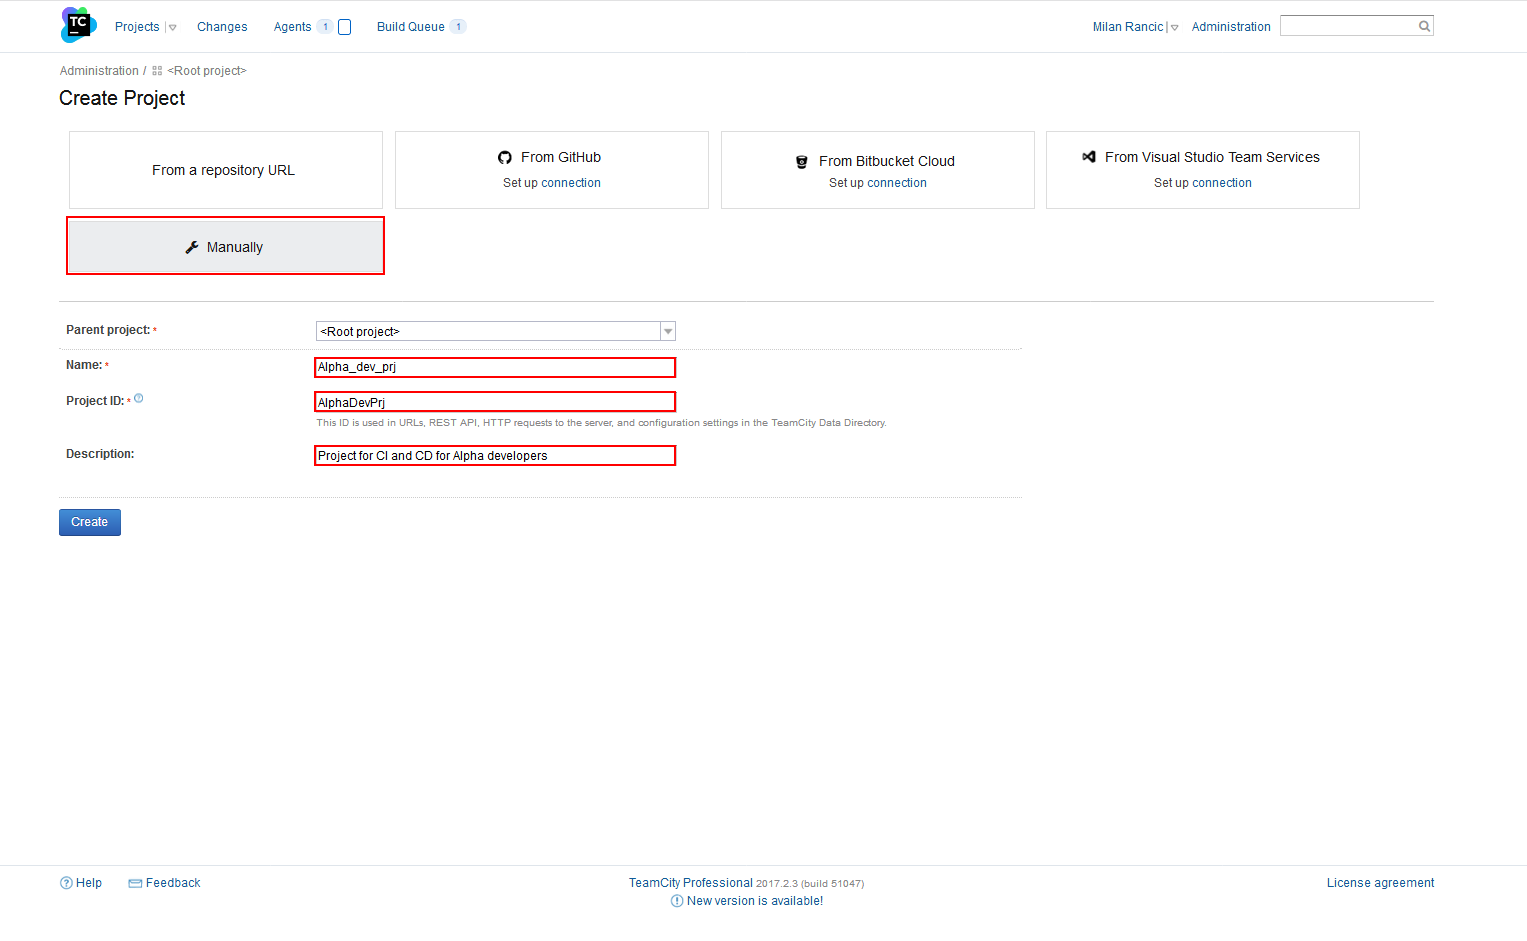
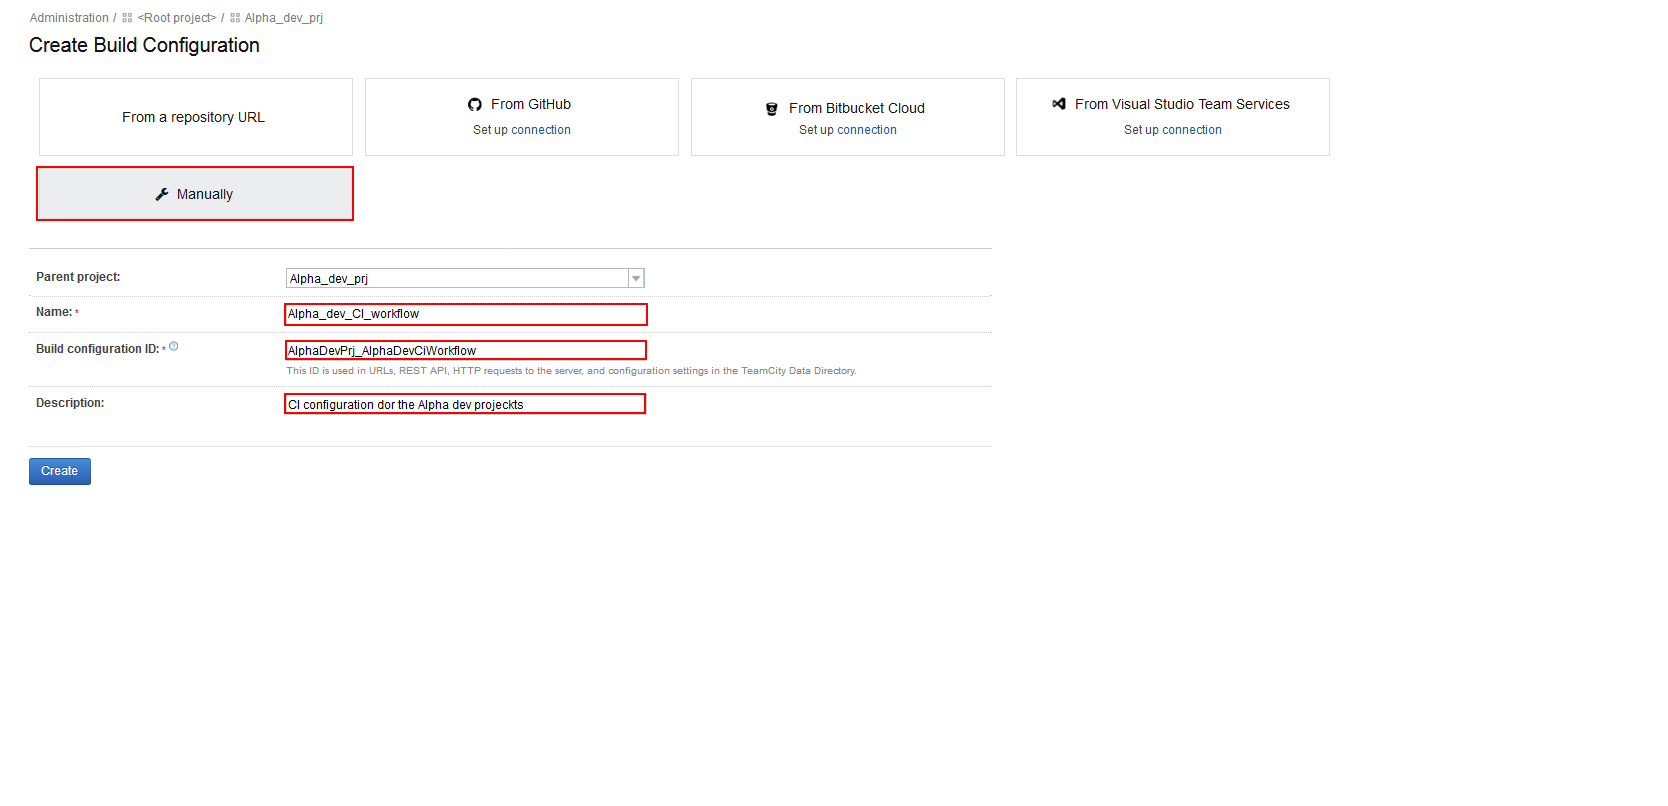
To begin, a TeamCity project has to be created. There are several options for the initial settings. Choose the option to use manual settings and the form for defining the project name and description will show up.
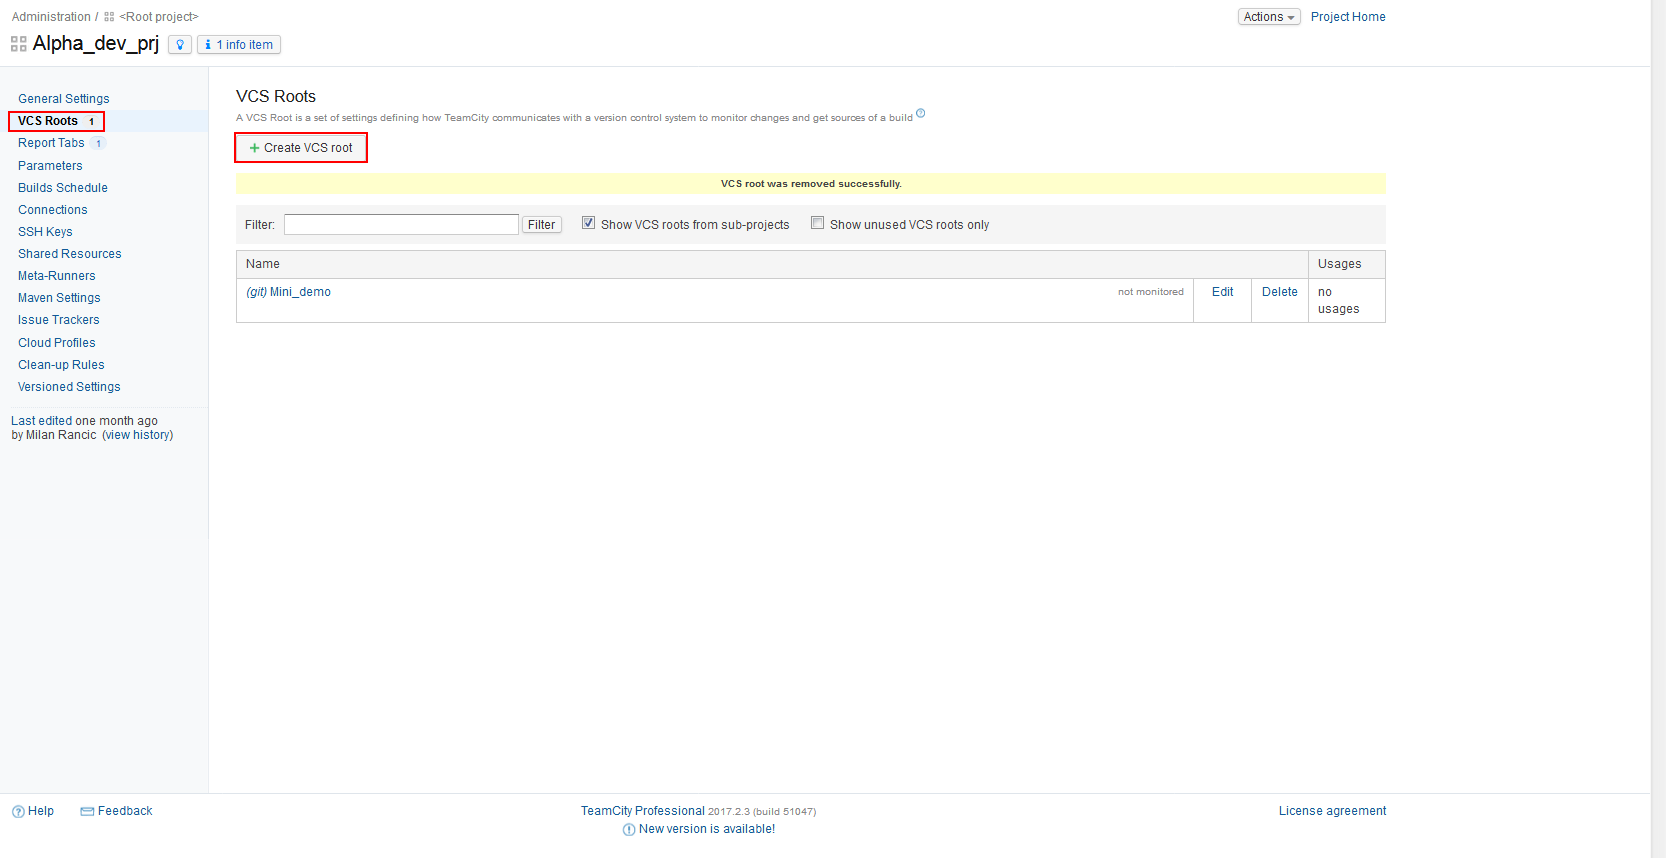
When a new build configuration is created, the first thing to do is to create a version control system aka “VCS” configuration. TeamCity allows using data sources exclusively from the designated VCS.
Creating the new VCS root starts from the main Project menu by clicking on the VCS root option then the Create VCS root button
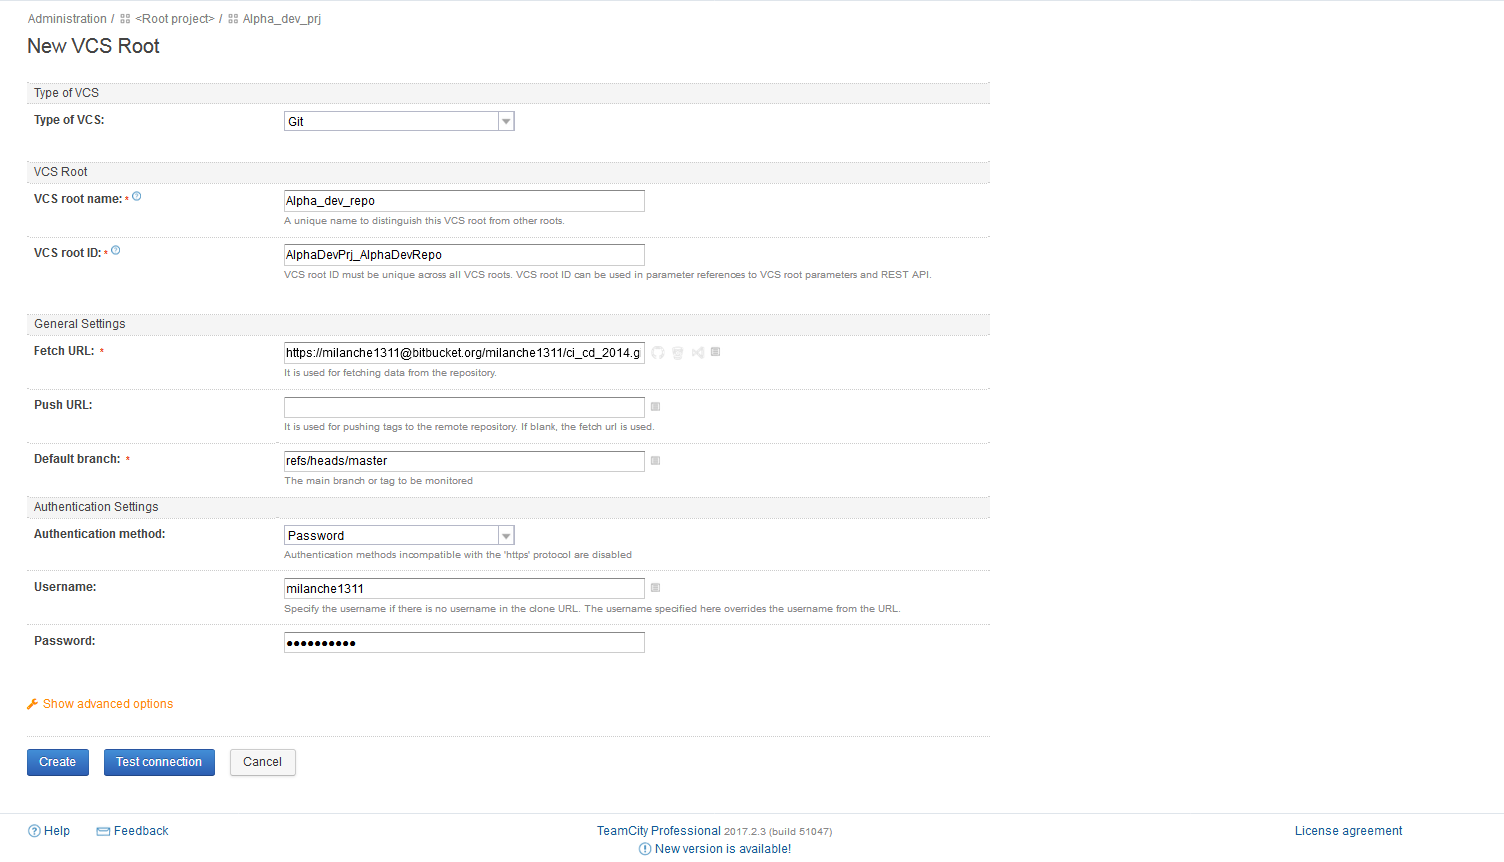
For the purpose of this demo we’ll use a Git repository hosted on bitbucket and configure the connection to the repository. After successful creation, the new VCS root will be available to be used for the Build configuration.
With the VCS root created, it’s time to create a build configuration for our CI and CD workflows.
To create a new Build configuration, from the project main view, click on the Create build configuration option and within the opened view again choose manual settings.
When the new Build configuration is created, the previously defined VCS root needs to be attached. Go to the Version Control Settings option in the Build configuration main menu and click the Attach VCS root button.
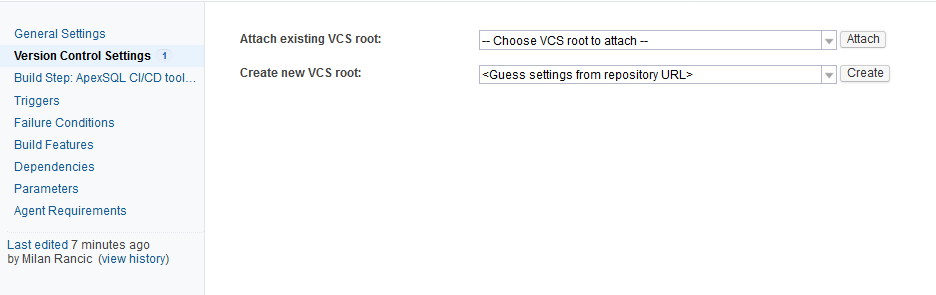
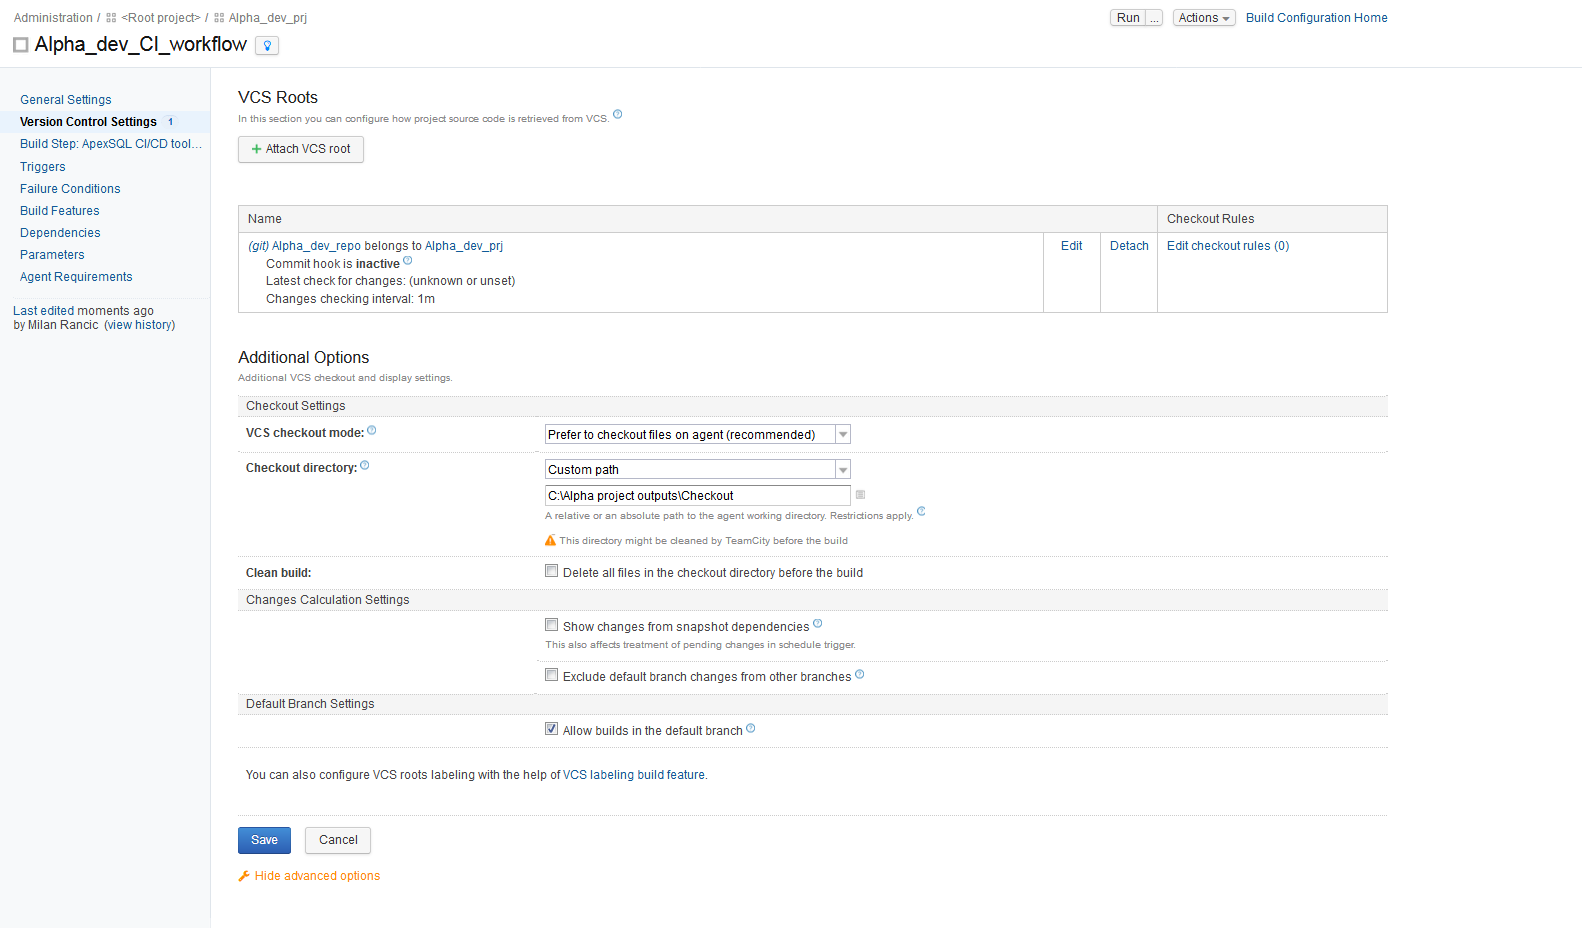
Pick the desired VCS root from the list and click the Attach button and additional options for the checkout location will appear. Here the checkout folder needs to be set, which is the folder where execution outputs and summaries will be stored. The settings we need are the checkout location on the machine where the TeamCity build agent is located, as this machine would be considered local, and then for the Checkout directory the custom path can be set to be the absolute folder path.
When the TeamCity Build configuration initial preparations are done, adding and integration of the steps provided by ApexSQL plugin can begin.
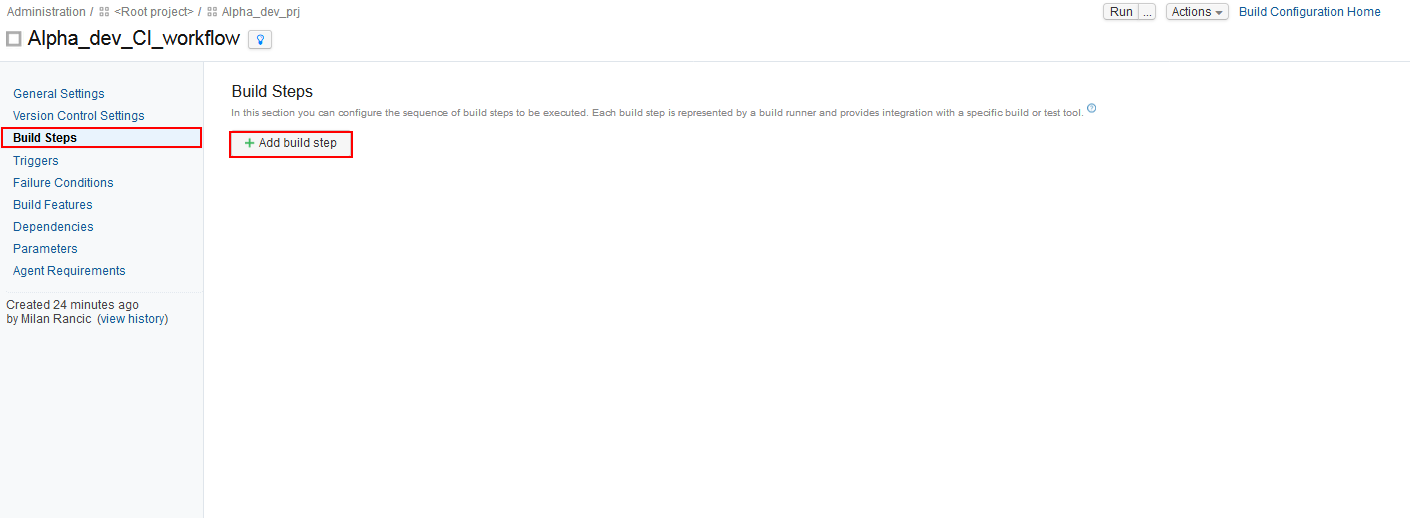
From the main options menu of the TeamCity Build configuration choose the Build steps option and the view for adding and configuring build steps will be displayed. From this view click on the Add build step button and the dropdown selection menu for build runners will show up. In this menu, ApexSQL runners will be listed among all of the other available runners.
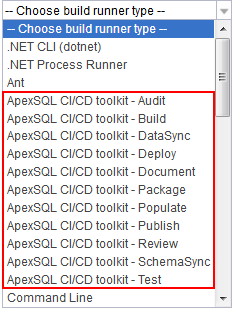
The first of available ApexSQL steps is the BUILD step. For this step, choose the “ApexSQL DevOps toolkit – Build” runner and the configuration view for the BUILD step will immediately show up. Here we need to name the step.
Second, in the Source section, pick the “Build VCS root” from the Database folder selection menu to point to previously defined VCS repository. Optionally, check the “Include static data” option to build the test database with static data stored in the repository, along with our object schemas.
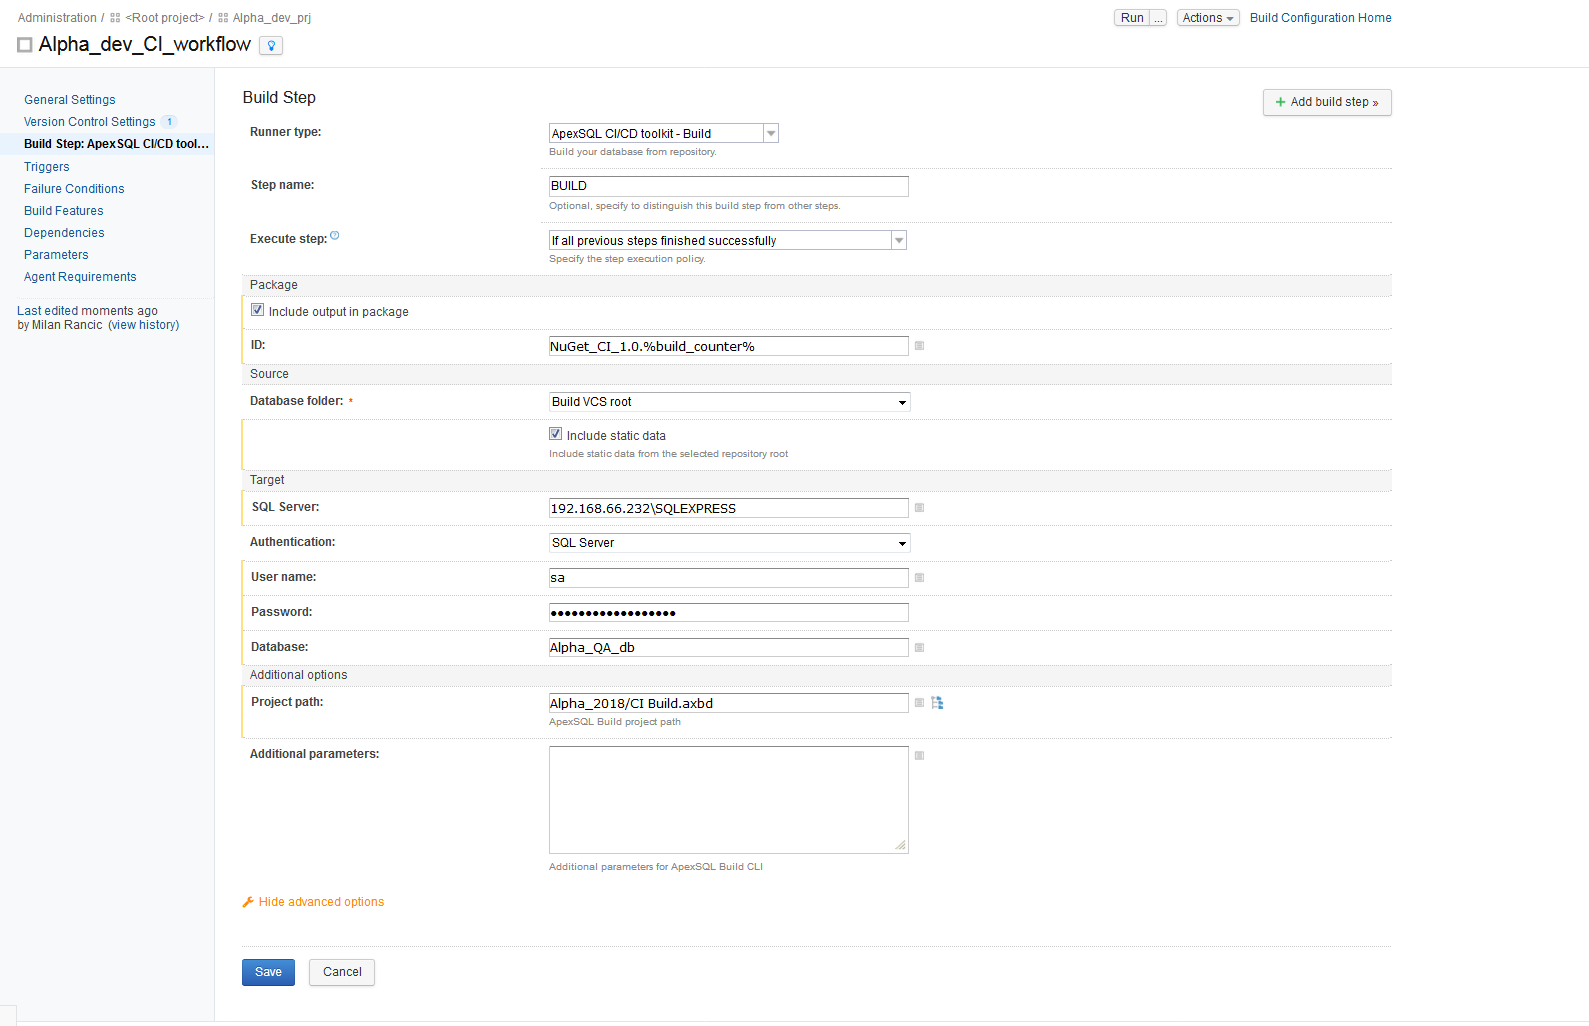
Next, set the connection for the SQL Server where the test database will be built. The SQL Server can be on a local machine, where the TeamCity build server is set, or on a remote location. For this demo, a remote location will be chosen.
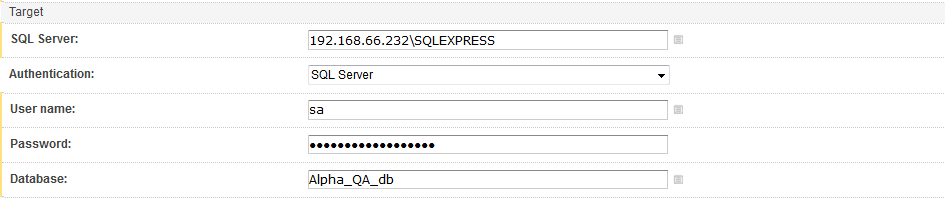
These connection settings will automatically be used in all other steps included in the Build configuration designated for Continuous integration.
After the SQL Server connection and authentication settings are configured, we need to define the name of the new test database that will be created. To accomplish that, type the database name in the Database field. In case a database with a given name already exists this step has a built-in setting to drop the database, if it exists, by default. This is meant to ensure a clean test environment for each run of our pipeline, where the test environment is destroyed and then recreated, from scratch, each time.
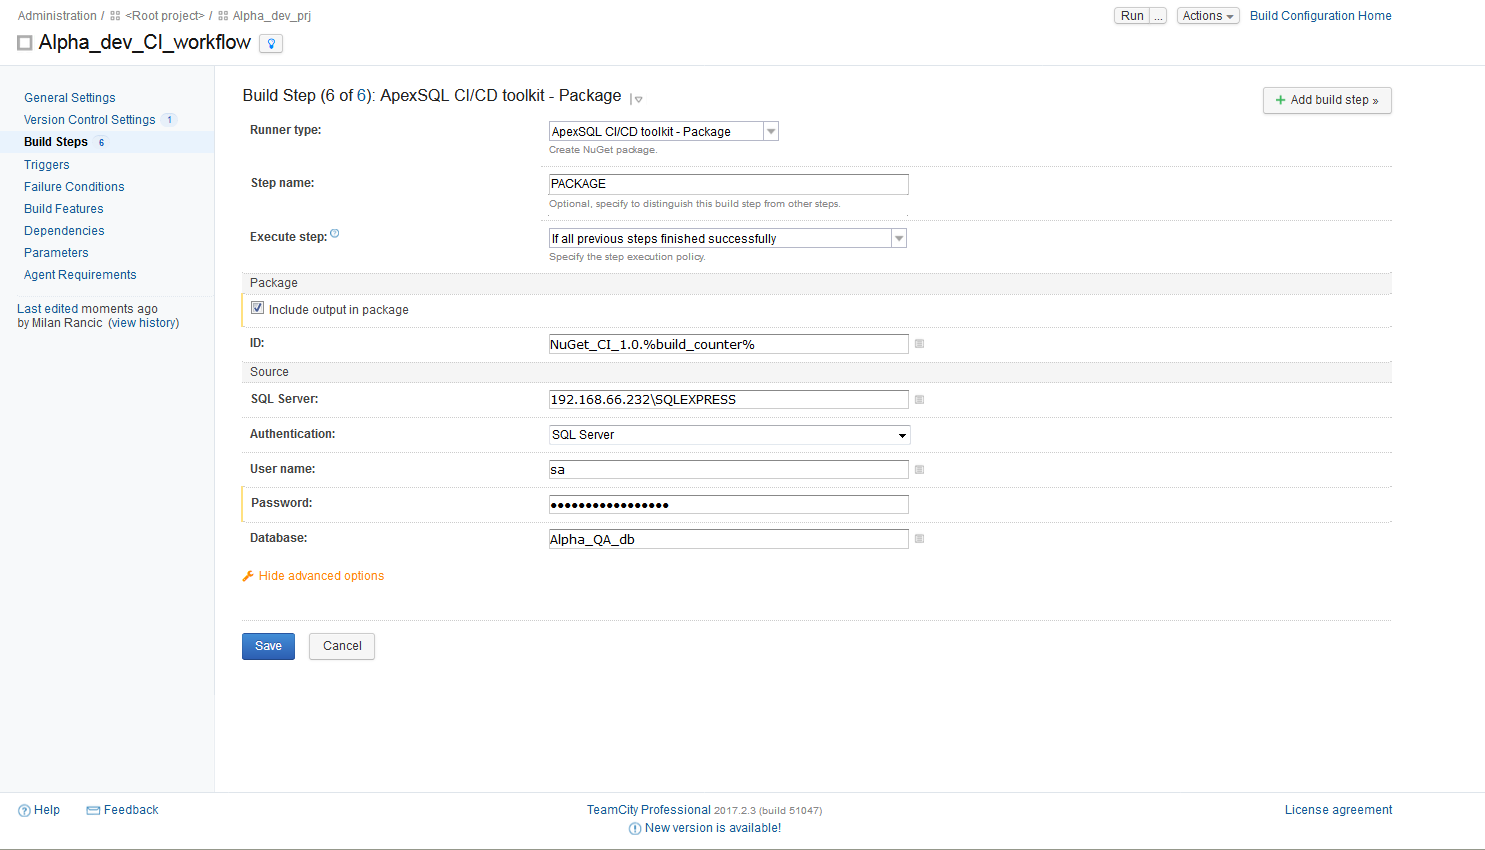
Within the BUILD step configuration, and all other available steps, there is a Package section with an option: “Include output in the package”. This option, if checked, allows for entering the name of a NuGet package where information, created in the course of the processing of these steps, like SQL scripts, reports and summaries will be stored.
As part of the package name, include the build counter tag to easily identify the particular package associated with each pipeline run. The output of the BUILD step execution will be a SQL script, for building the database, and the execution summary showing the results from processing the script.

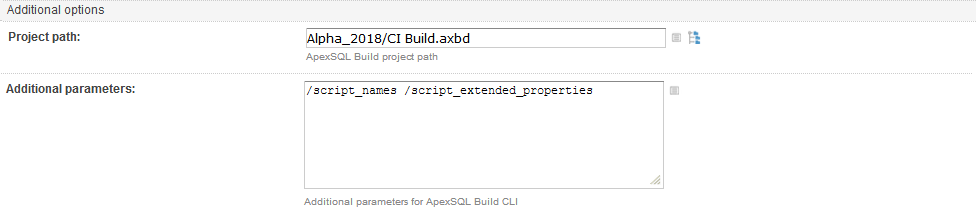
The final section which is included in each of the configuration steps is the Additional options section that opens when clicked on the Show advanced options. In the project path field of this section we will include the project file created with the ApexSQL Build application to customize the build settings. With a project file it is possible to import set of configuration options created and saved with ApexSQL tools, so that the TeamCity plug-in will process exactly like the respective ApexSQL application, ApexSQL Build in this case.
For example, the Build project file can have settings to exclude some of the objects from the database creation process.
To be able to include the project file for this step and all other following steps, they have to be uploaded to the same repository that was defined as VSC root because the TeamCity will use that location for all required inputs.

In the Additional parameters field it is possible to include some command line interface option switches which can further customize the behaviour of this step, to override the project file settings or append to them.
For example, we used an ApexSQL Build project file where we had some global options like to include USE statements, ANSI nulls and ANSI padding set for the build script which will form the test database upon step execution, but we failed to include object extended properties and foreign keys and constraints names. In that case, we will add those options in the Additional properties fields and include them in the build.
Combining options like this works in every available step.
With the BUILD step configured and saved, it is time to add the next step for the Build configuration. The POPULATE step is used to fill empty tables with synthetic test data. It is configured by choosing the “ApexSQL DevOps toolkit – Populate” runner type. This step will automatically use the same SQL Server settings defined in previous step and the same NuGet package if the “Include output in package” option is set. The output of the execution of this step will be a SQL script file, containing all of the DML statements, and an execution summary.
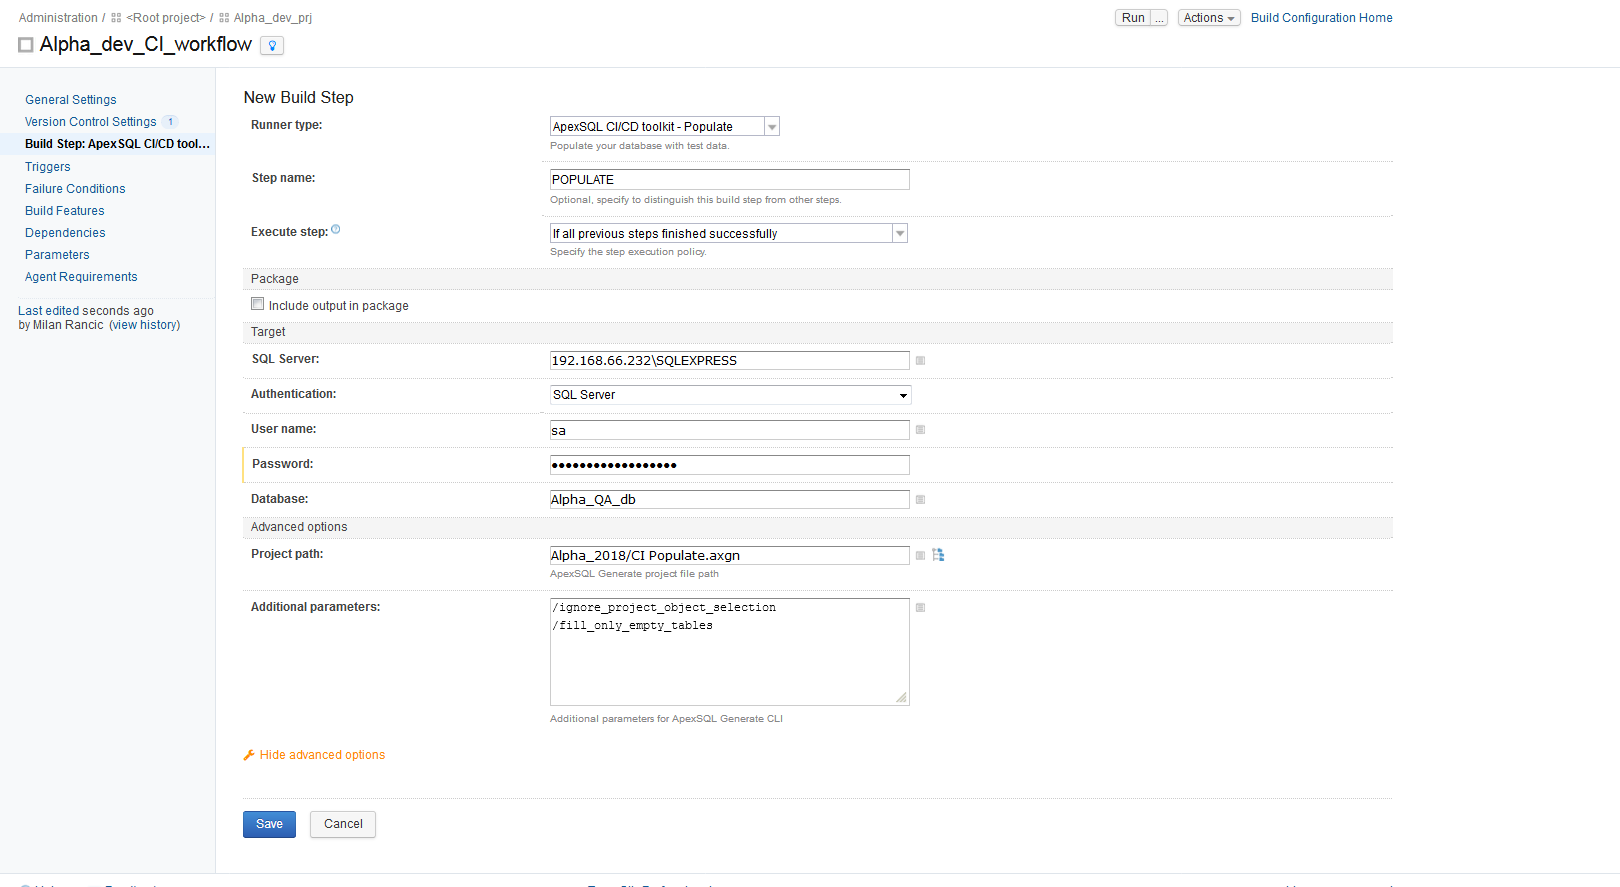
Details like the number of rows and which tables to generate data for can be specified with ApexSQL Generate and saved in a project file which will be included in the step.
Alternatively, we can use Additional parameters option switches to ignore the specific table selections in the project file, and instead to fill all empty tables. Outside of any additions like these, settings found in the project file will be adhered to.

The next step is the AUDIT step and it is used to implement trigger based data auditing for sensitive tables. An ApexSQL Trigger project file should be included which specifies which of the tables should be audited. These are generally referred to as sensitive tables. By default, the entire auditing architecture of tables, views and procedures for storing auditing data, reporting etc will be added to the database in this step. This provides a repository for the audited data and means to produce reports. But in most cases, we’ll want to exclude these as that auditing database would reside in separate database, so we’ve included additional switches to make sure they don’t get added
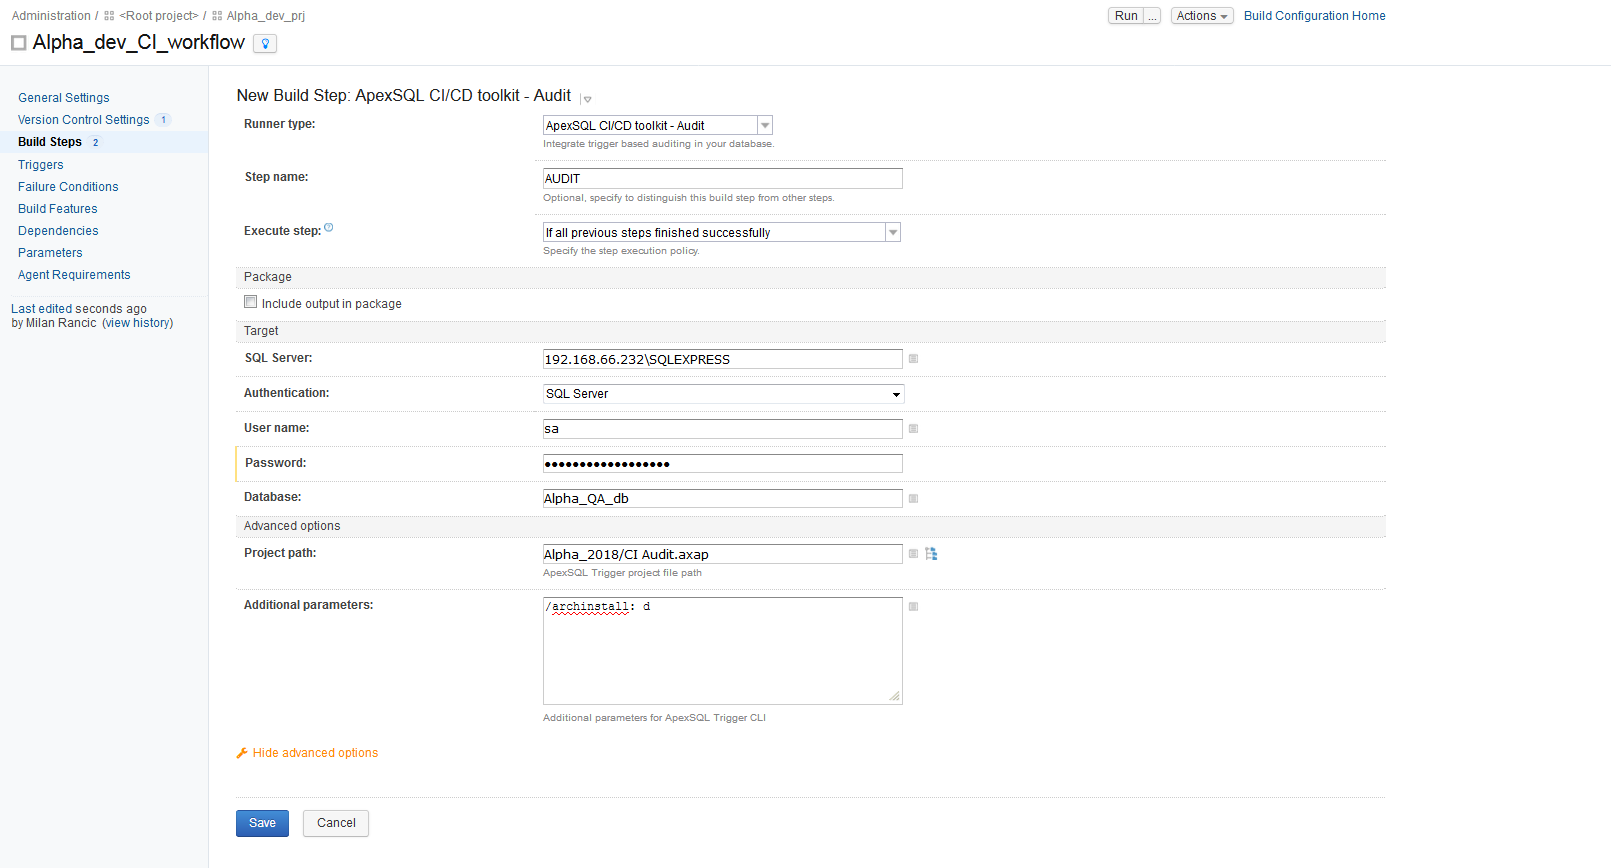
The output included in the package file contains the SQL script to add the triggers and the execution summary.
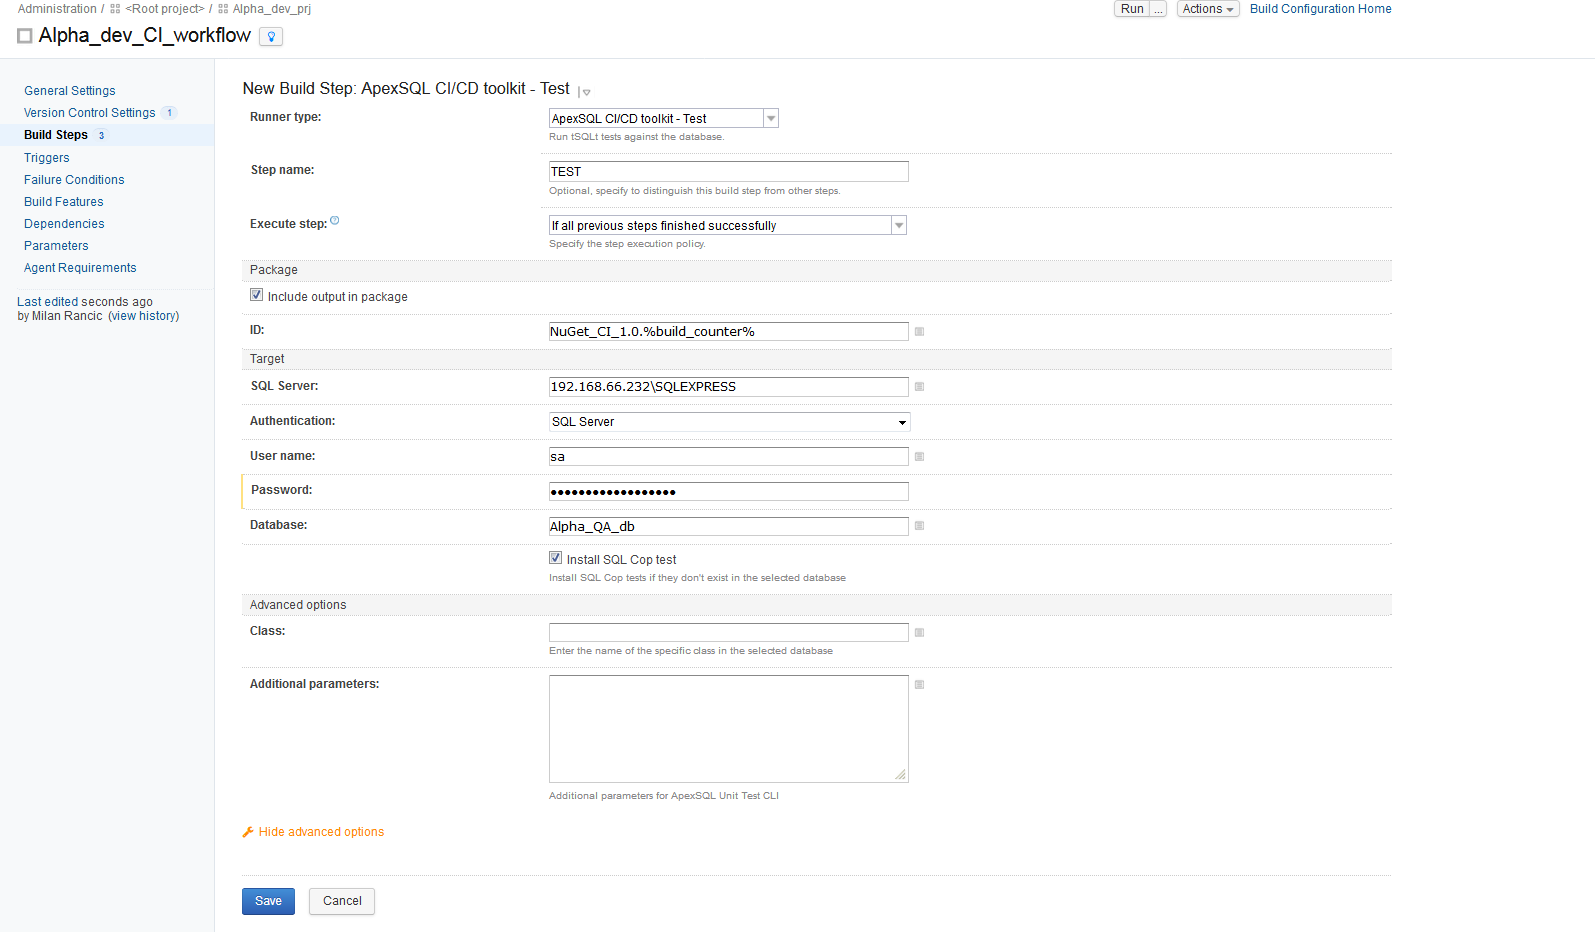
The TEST step is used to install the tSQLt framework on the target database and perform unit tests for reviewing the database.
The configuration view of this step is opened with “ApexSQL DevOps toolkit – Test” runner type. One specific feature of this step is the “Install SQL Cop test” option. With this option checked, the step will install the set of nearly 50 predefined static code analysis tests the execute them to evaluate the test database for potential issues or poor coding practices. In the Additional options section, a test class can be included that contains any additional set of tests created with ApexSQL Unit Test. Output in the package will be the test report to show which of the tests have passed and failed.
The REVIEW step configuration is opened by choosing the “ApexSQL DevOps toolkit – Review” runner. This step can be used to review the database for any SQL coding or best practices violations, if they exist, before deploying the changes to production.
In the Source section, the rulebase file created with ApexSQL Enforce has to be included. Click on the Browse button to locate the path to the previously created rulebase project file then upload it. When executed, the step will use the rulebase as checklist for issues like missing primary keys or missing clustered indexes in tables and create a summary report with any issues that were discovered along with aggregate results like violation counts and whether the database passed or failed the review.
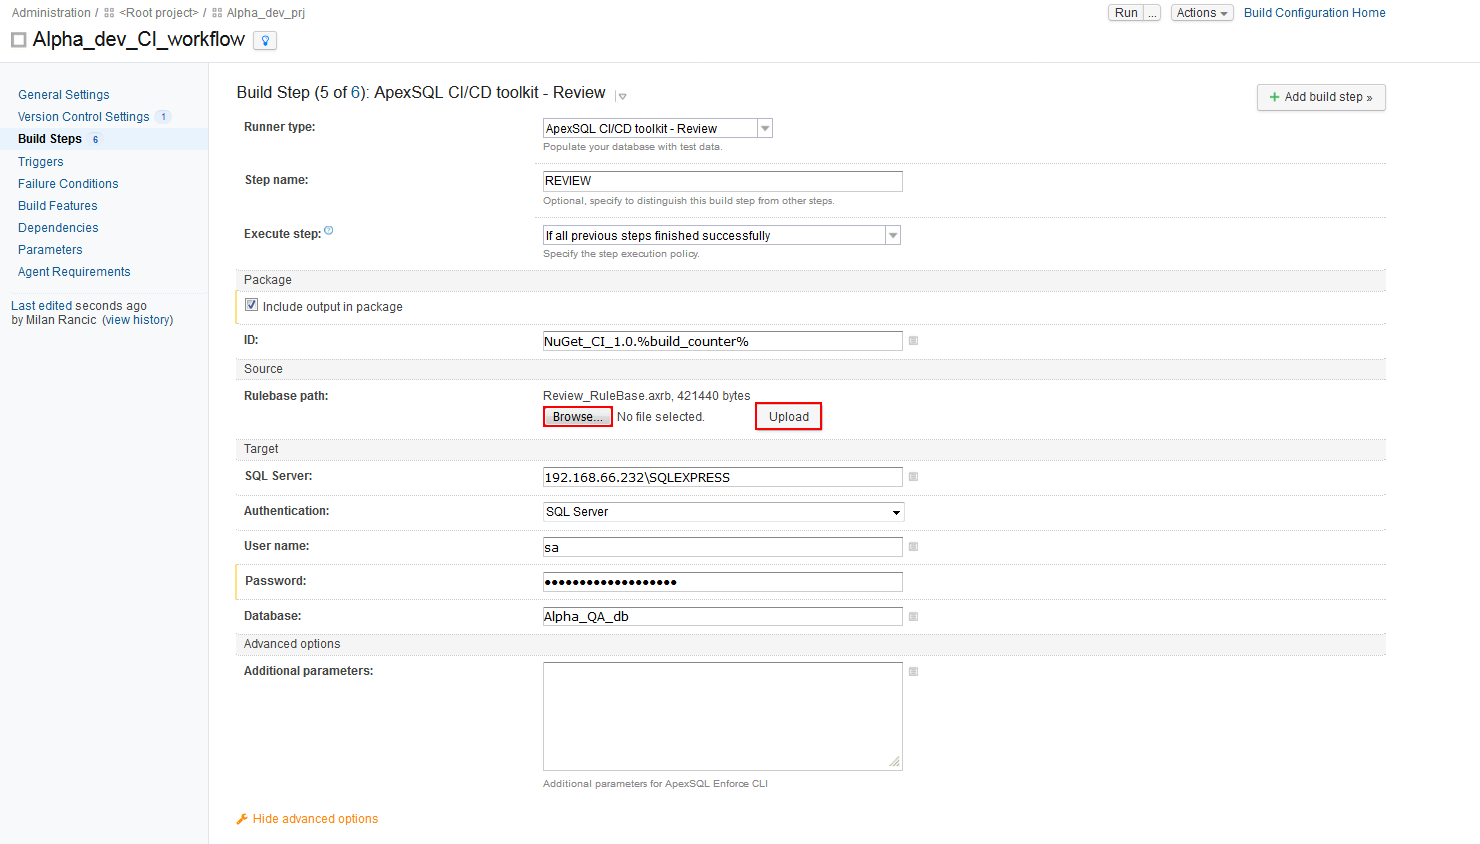
Since the rulebase file might contain some inactive rules which will not be applied for review, it is easy to activate all of them without the need to update the rulebase. To do that we will use the switch in the Additional parameters field to use all rules in the rulebase file.

The resulting NuGet package will contain the review report if output is included in the package.
The final step to be used in Continuous integration process is the PACKAGE step and its configuration is opened by choosing the “ApexSQL DevOps toolkit – Package” runner. This step uses the test database to create a clean database script folder without any test data. The database folder will be used later in the Continuous delivery process to compare it with the production database and prepare changes for deployment.
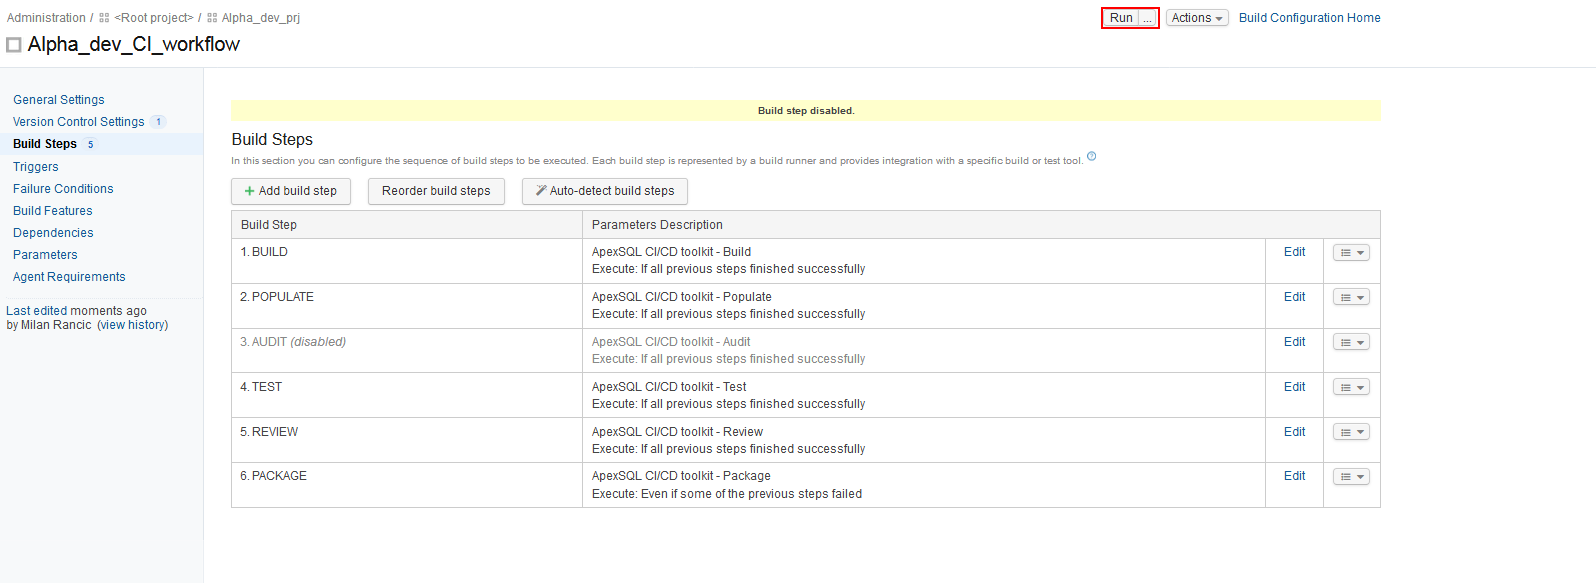
With all steps included in the Build configuration it is possible to reorder, disable and reconfigure them.

When the Build configuration is done we can execute it with the Run button.
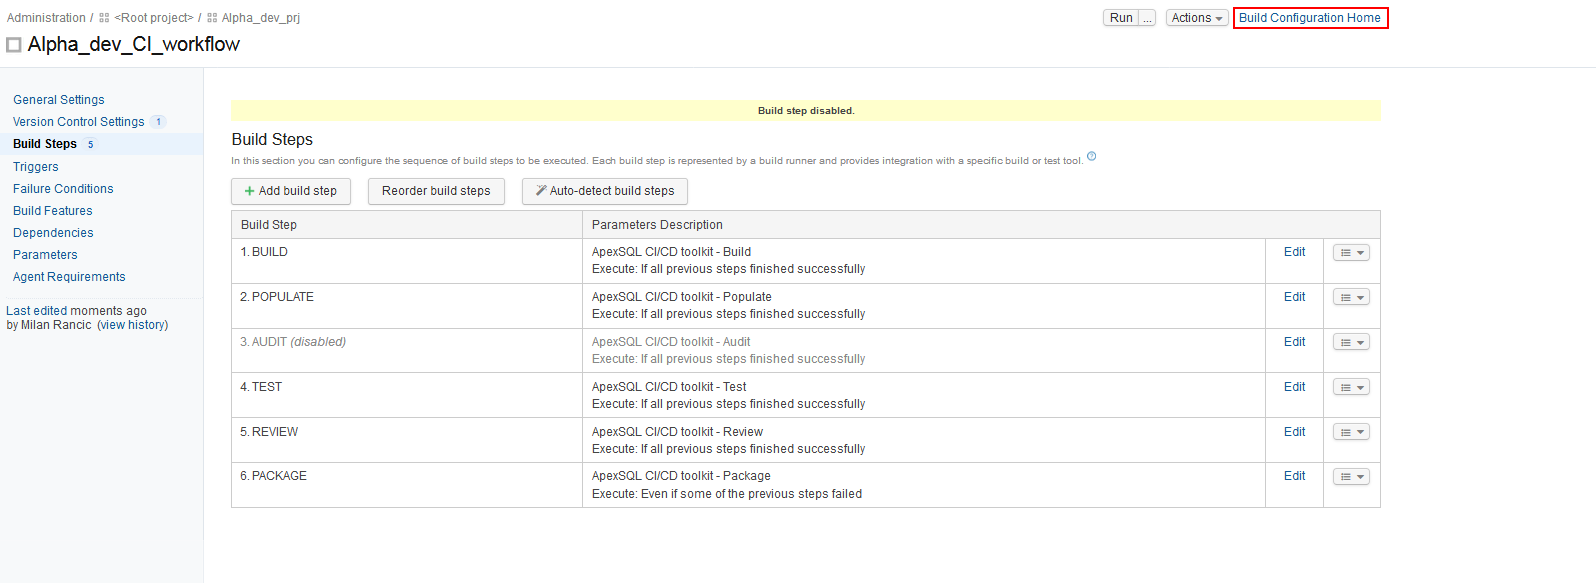
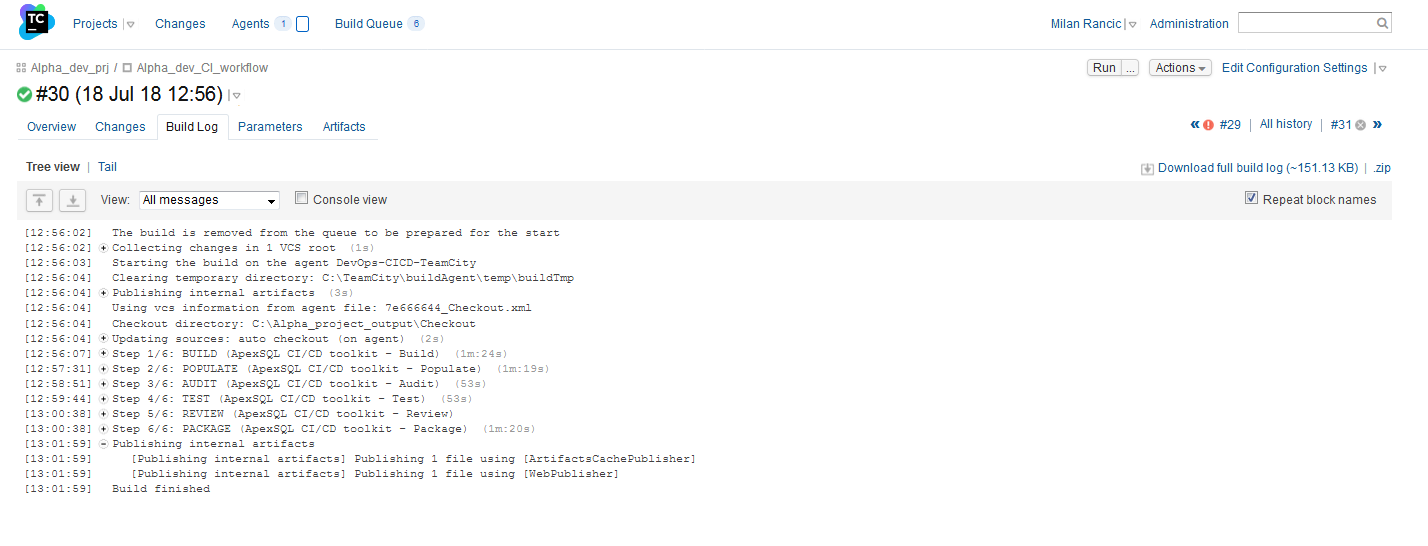
When executed, the progress can be monitored from the Build configuration Home view where the history of this Build executions can be found and log summaries can be accessed for easier troubleshooting.
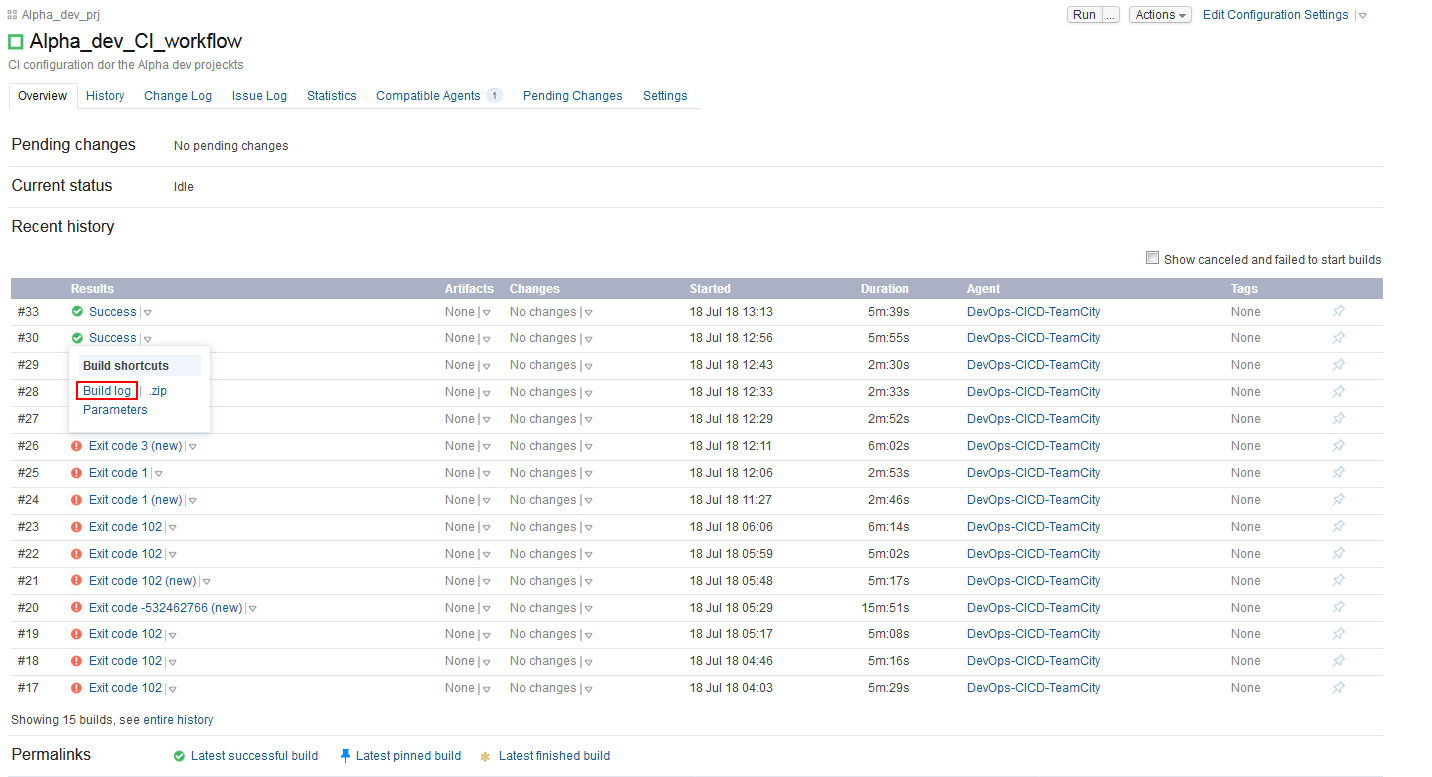
When the execution is finished the build log will show summary for every step. In addition, execution summary for every step and the NuGet package with all outputs can be found in the checkout folder defined at the beginning with the basic Build configuration settings.
This concludes the video tutorial for the ApexSQL DevOps toolkit – TeamCity plugin.
Thanks for watching. For more information, go to ApexSQL.com


