


This video will cover database baselining, provisioning, committing code to source control, setting continuous integration, and continuous delivery pipelines through ApexSQL DevOps toolkit solutions with advanced workflow customizations.
Transcript
Hello, and welcome to this tutorial on managing database lifecycles through automation capabilities of ApexSQL tools and ApexSQL DevOps toolkit – Web dashboard, a standalone, web-based continuous integration, and continuous delivery solution.
This tutorial will cover database baselining, provisioning, committing code to source control, setting continuous integration and continuous delivery pipelines through ApexSQL DevOps toolkit solutions with advanced workflow customizations.
Baselining
The usual database lifecycle starts with baselining. This concept simply describes the situation where a production database is replicated as a development database, which source code is further committed to source control, also replicated as a staging database where multiple check-ins can be deployed, then QA database where updated staging database can be synced and tested. In the end, the staging database will be used to sync all changes with the production database, thus updating it to the new version. In summary, baselining implies providing multiple instances of a single production database for competition od database lifecycle using best practices.
The baselining procedure can be achieved with a process known as database provisioning. ApexSQL DevOps toolkit offers as feature automated database provisioning using simple SQL backup and restore methods or advanced database imaging and cloning method where faster restore time and lower occupied space per instance can be expected.
Image-based provisioning
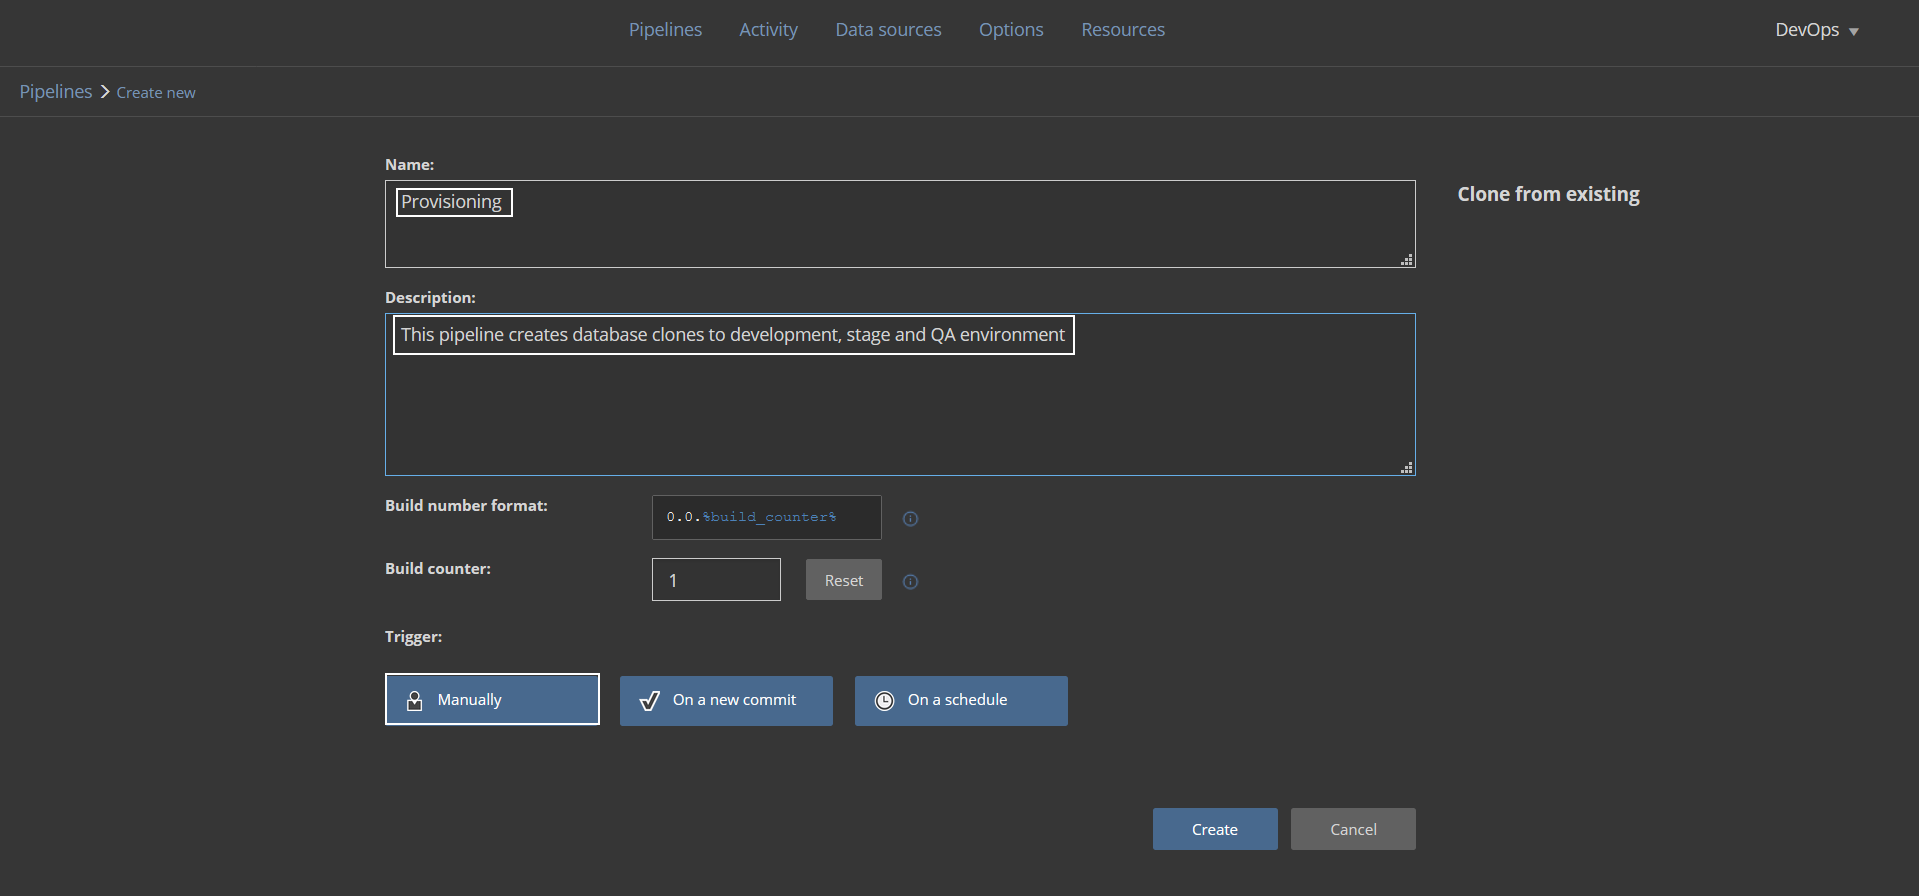
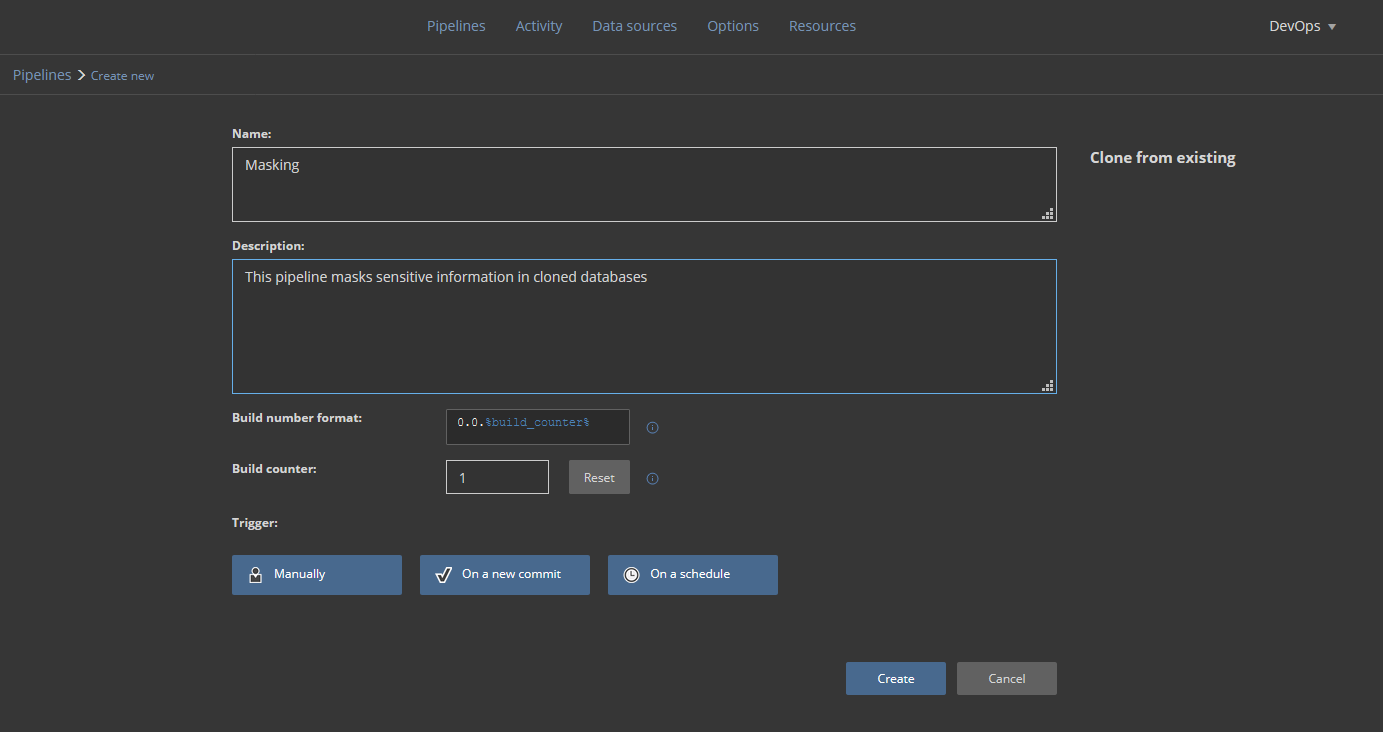
Assuming that database developers should start their work with the latest version of a production database they should have a copy of that database provided. Setting the automated process for every lifecycle will require a dedicated pipeline. Let’s create a new pipeline and name it simply “Provisioning” with an adequate description. The pipeline is expected to be triggered on demand so the default Manual trigger will be used:
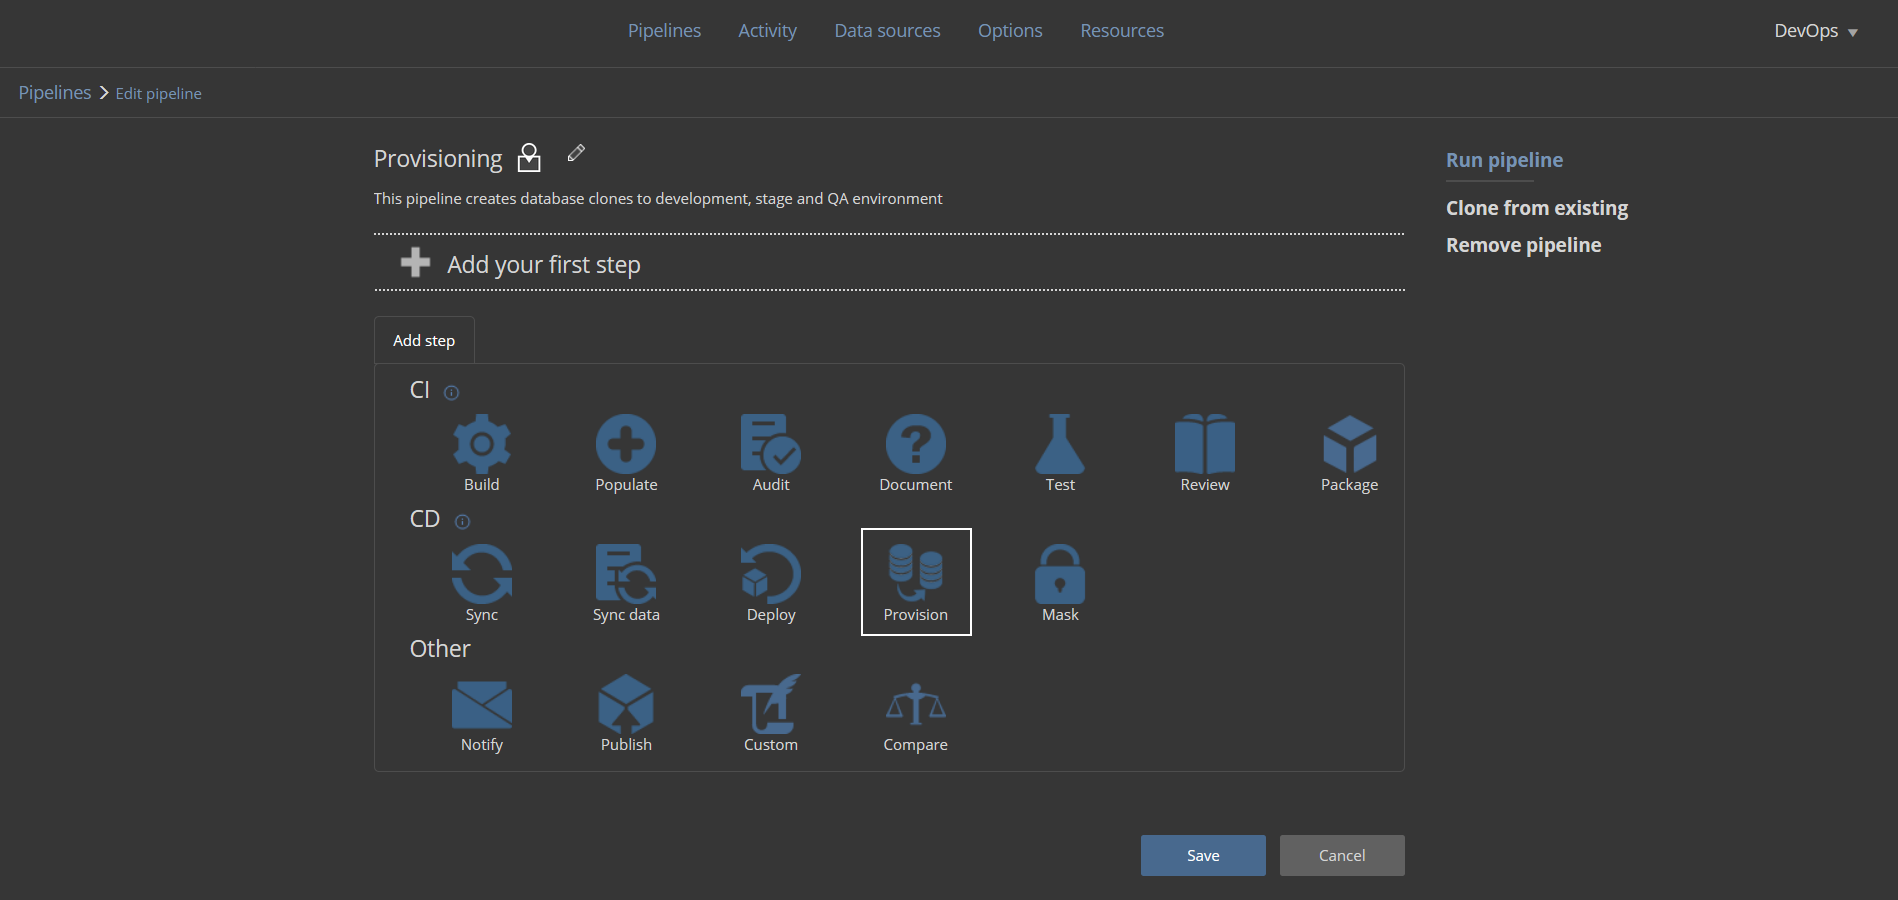
This pipeline should have, above all, the Provision step. Add the step to the pipeline to start configuring it:
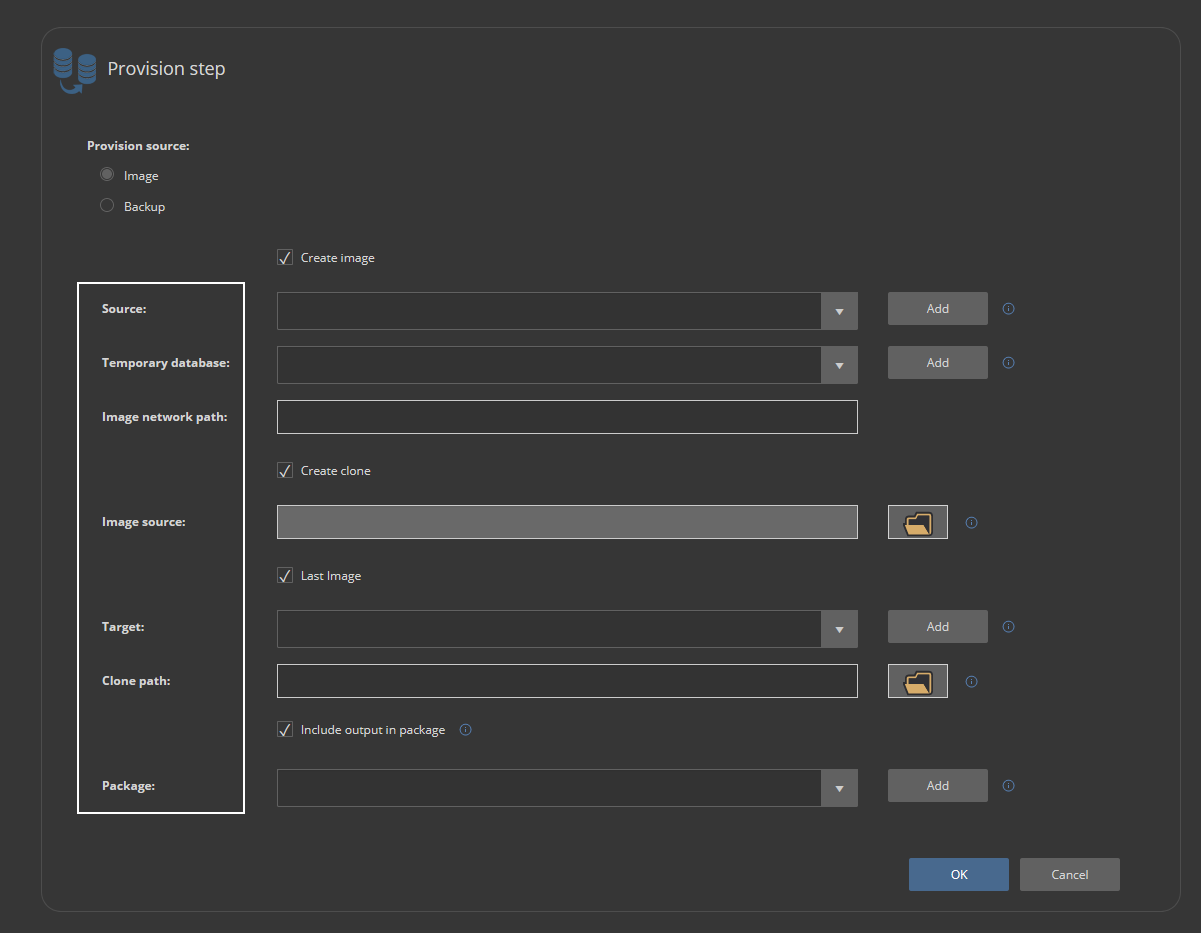
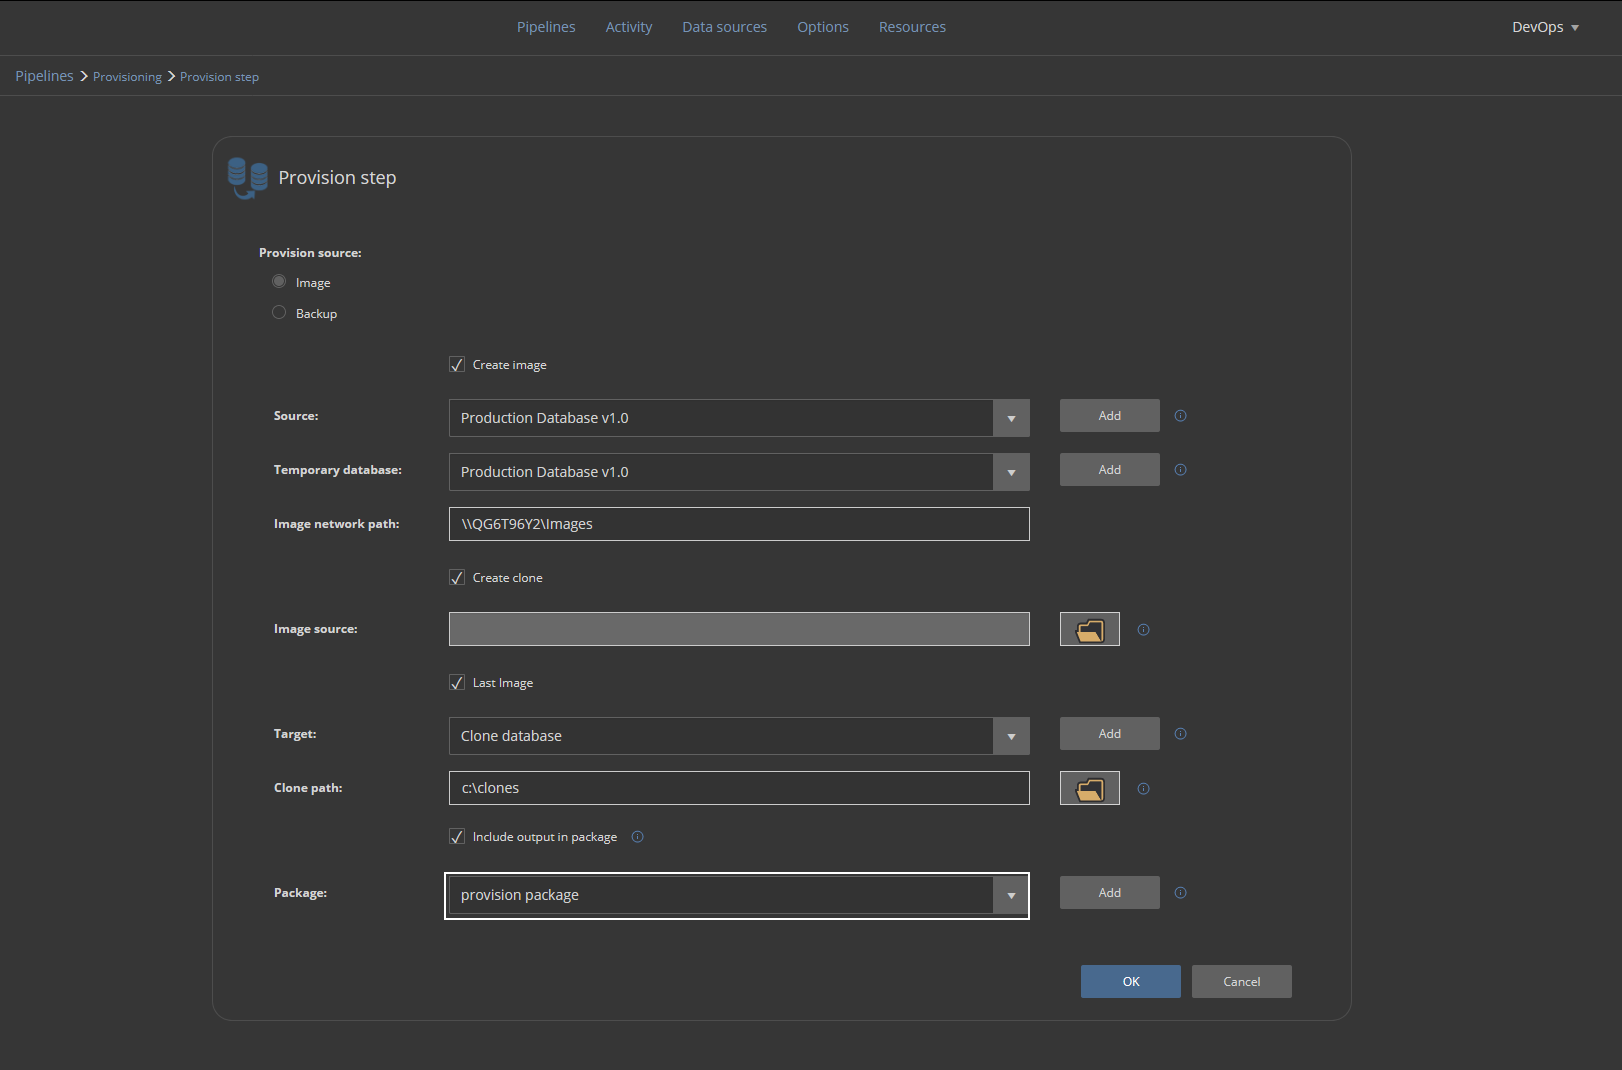
The Provision step’s configuration should be set with the image-based provisioning method to provide database clones with more speed and fewer resources. It uses the PSDatabaseClone PowerShell utility as an engine to create virtual disks containing database images. If 3rd party utility is not an option, the Backup based method can be used which uses usual backup and restore capabilities of the SQL Server.
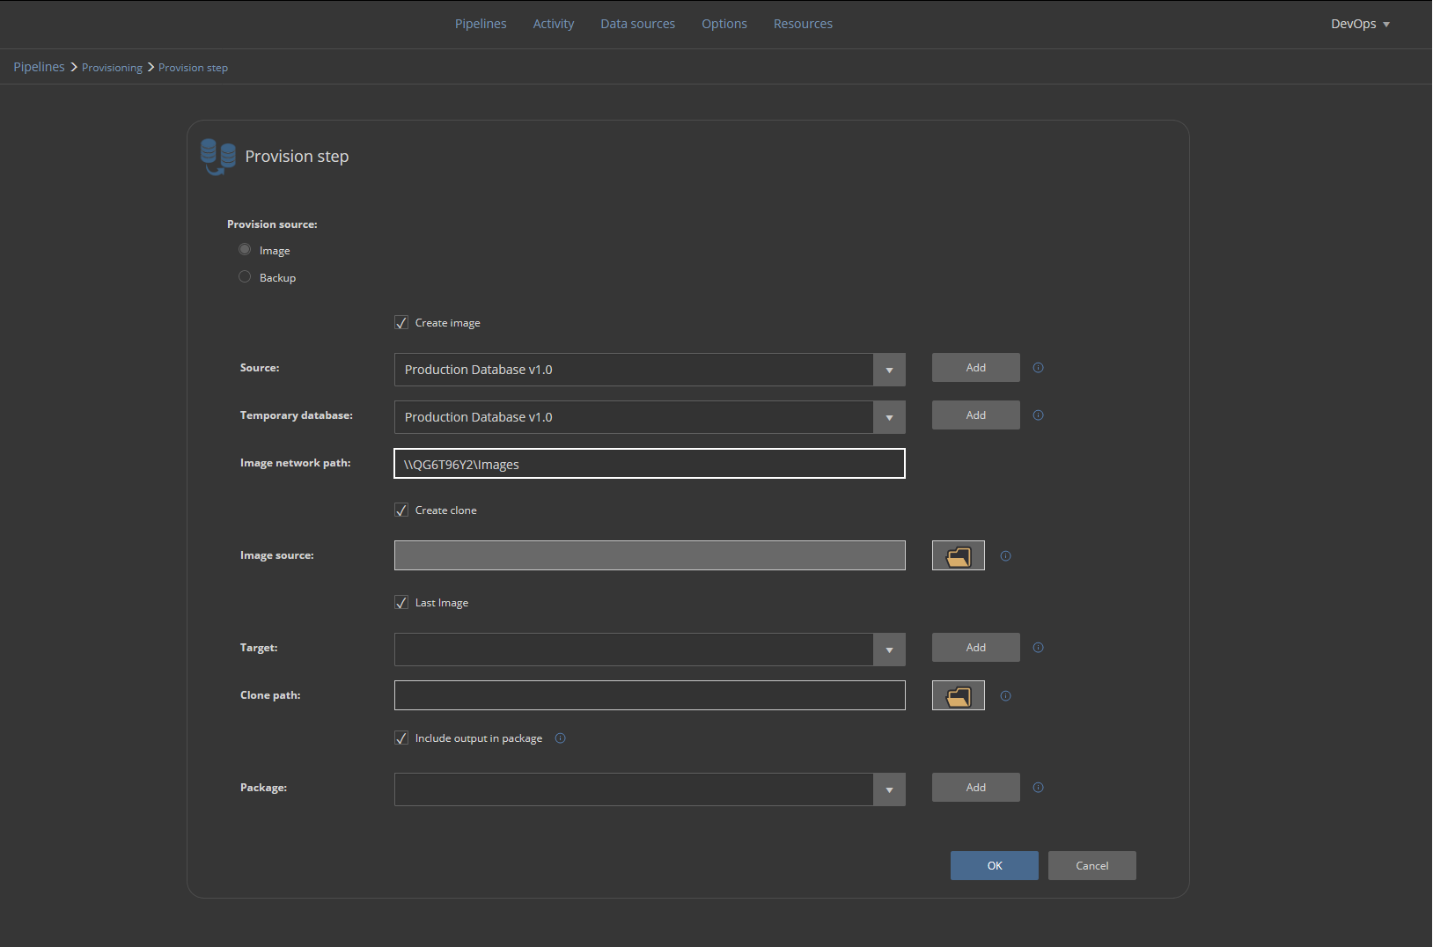
Providing that the PSDatabaseClone is configured, the creation of a database image will require the following:
- Source database, which is the latest production database
- The temporary database represents an emulated SQL Server instance which will be used to attach database image within the virtual disk
- The image network path is the location of a shared folder where the virtual disk will be stored
Clone creation will provide a database clone from the designated image source. In this case, the Last image will be used. It is going to be the same image that was created within this step execution. The image will be saved as a database clone file in the designated folder location and attached to the defined Target instance:
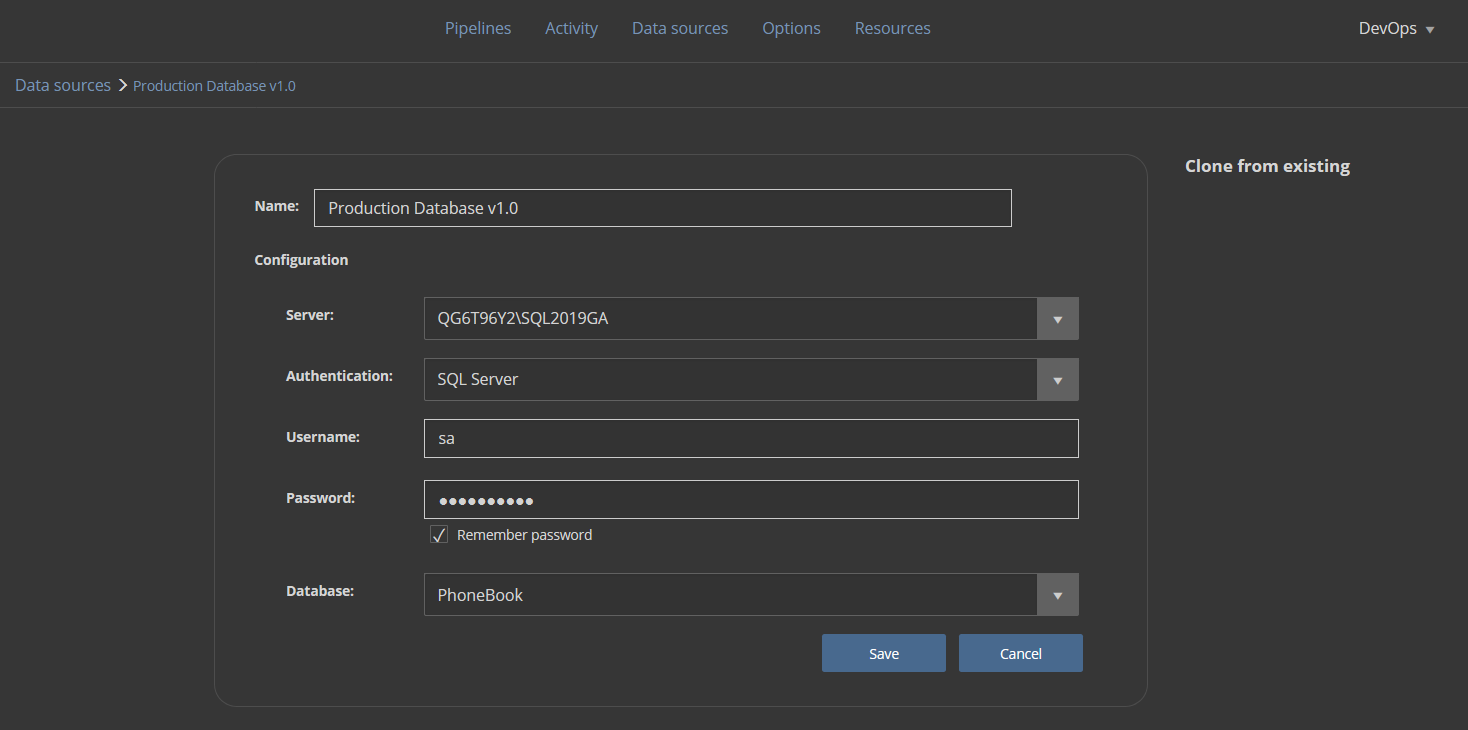
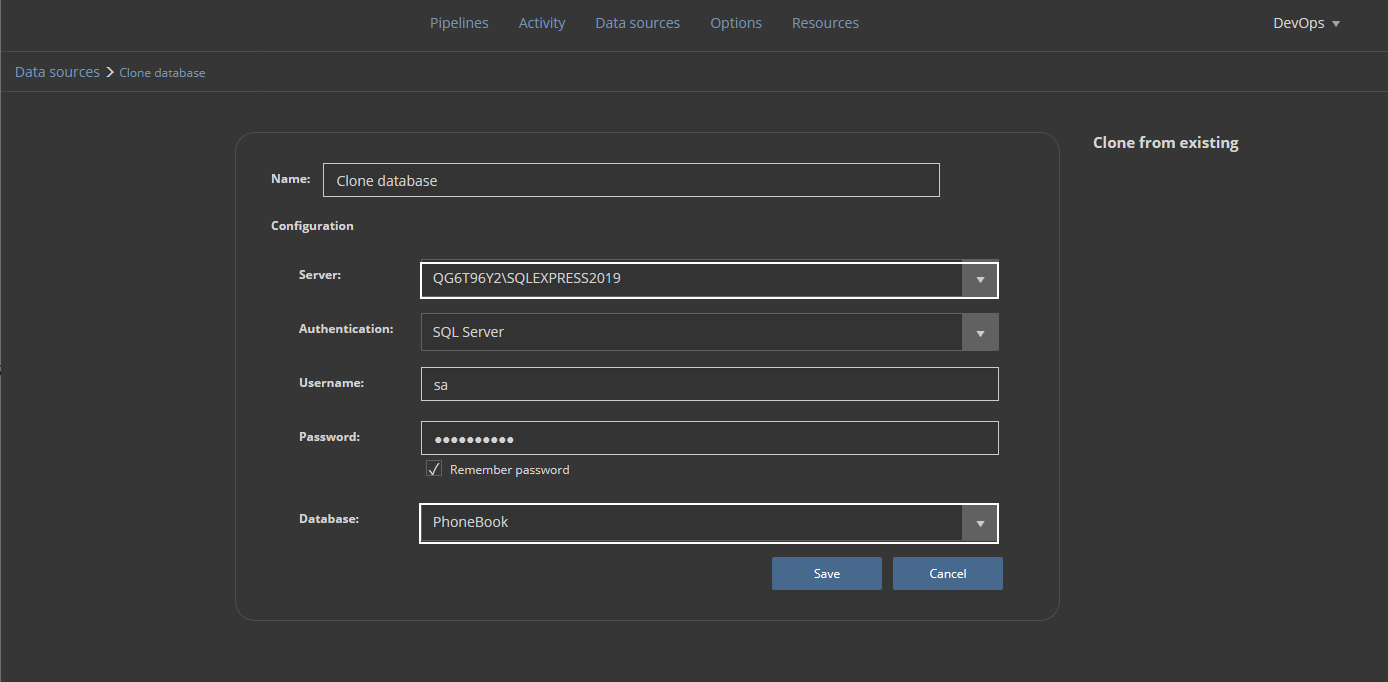
For parameters to be set, it will be necessary to create data sources. This can be done from the current screen with the Add button:
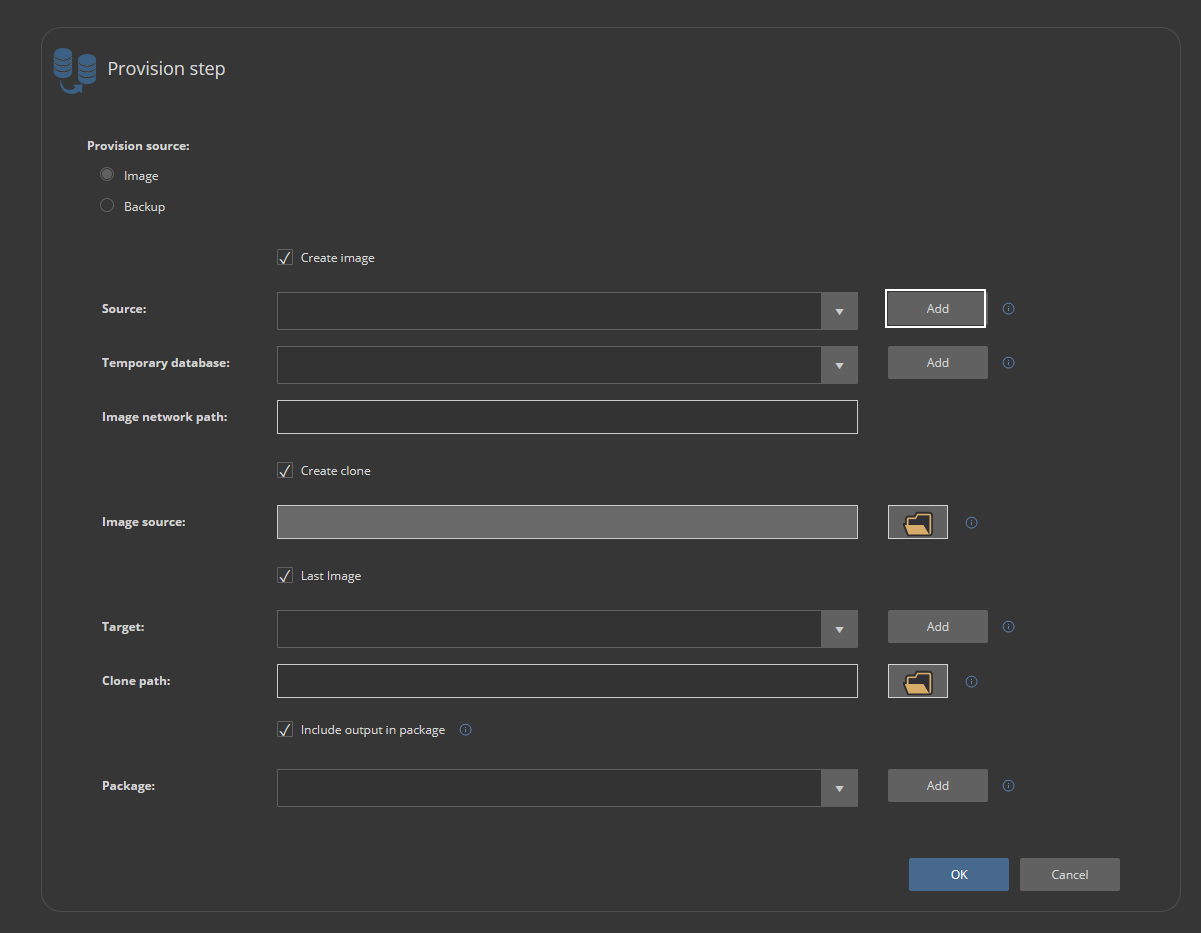
Let’s set the source database first. The data source configuration will require a recognizable name and SQL Server connection parameters with the production database:
For the Temporary database, it is enough to choose the same data source as for the Source, as it is only going to represent an emulated SQL Server instance:

The Image network path field should be populated with a network location of a shared folder:
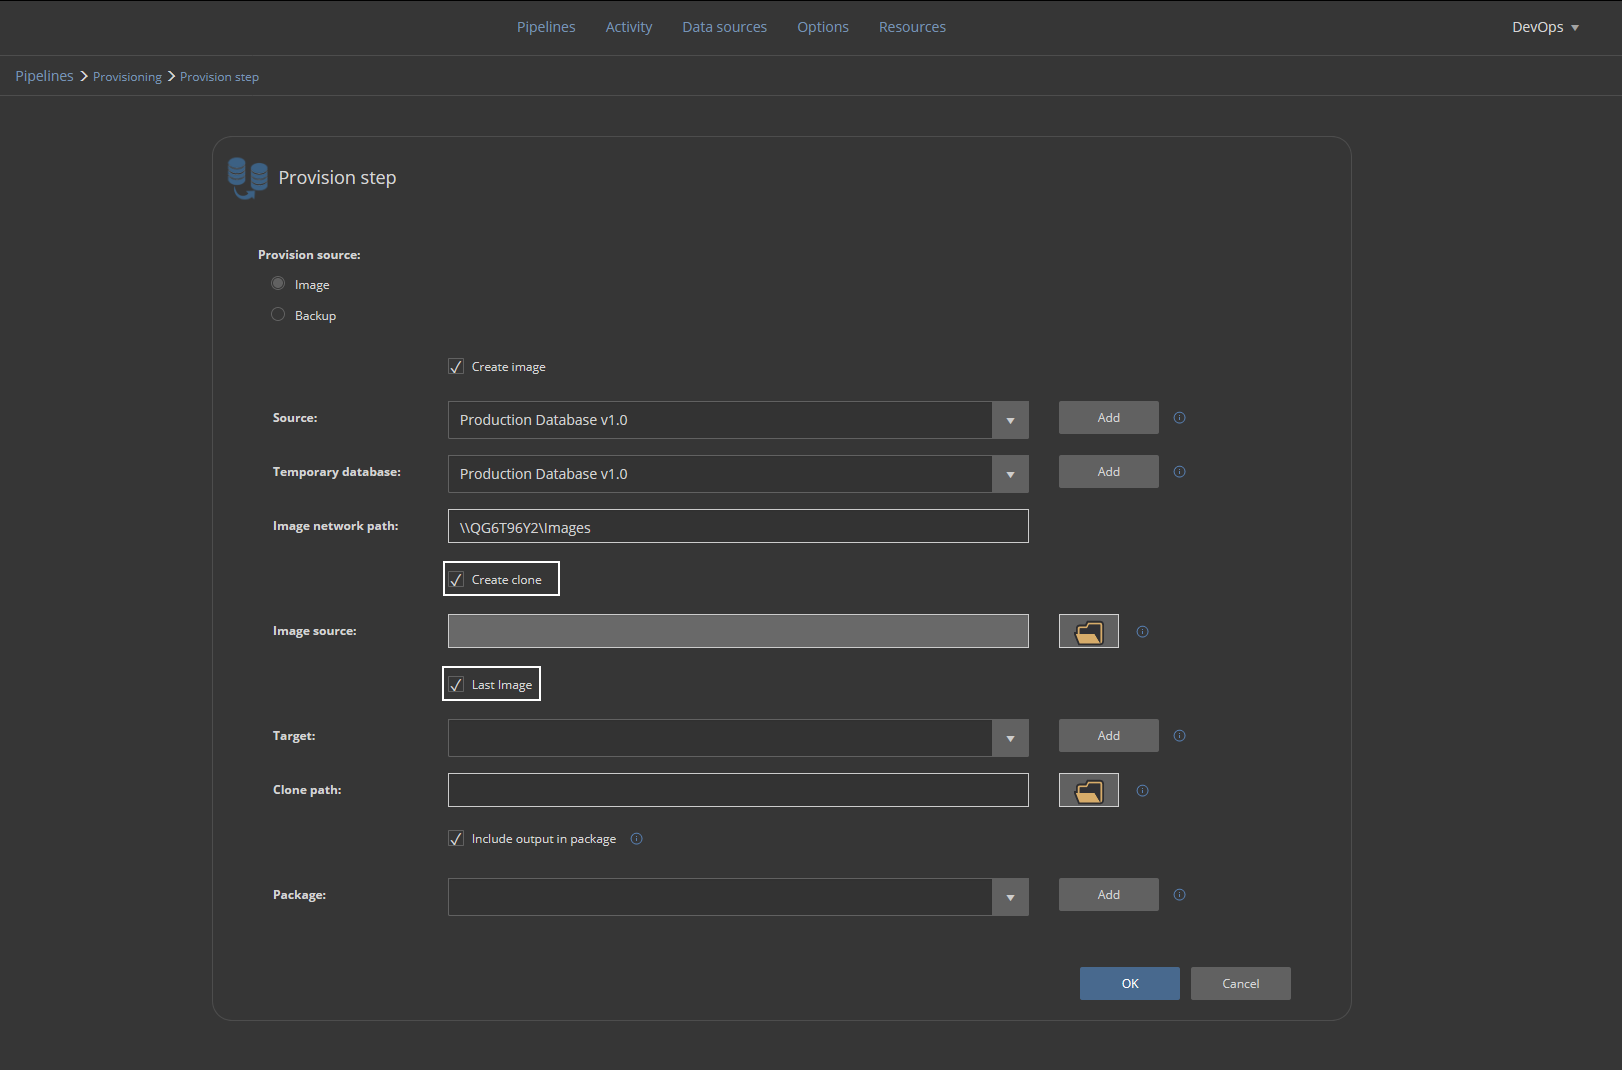
To create a database clone within the same step, the Create clone option should be checked and for this case, the latest created image will be used. That will be the image created within this same step as defined above:
Now we need to provide in the Target section the SQL Server instance where the cloned database will be stored and used for development purposes:
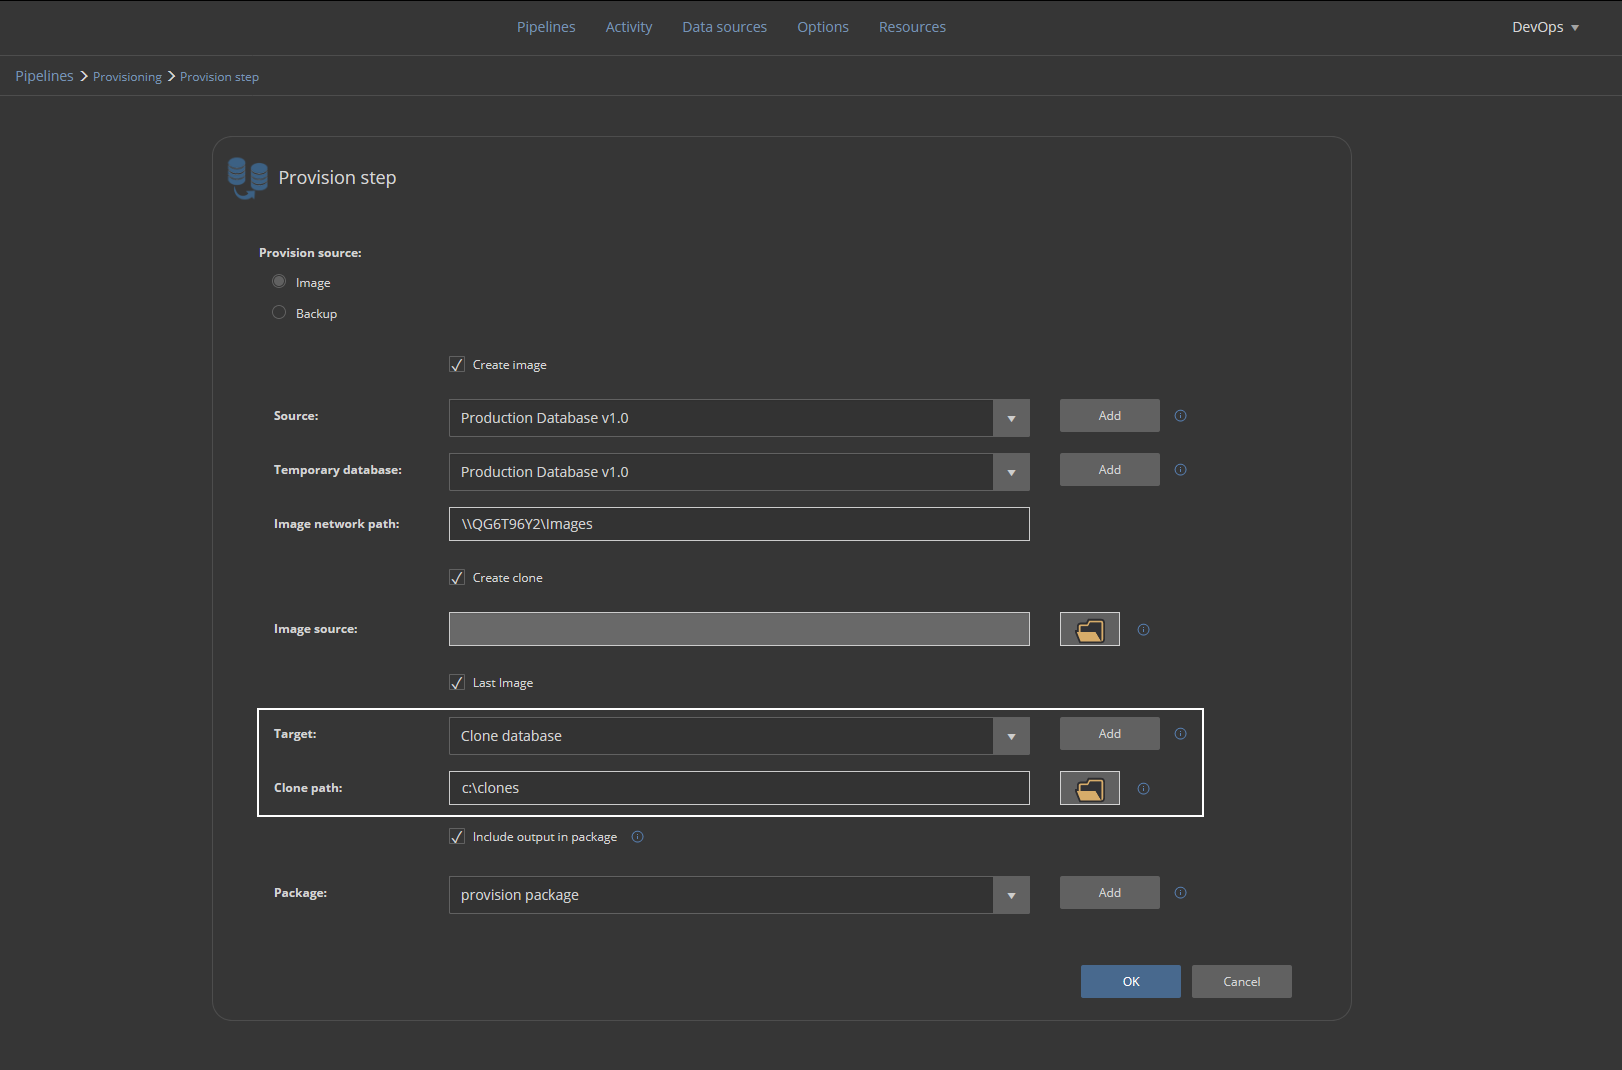
This is usually not the same instance as the one where a production database is located. We will repeat the procedure for the addition of a new data source and pick the dedicated development SQL Server instance. The database name here should be the same as the original in order to recognize the source database image, but note that the attached database name will have a timestamp as the suffix:
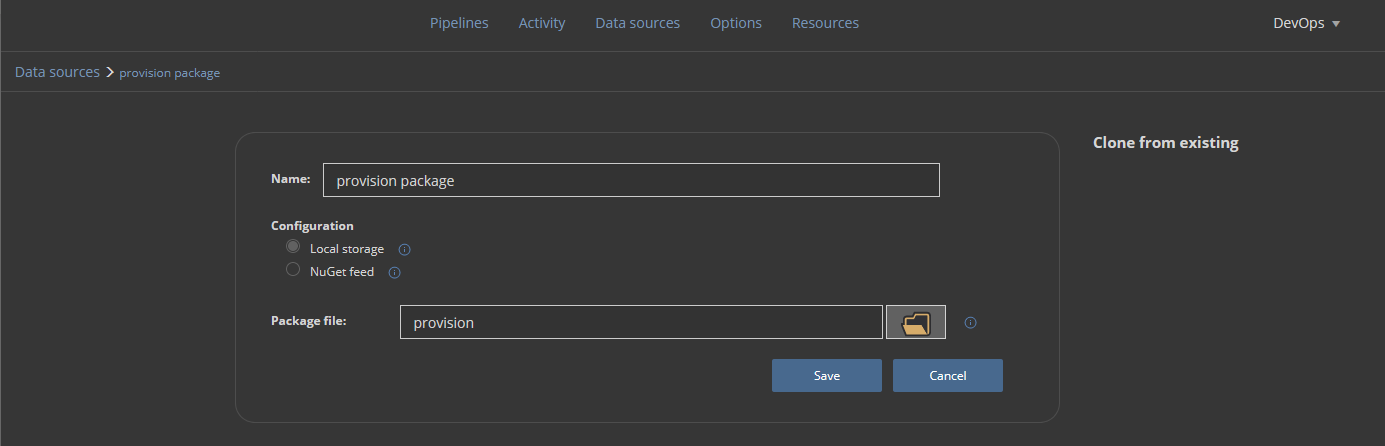
In the end, the execution summary will be saved in a NuGet package:
The NuGet package is defined the same way as the rest of data sources:
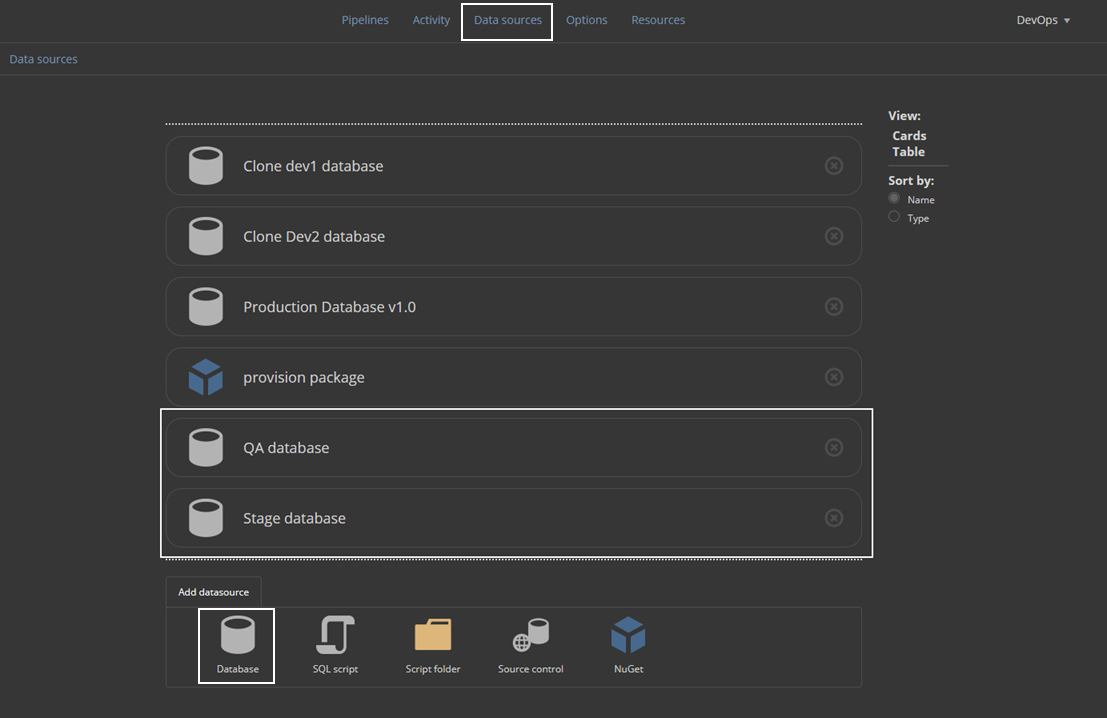
The Provision step should be repeated in order to place all the developer’s database, a staging, and a QA database:

Provisioning the stage and QA database requires the creation of target database data sources so these data sources will be used again later during continuous integration and continuous delivery phase:
The provisioning pipeline configured like this can be executed to provide baselining every time when database lifecycle starts anew because the latest production database images will be created, and new clones provided.
Data masking
Since the development database is provided by the cloning method, it will contain original data from the production database which might contain sensitive information that shouldn’t be displayed to developers or testers. To resolve this, we will create a masking pipeline:
This pipeline will consist of Mask steps that use the ApexSQL Mask tool but will require a project file created with this tool. The project will import assigned masking filters and selection of tables and columns to apply masks to.
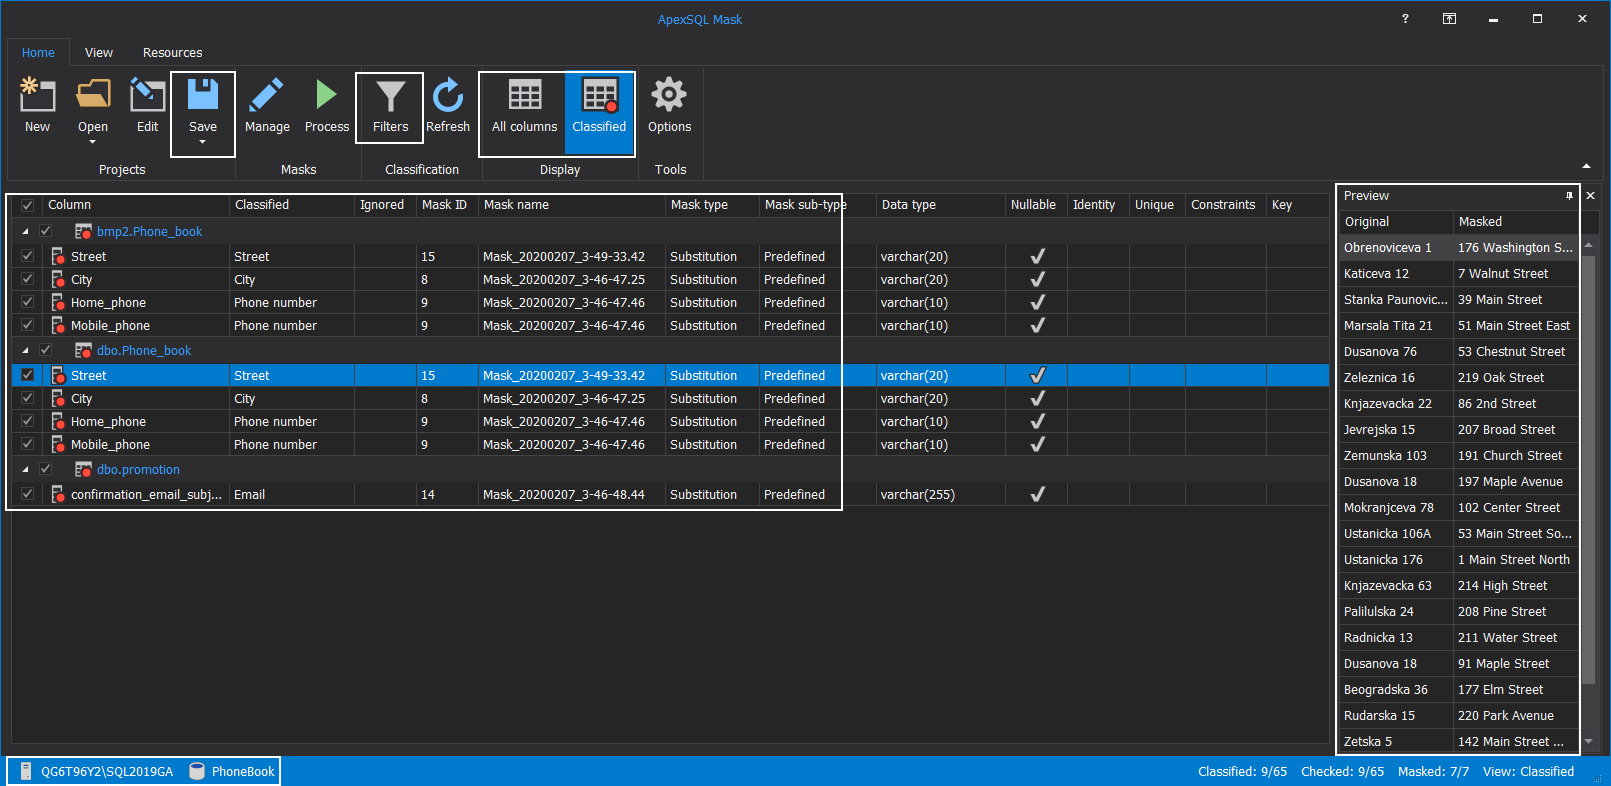
To create a project open the ApexSQL Mask tool and load the production database directly. This database has an identical structure as cloned ones so the project created and saved with this source can be used as a template for cloned databases. The tool has an auto-sensing capability that will identify potentially sensitive information. This can be seen in our example as fields with telephone numbers and addresses were automatically selected for masking. The Preview panel will show how the conversion will look after masking is applied:
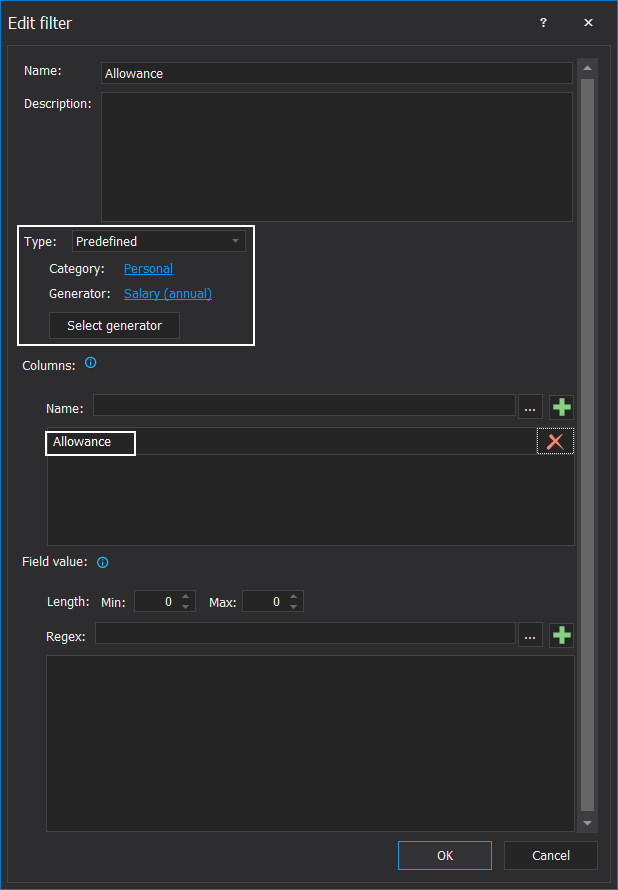
Masking filters can be updated with additional filters in case a specific column name should be considered for the masking process:
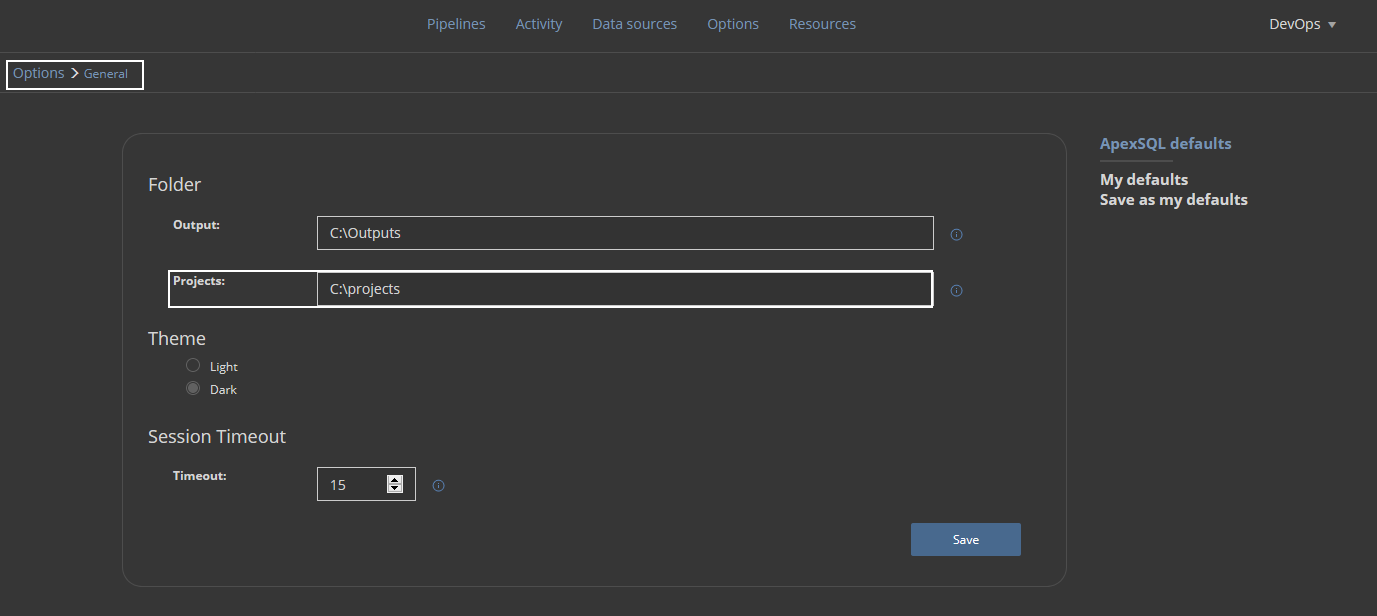
ApexSQL Mask project file should be saved in a dedicated ApexSQL DevOps toolkit – Web dashboard project folder:
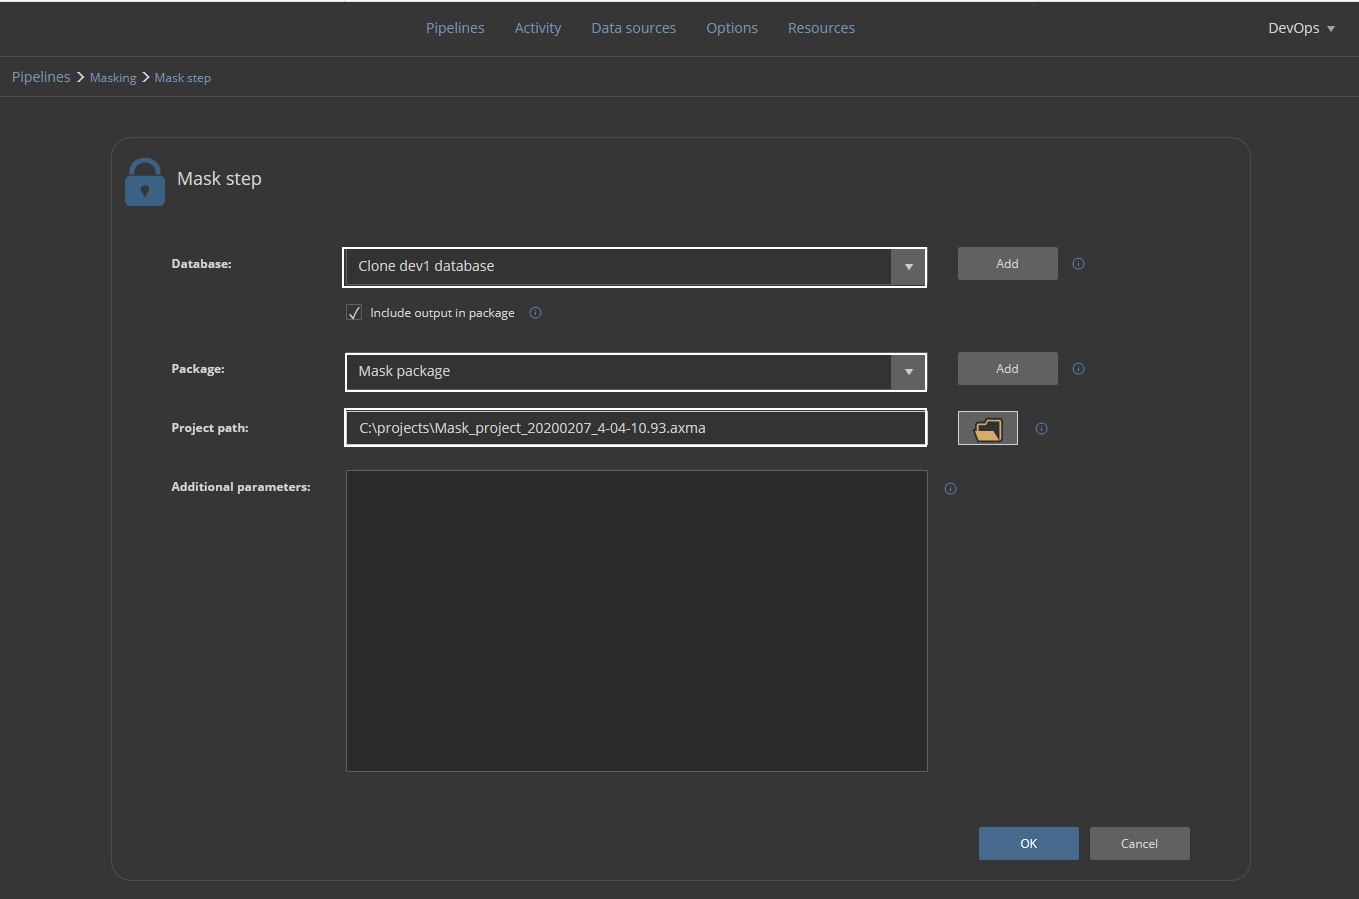
Now the Mask step can be completed. It will require database type data source for target, which are cloned databases, a NuGet package defined data source to store execution summaries, and the project file which was created in the previous step. This step should be repeated for every cloned database where only the Database field should be different to provide connection parameters to those databases:
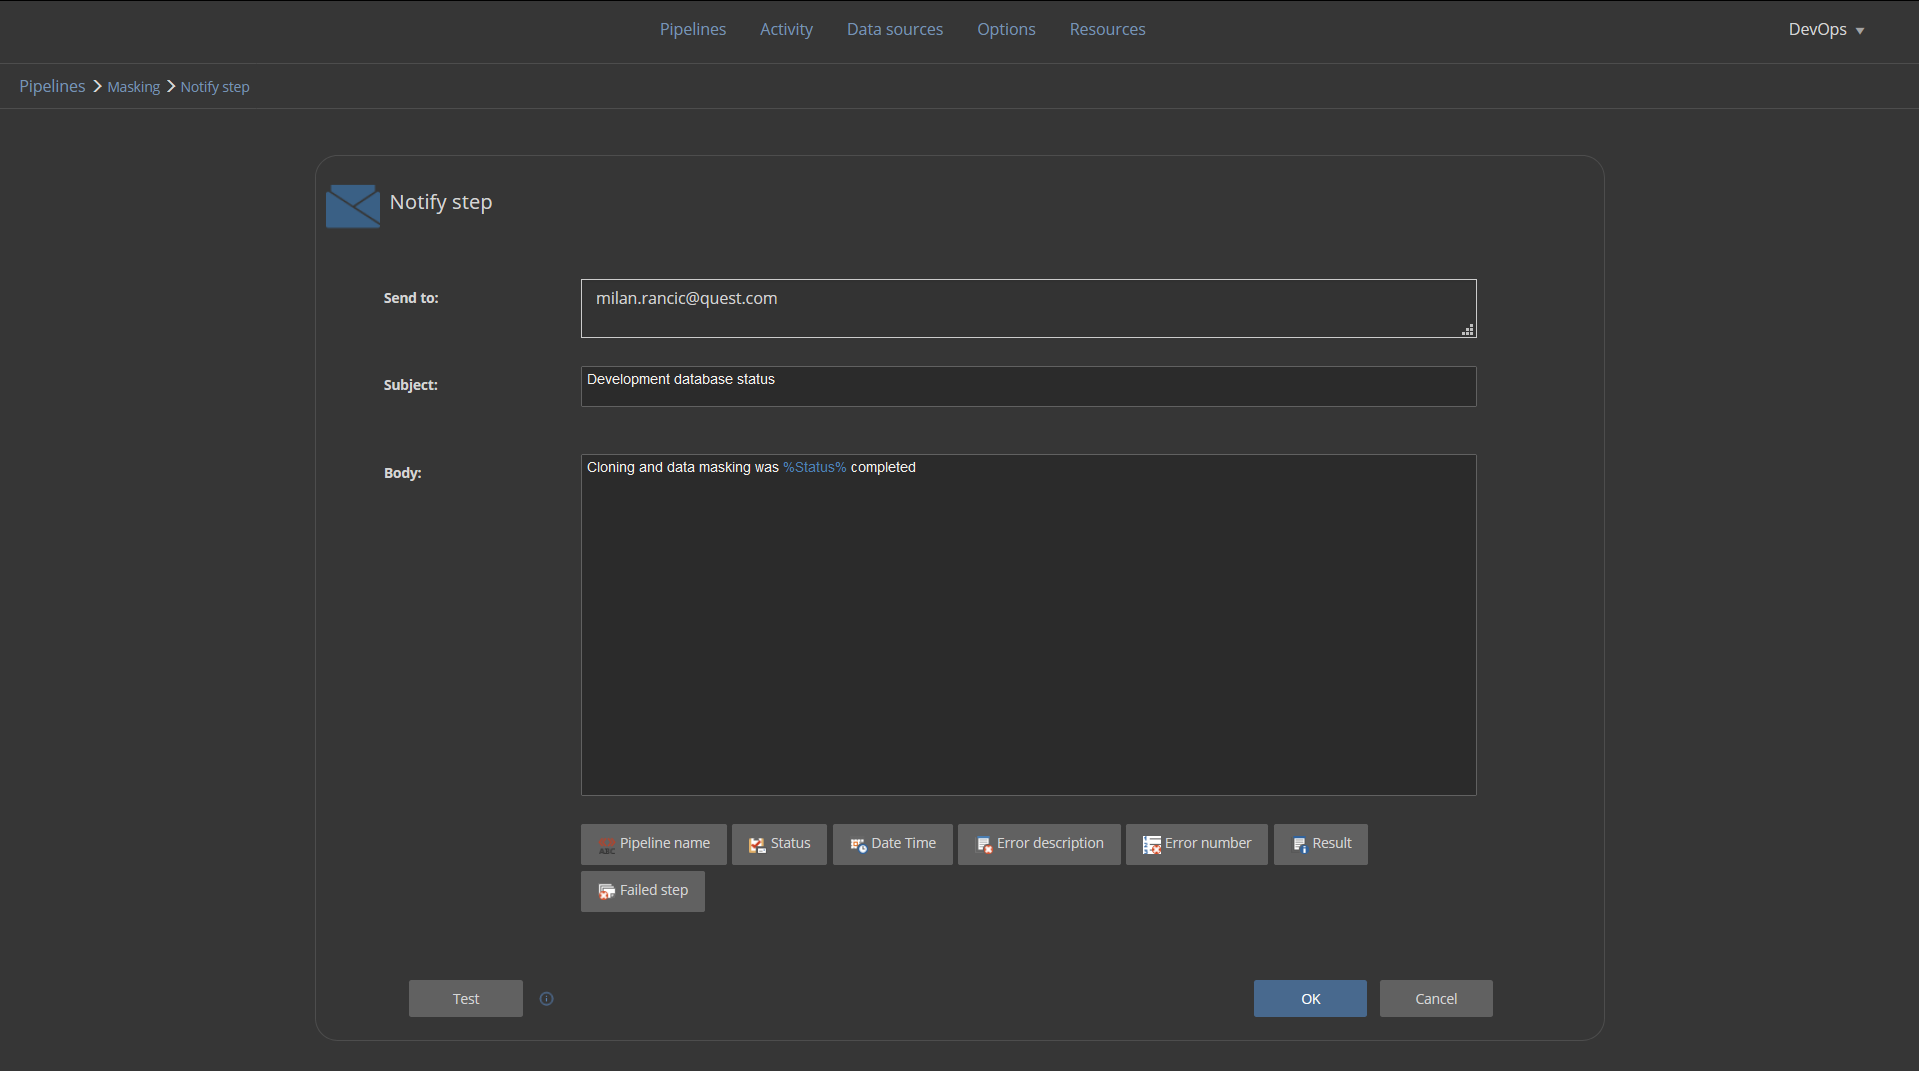
We will terminate this masking pipeline with the Notify step which will send an email notification to the developer that development database has been provided and data masking was done:
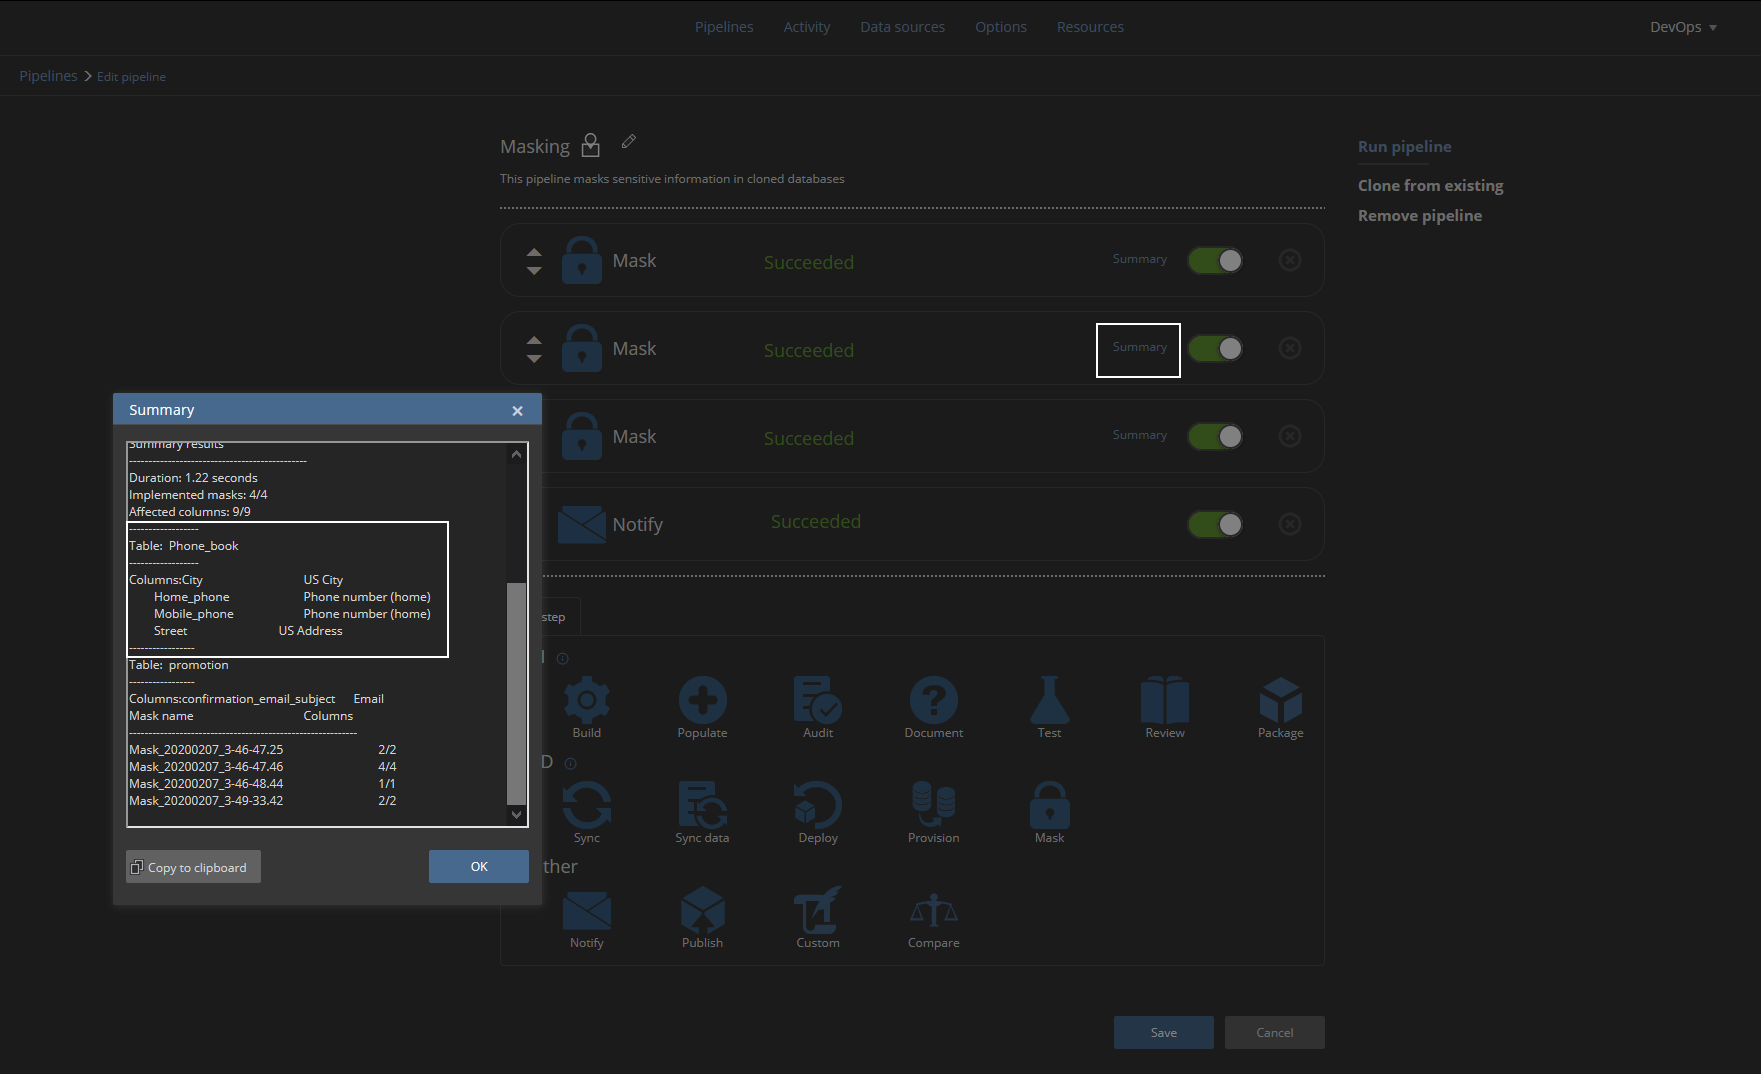
On successful masking pipeline execution, we will be able to see execution summary for every Mask step which will show which tables and columns were masked by which masking generator:
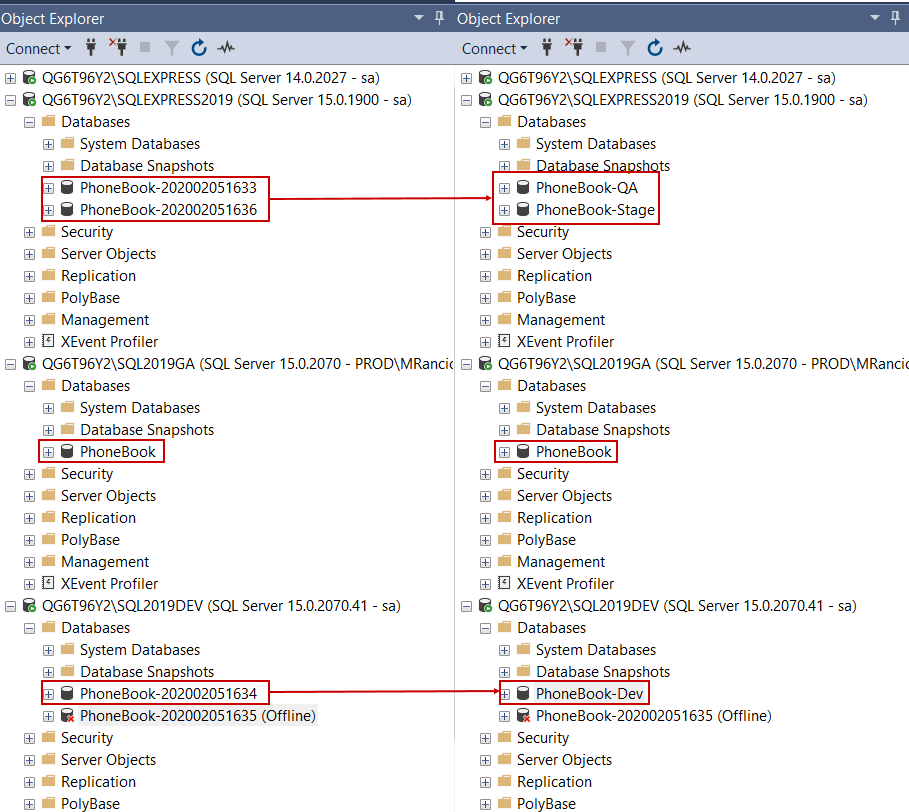
Now the developer can start working on the database. Along the way with successful provision pipeline database clones can be found in SQL Server Management Studio’s Object Explorer and renamed to simplify identification. However, this will be influential on created data sources so they would need to be updated later:
Thanks for watching! For more information, please visit apexsql.com


