


In this article, we will take an overview of some main features in ApexSQL Script.
Transcript:
Hello and welcome to this ApexSQL Script general overview video. ApexSQL Script is a SQL Server development tool which can script databases into scripts, scripts folders, deployment packages and commit directly to source control projects. ApexSQL Script also supports scripting from SQL Azure Databases and Amazon RDS for SQL Server.
ApexSQL Script can also:
- Automate and schedule database scripting using the Command line interface or CLI
- Script both SQL database objects and data
- Consolidate multiple SQL scripts into one script
- Script an entire SQL Server database down to individual columns
- Easily decrypt encrypted SQL database objects
- and much more
ApexSQL Script also supports picking specific SQL database objects and data for scripting, along with automatically including dependent objects, and creating executable installation packages that end users can run without installing any other software.
ApexSQL Script consists of two main components:
- A Windows application used for manual SQL database scripting, selecting specific SQL database objects and data, and various options for the scripting process
- A console application which allows users to schedule and automate SQL database scripting and to run everything unattended
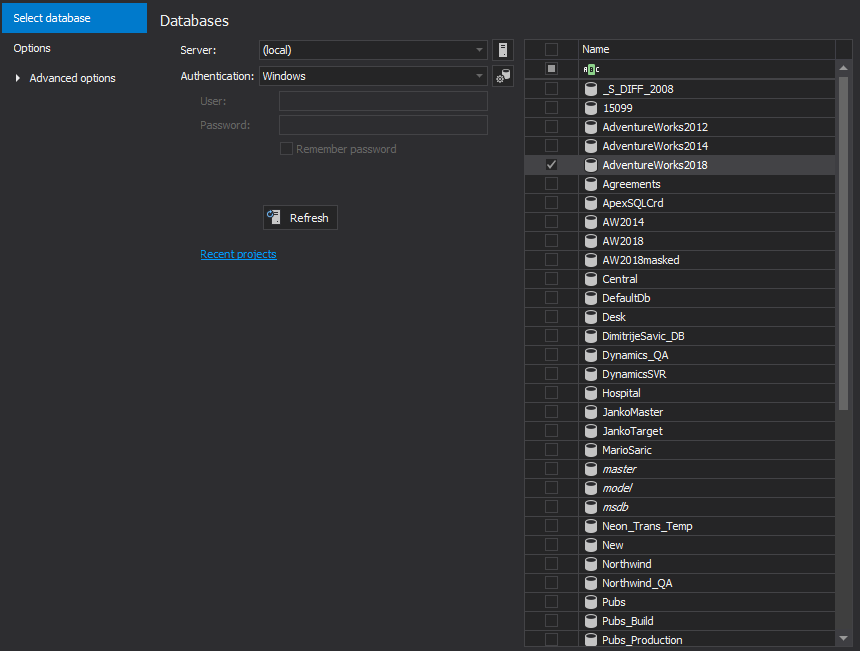
On application startup, the main application window will be shown, along with the New project window. Select database is the first tab in the New project window and here, one or multiple database can be checked for the scripting process after connecting to a desired SQL Server:
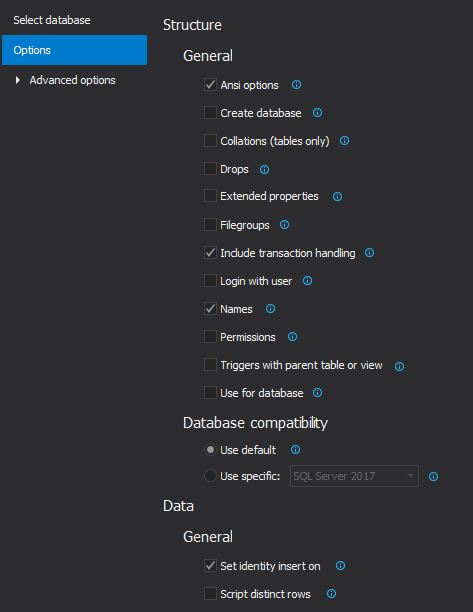
The next tab in the New project window is the Options tab, in which various options can be set for the Structure, Data, Owners in script, Optional output elements and Header and footer:
Also, additional tabs with their options can be set with a click on the Advanced option tab. The first is the Schema mapping tab. Here, on the left side, in the schema mapping pairs list. Original schema names will be shown from a loaded database, while on the right-side schema names are shown for the script that will be created and those ones can be edited:
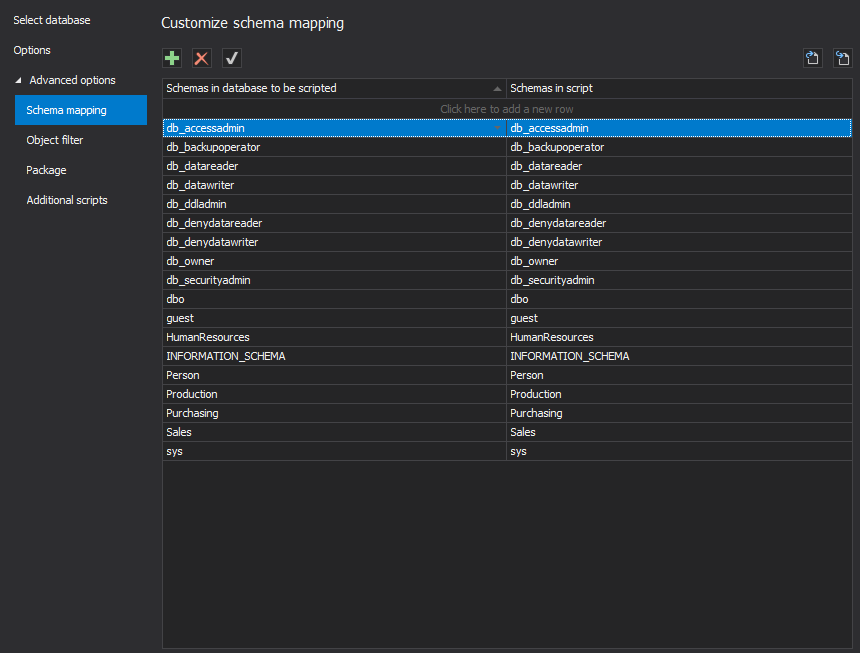
In addition, new schema mapping pairs can be added or existing ones can be removed from the list.
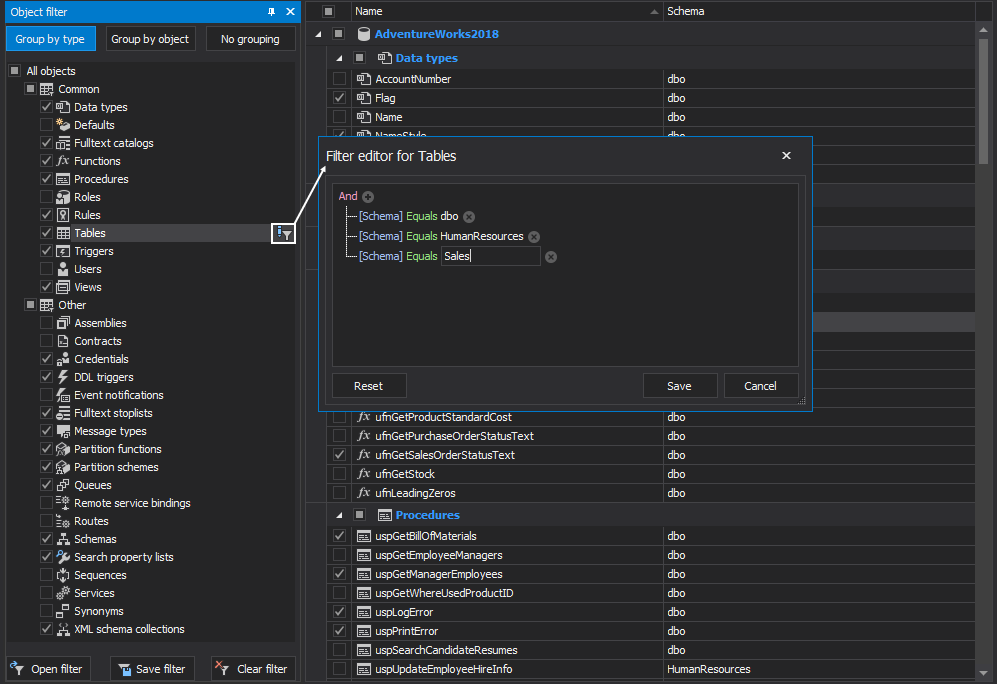
The next tab is the Object filter tab in which specific object types or objects can be included or excluded for the scripting process:

To see all objects for a specific object type, just click on it in a left tree-view panel and all objects for that object type will be shown on the right panel list. Additionally, object selection can be saved in a file with the click on the Export button and later on it can be used for the same or similar databases with the Import button.
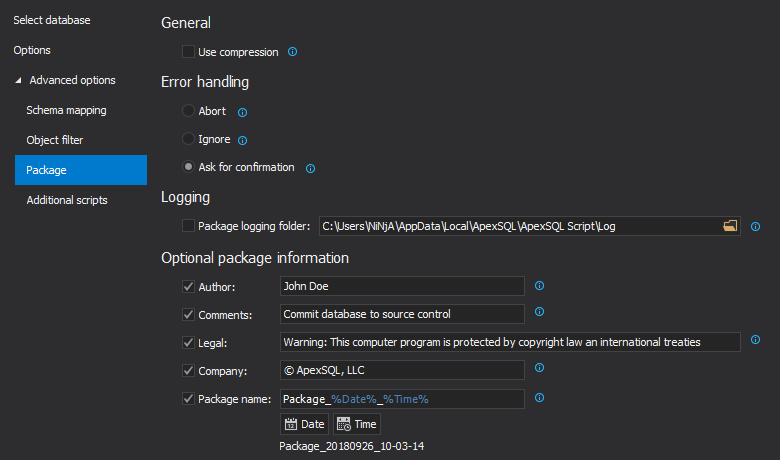
The Package tab contains options for package installers such as Use compression, Error handling, Logging and Optional package information:
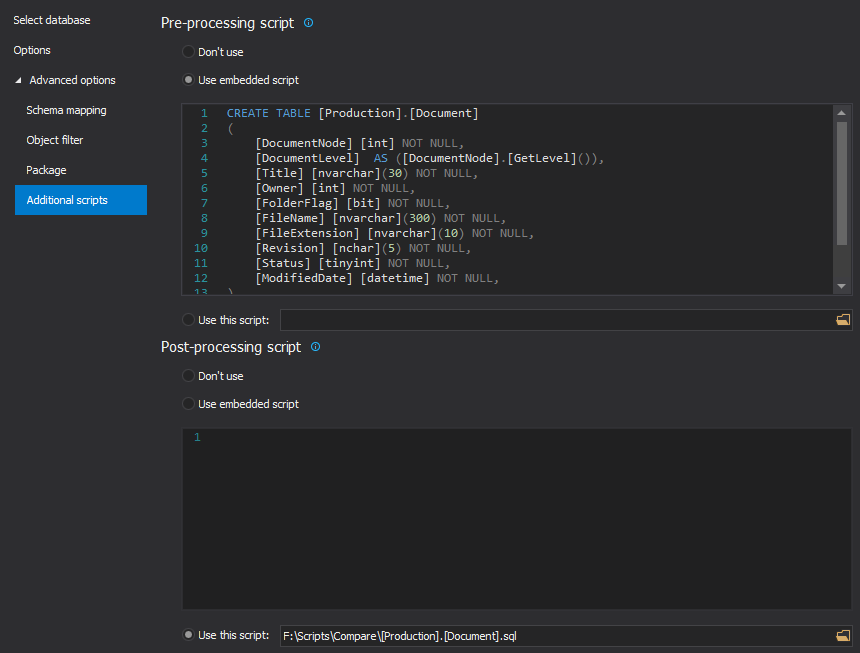
The last tab is the Additional script tab, in which Pre or Post processing scripts can be set to be executed before or after the scripting process. These scripts can be loaded with the Use this script option or typed in with the Use embedded script option:
Now, when all options are set, click the Load button in the bottom-right corner of the New project window and the selected database with all of its objects and data will be shown in the main application window.
By default, the Structure view is selected, with a list of all objects which can be further filtered by using the simple check option in the list, selecting which objects will be included in the scripting process:

Additionally, the Object filter panel on the left side can filter shown object types in the list by unchecking the undesired ones or the Filter editor can be initiated to filter out specific object types based on the filter conditions for object name or schema:
If there is a need to include data in the scripting process, switch to the Data view with a click on the Data button from the Home tab:
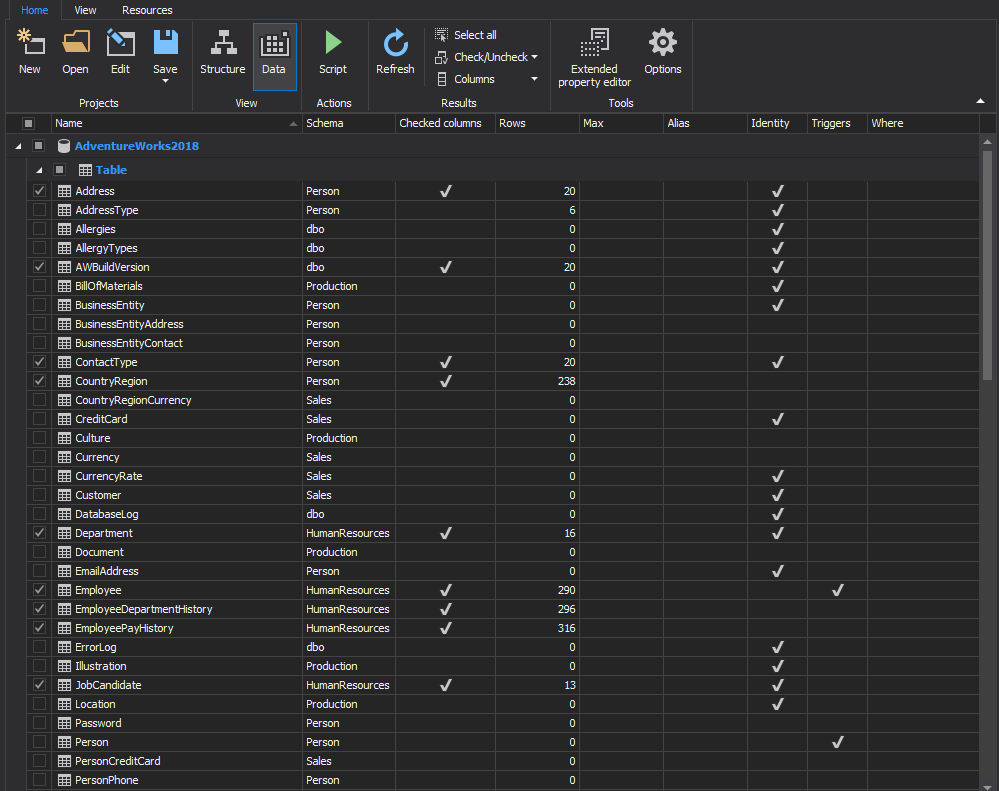
If data needs to be included, make sure that the same tables are checked in both Structure and Data views, in order to script them correctly.
If there is a need to script specific data, there are three ways to achieve it:
Switch to the View tab and click the Columns filter button and the Column filter panel will be shown. For each selected table in the Data view, all its columns are shown in the Columns filter panel. If there are some columns that don’t need to be scripted, just uncheck them:

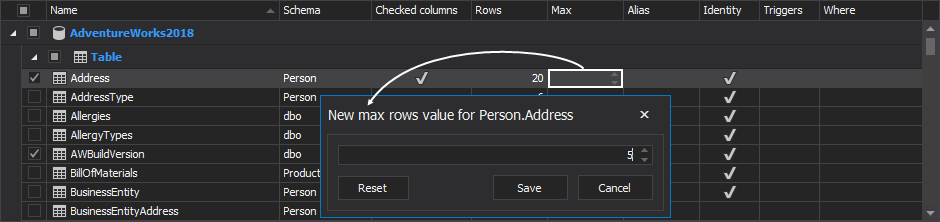
For each table, under the Max column, a new maximum value of scripted rows can be set, by directly entering it into the Max cell or with a right-click on the cell and choosing the Edit max value command. For example, if there are 20 rows and the Max value is set to 5, only the first 5 rows will be included in the generated script:
The last filter mechanism, is the Where clause filter, which can be initiated with a click on the ellipse button in the Where cell or by selecting the Edit SQL Where clause command from the right-click context menu:
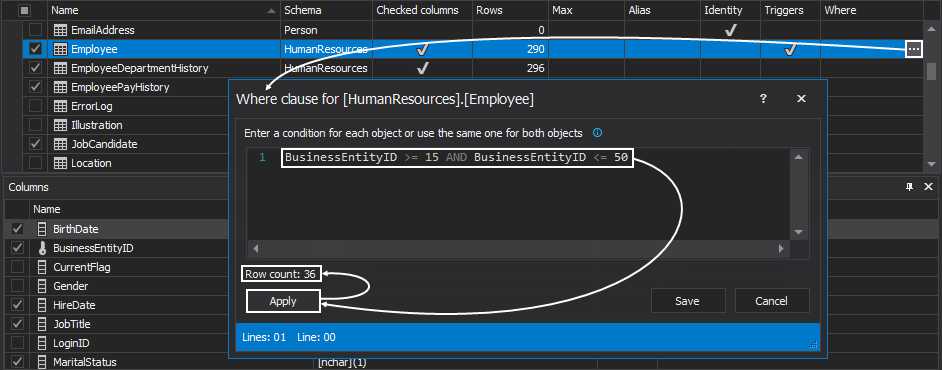
In the Where clause window for the selected table, specify a desired condition that will limit the number of rows that will be included in the scripting process. After the condition is entered, click the Apply button and it will instantly show the new row count.
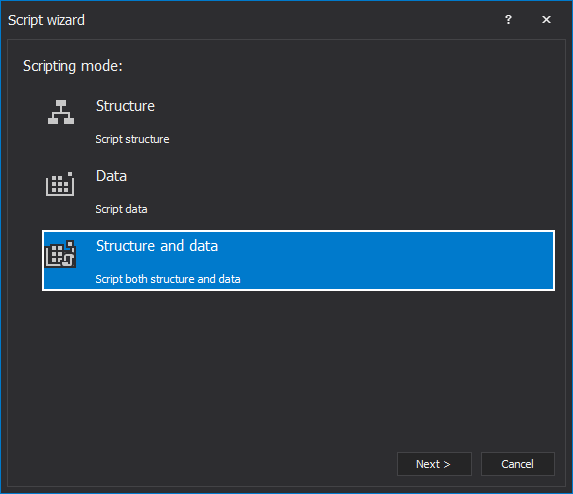
Once everything is set and selected, click the Script button from the Home tab to initiate the Script wizard:

In the first step of the Script wizard, the Scripting mode should be chosen and, in this example, Structure and data is selected:
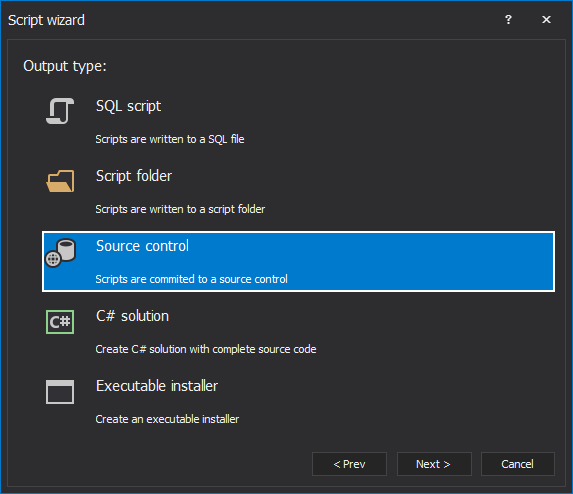
The second step, the Output type should be chosen and it can be selected between five different output types:
- SQL script
- Scripts folder
- Source control project
- C# solution
- and Executable installer
In this case, the Source control output type is chosen:
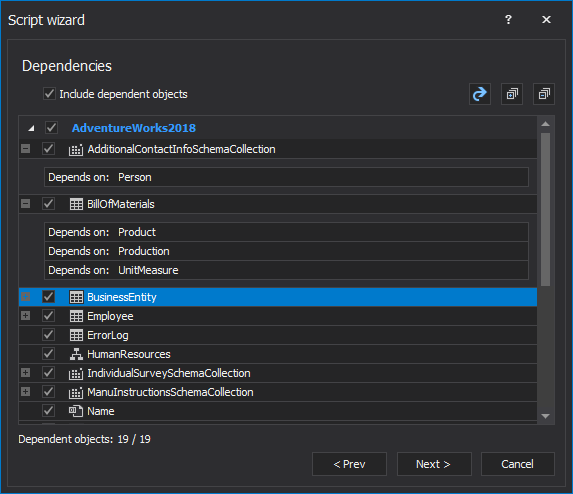
The next step is the Dependencies step in which, by default, all dependent objects that were not checked in the Structure view are automatically included and checked for the scripting process:
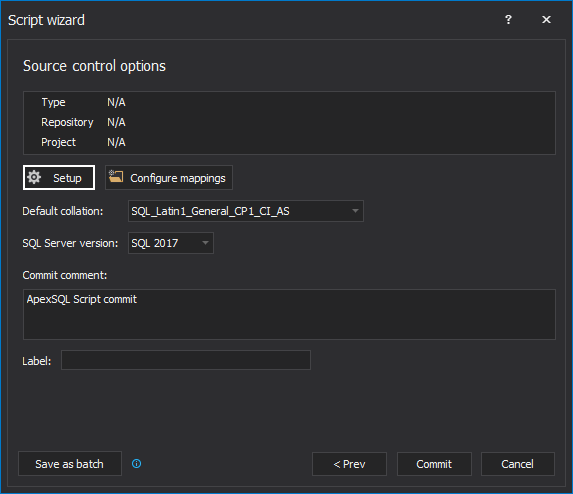
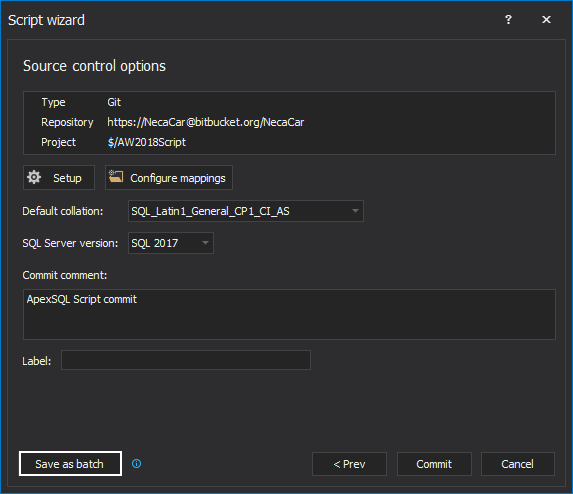
The last step contains the output options and it’s different depending on the previously chosen output type. In order to set where the selected objects should be committed, click the Setup button to initiate the Source control wizard.
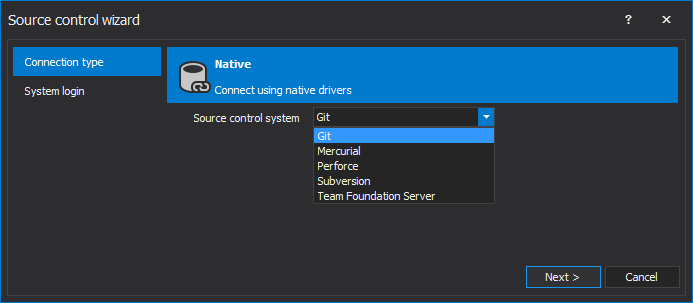
The first step of the Source control wizard allows users to choose between five different source control systems. In this example, Git is chosen from the drop-down, while other systems can be chosen as well, such as Mercurial, Perforce, Subversion and Team Foundation Server:
In the next step of the Source control wizard, the System login information should be set including:
- Username
- Password
- Repository
- Branch
- and Project
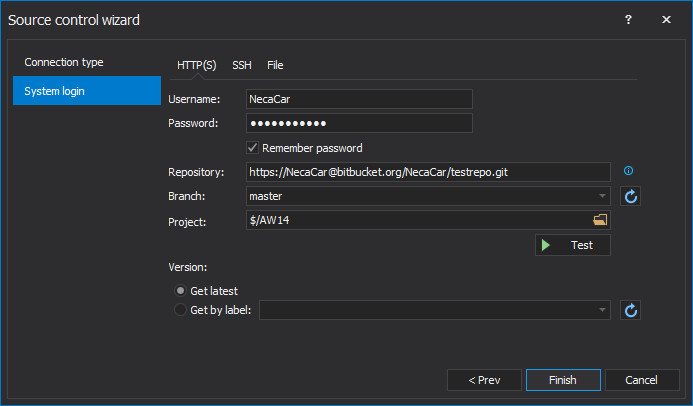
Once all information are provided, click the Finish button in the Source control wizard and all information will be loaded in the Input source step:
If a database needs to be scripted several times, for continuously committing objects to a source control repository for example, it can be easily automated by creating a batch file or a PowerShell script that can be scheduled via a SQL Server Job or the Task Scheduler. To create and save the automation script, click the Automation script button in the bottom-left corner in the last step of the Script wizard and Automation script window will be shown.
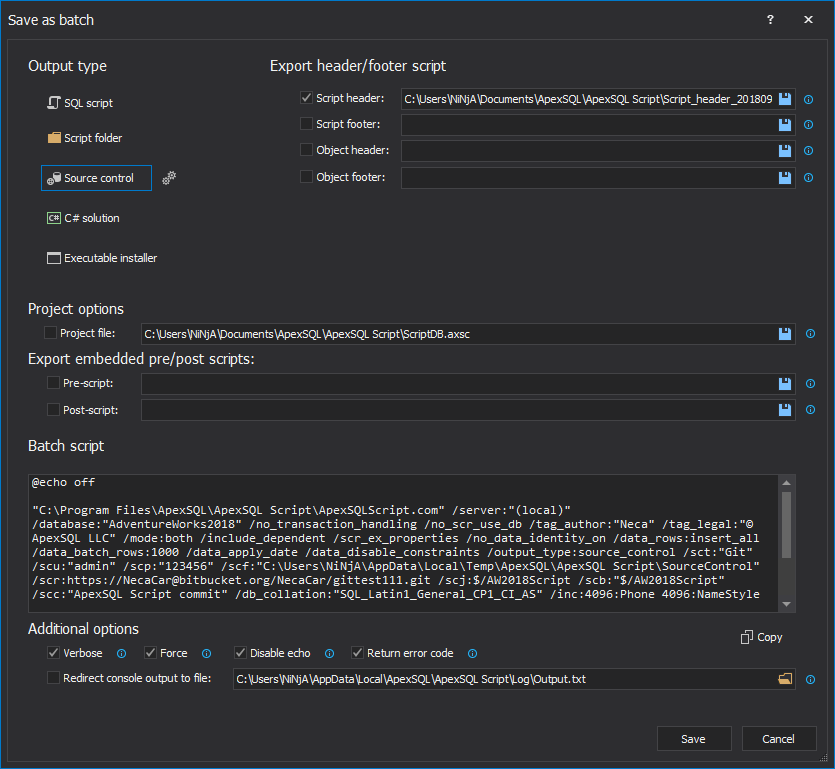
As displayed, the automation script will contain all CLI switches for options that were set along the way, as the project was constructed. Additionally, a project file can be created and saved, and it will replace all project options and encrypt any passwords that you might have for SQL Server authentication or for the source control system. Once everything is reviewed and set, click the Save button from the bottom-right corner of the Automation script window and provide the location where it should be saved.
The execution results can be saved as a text file and reviewed if needed
Once the execution results are saved and the Close button is clicked in the Results window, the main application window will be shown again, and a new script process can be done for the same database.
Thanks for watching. For more information, please visit apexsql.com


