


In this article, we will do an overview of the main features of the ApexSQL Pump.
Transcript
Hello and welcome to the ApexSQL Pump general overview video. ApexSQL Pump is a standalone application with the possibility of being run via CLI. The application is a SQL development tool capable to export and import files from different sources and file formats. It’s a very easy wizard application where the user will be guided through. ApexSQL Pump is able to import 13 and export up to 16 different source data and file formats.
Beside the import and export features, the application has some additional ones which are:
- Pre and post-scripts when importing or exporting data
- View full import and export process summary
- Export data from multiple tables and views at the same time
- Import data into SQL server from different file types
- Variety of import mode types such as append, update, etc
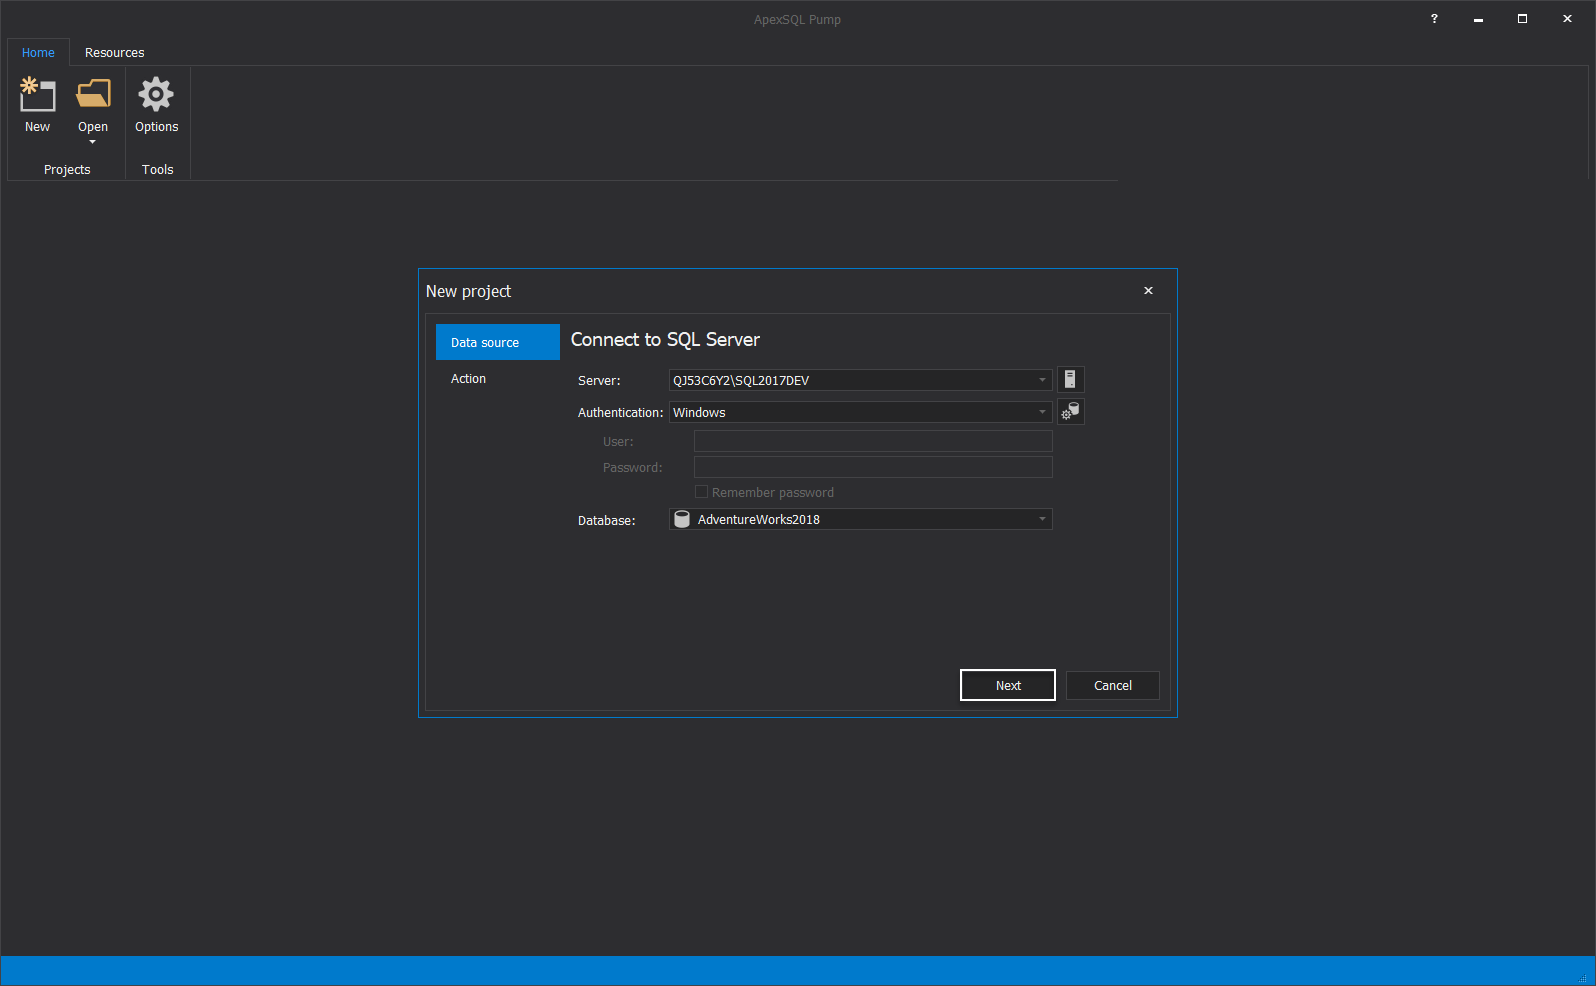
Let’s get started. Upon starting the application, the New project window will show up. First, under the Data source tab set the SQL Server:
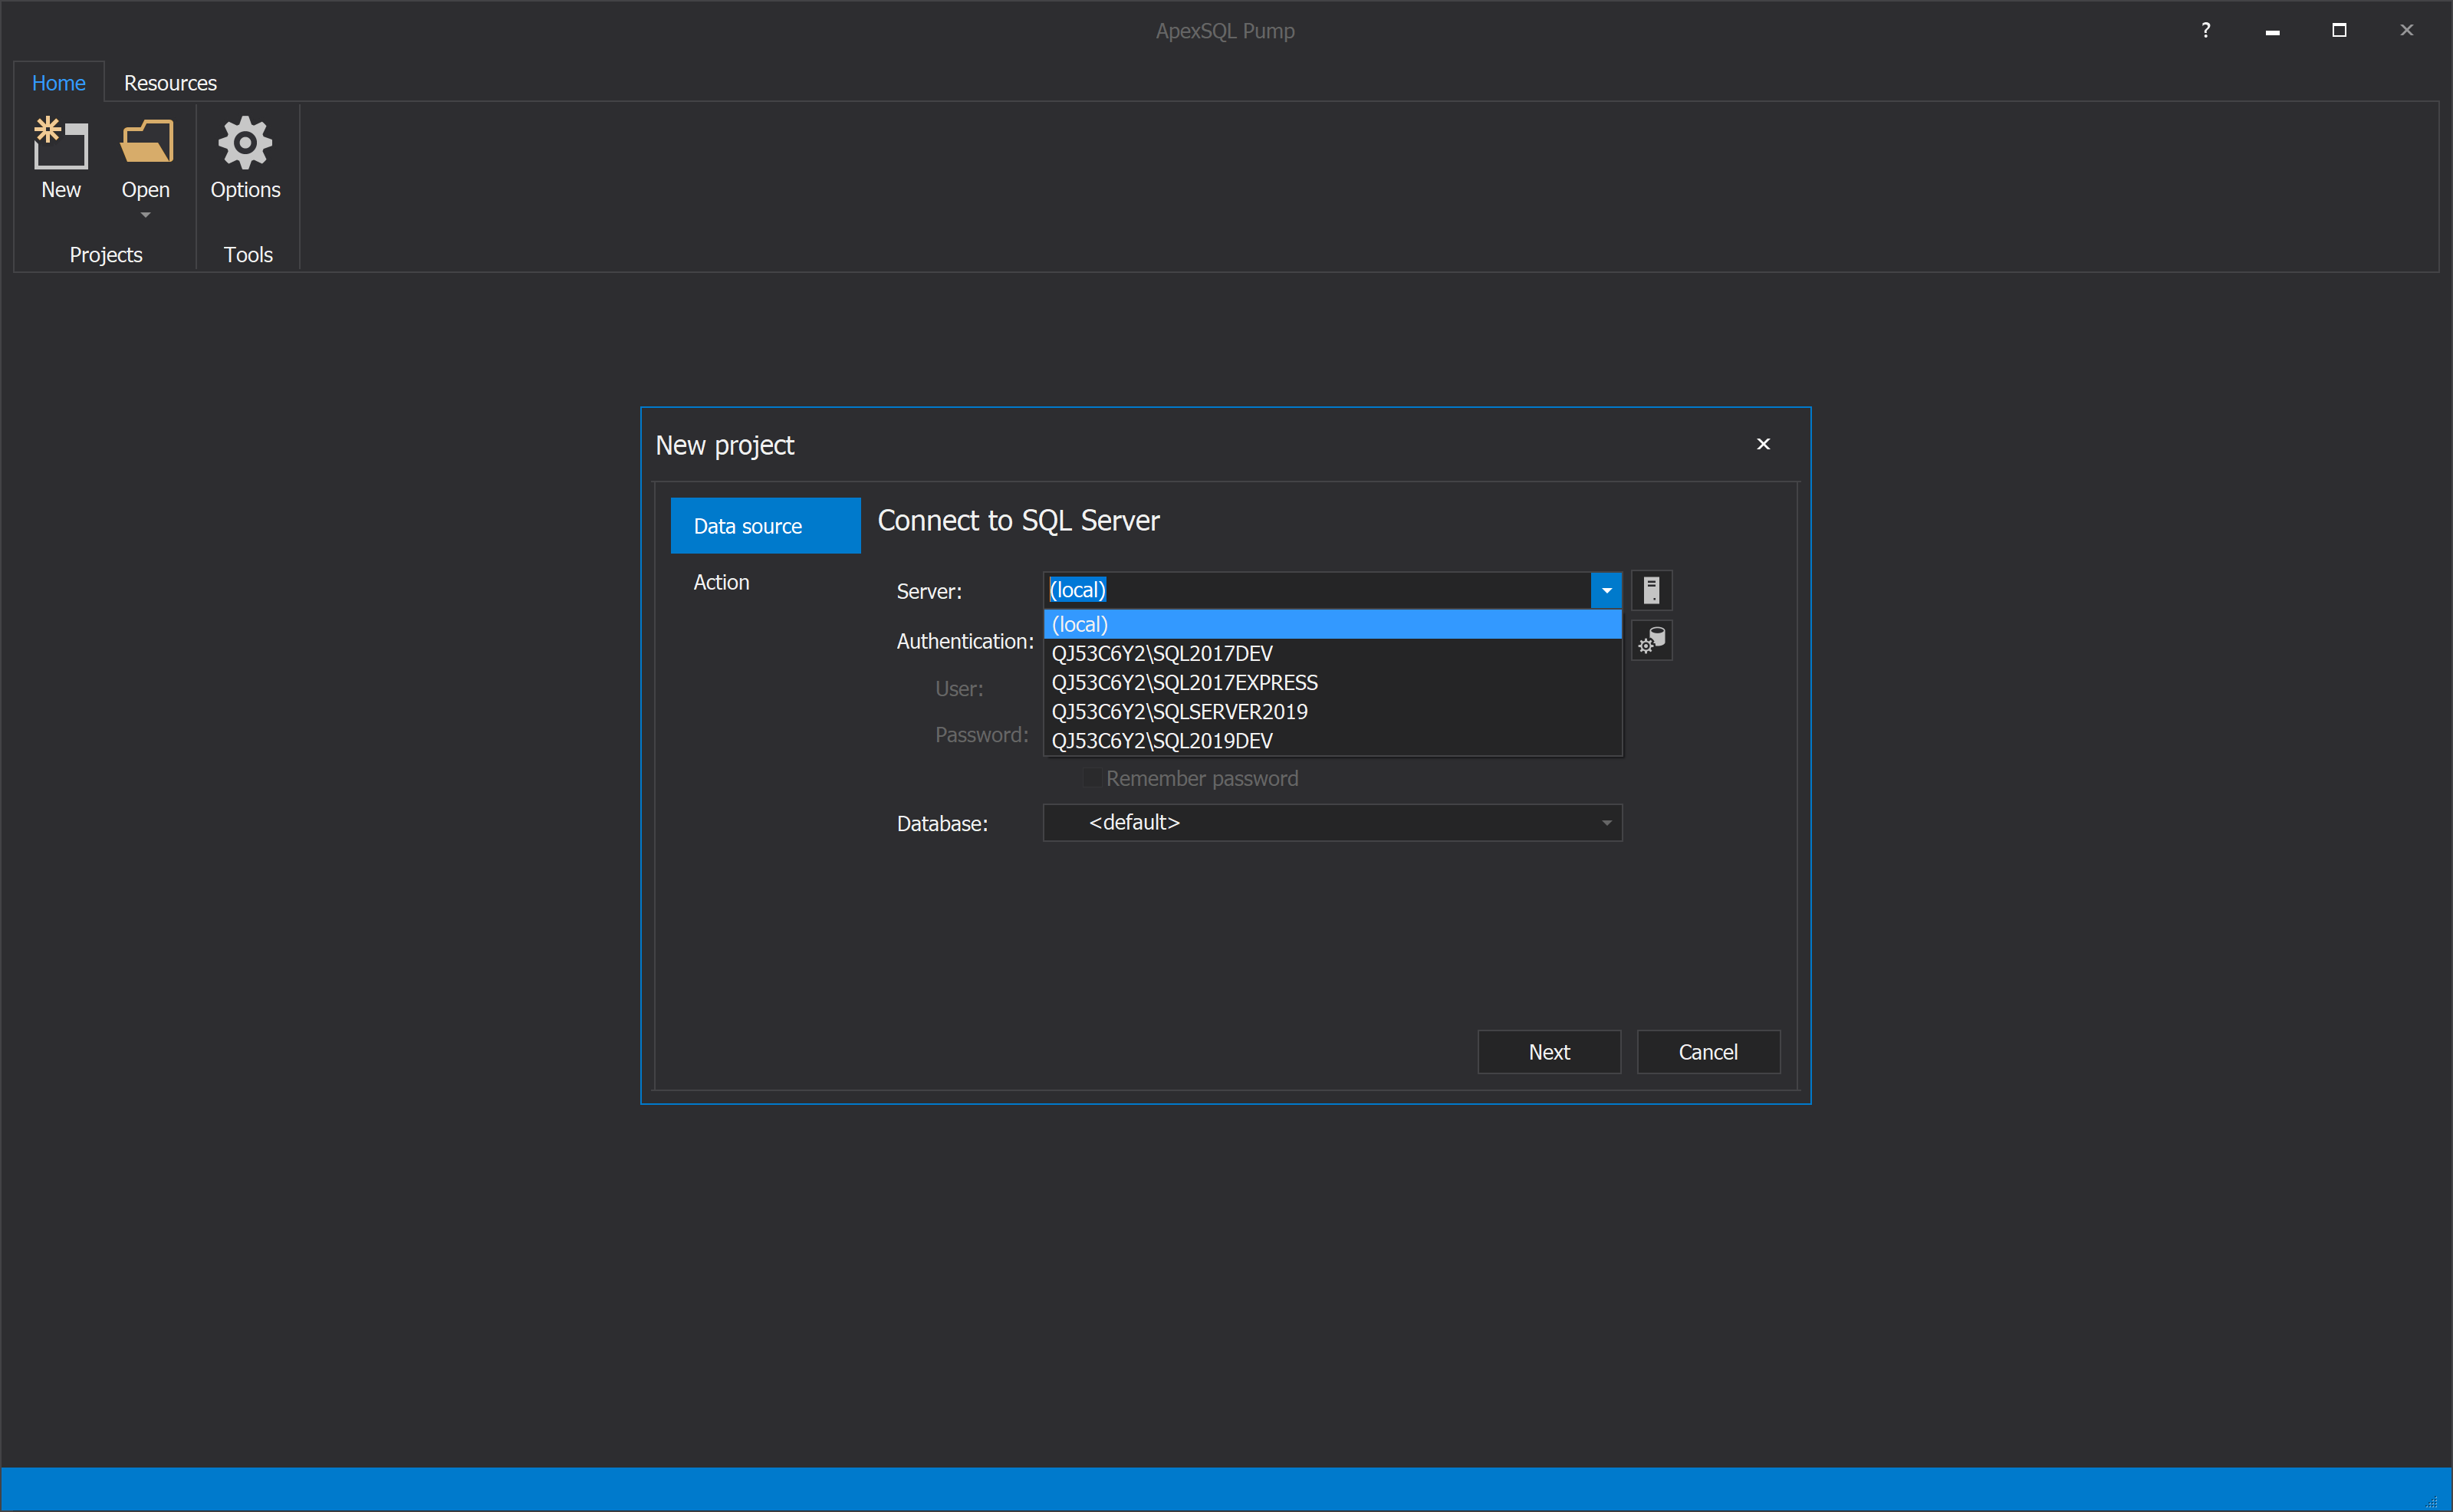
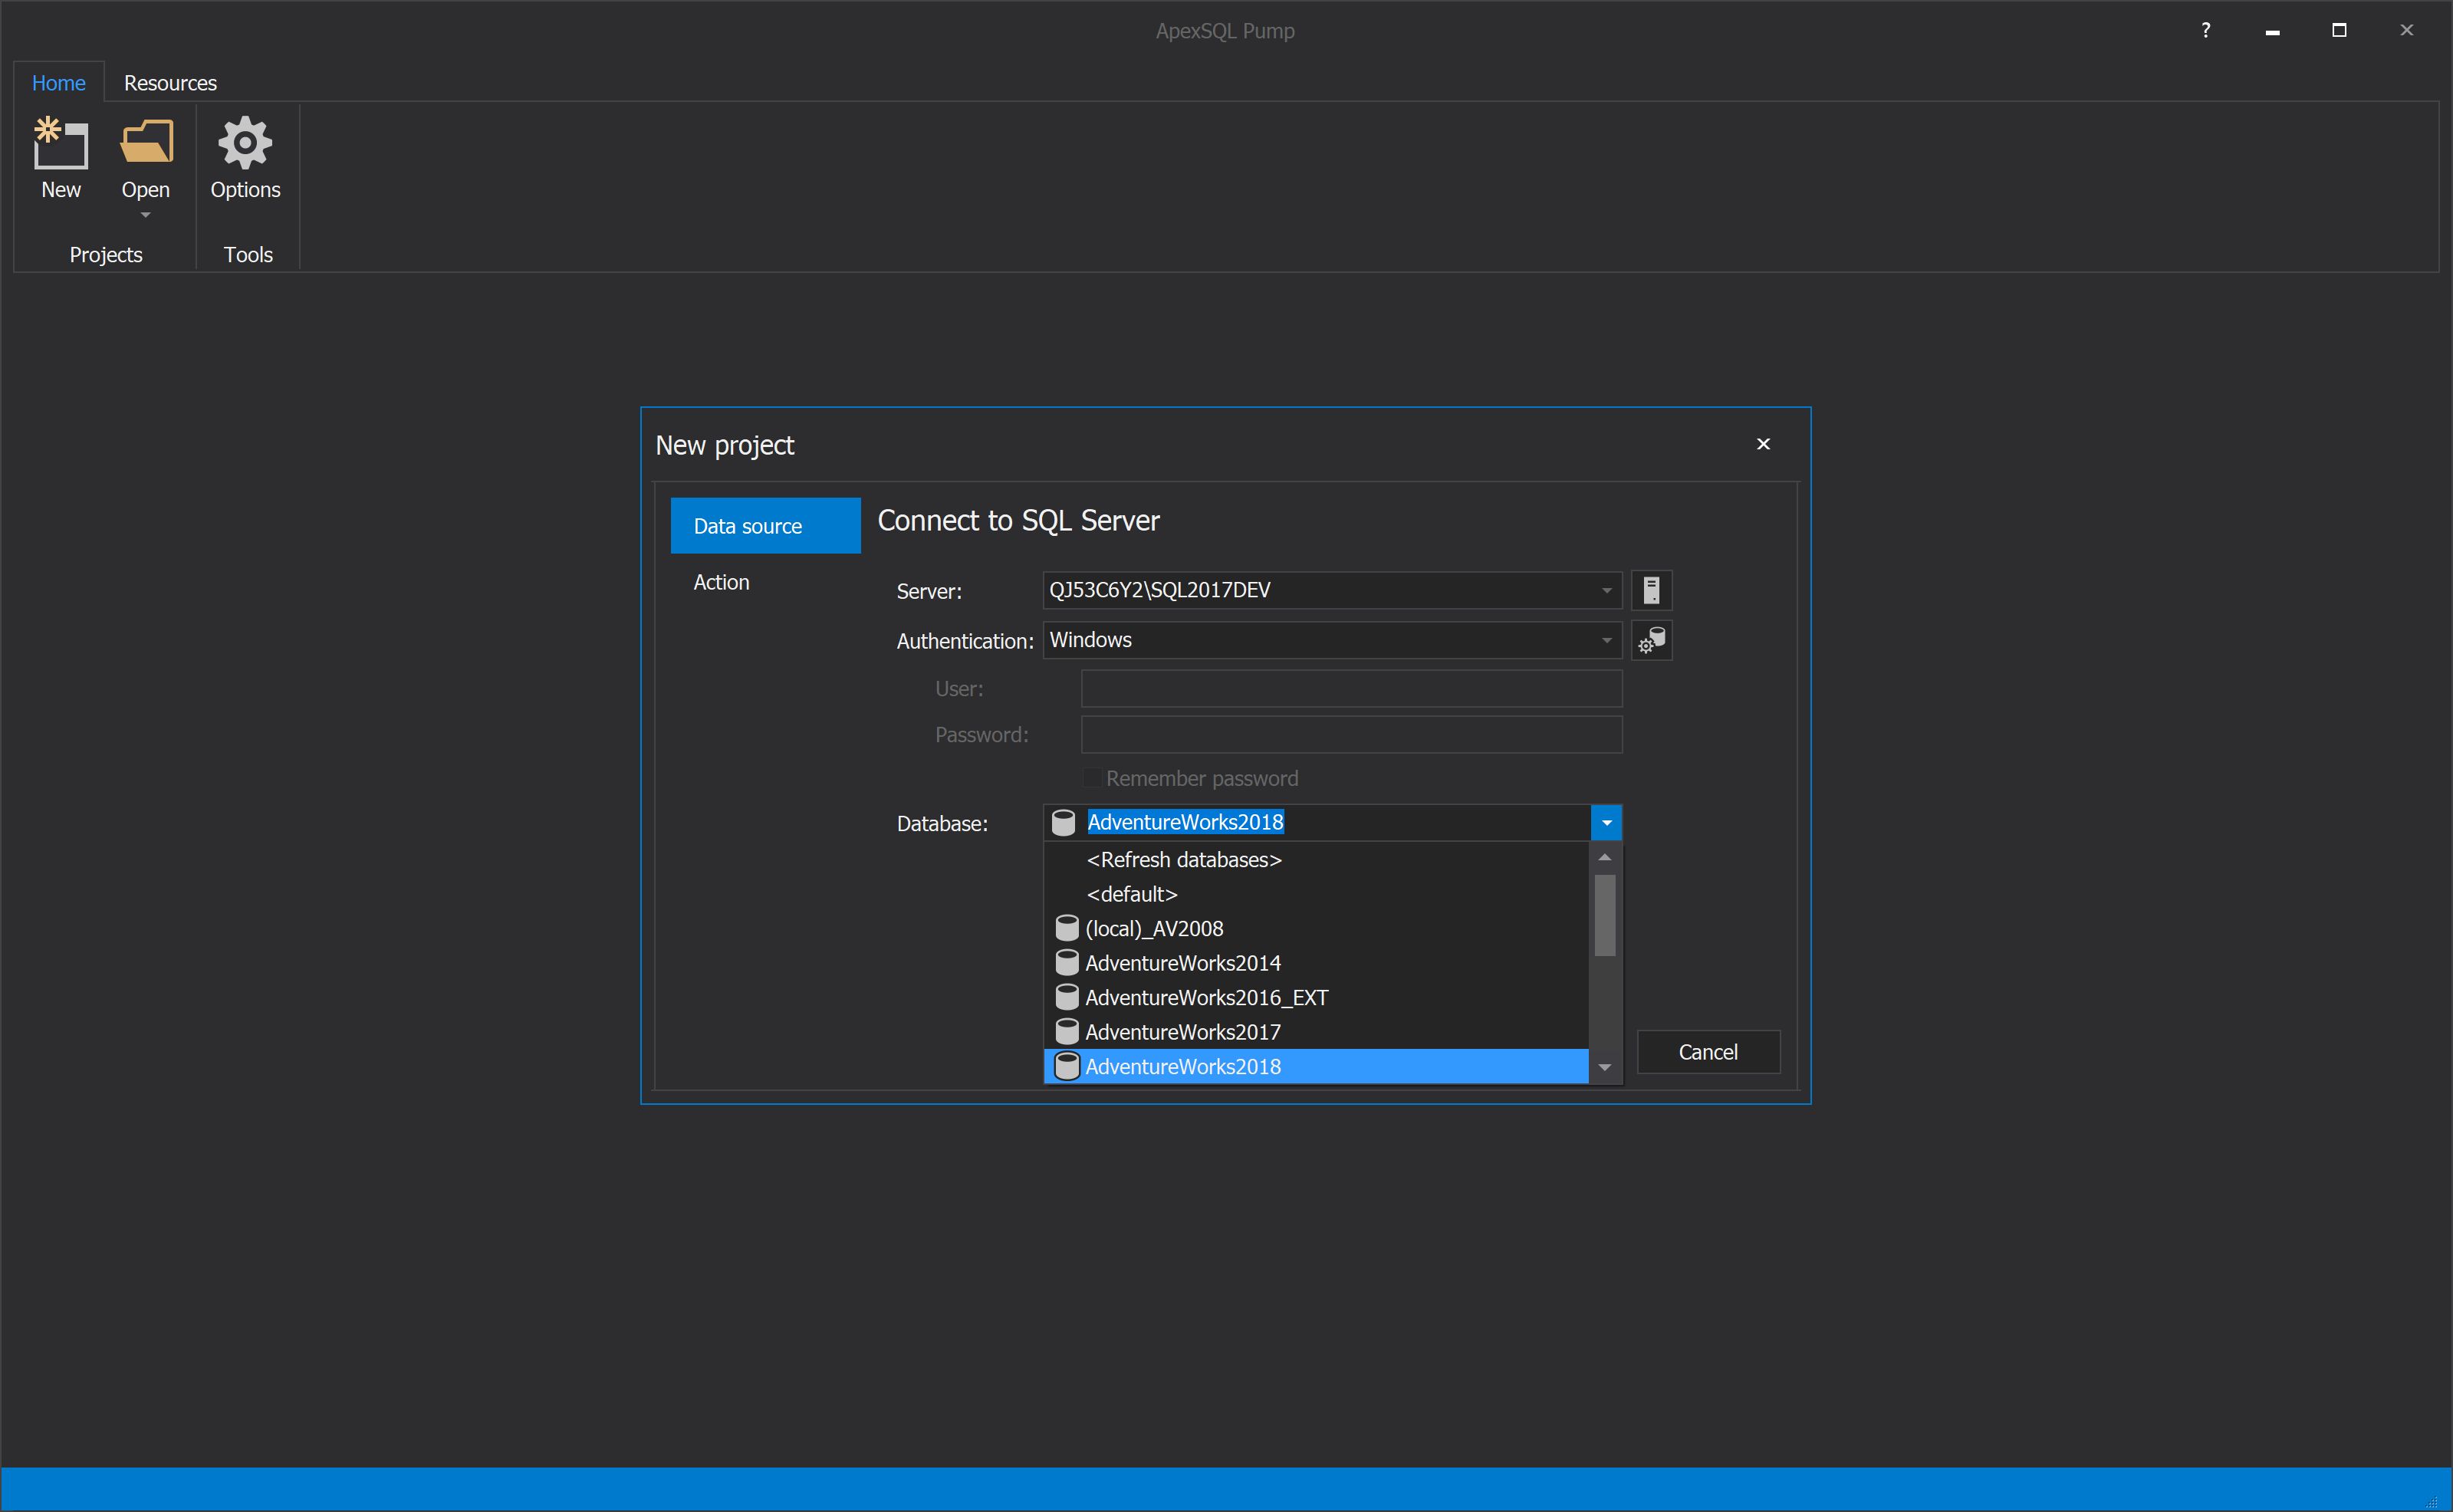
Then set the Authentication type for the SQL Server. For purpose of this video the Windows authentication will be used:

Next step is to choose the database under the Database drop-down list:
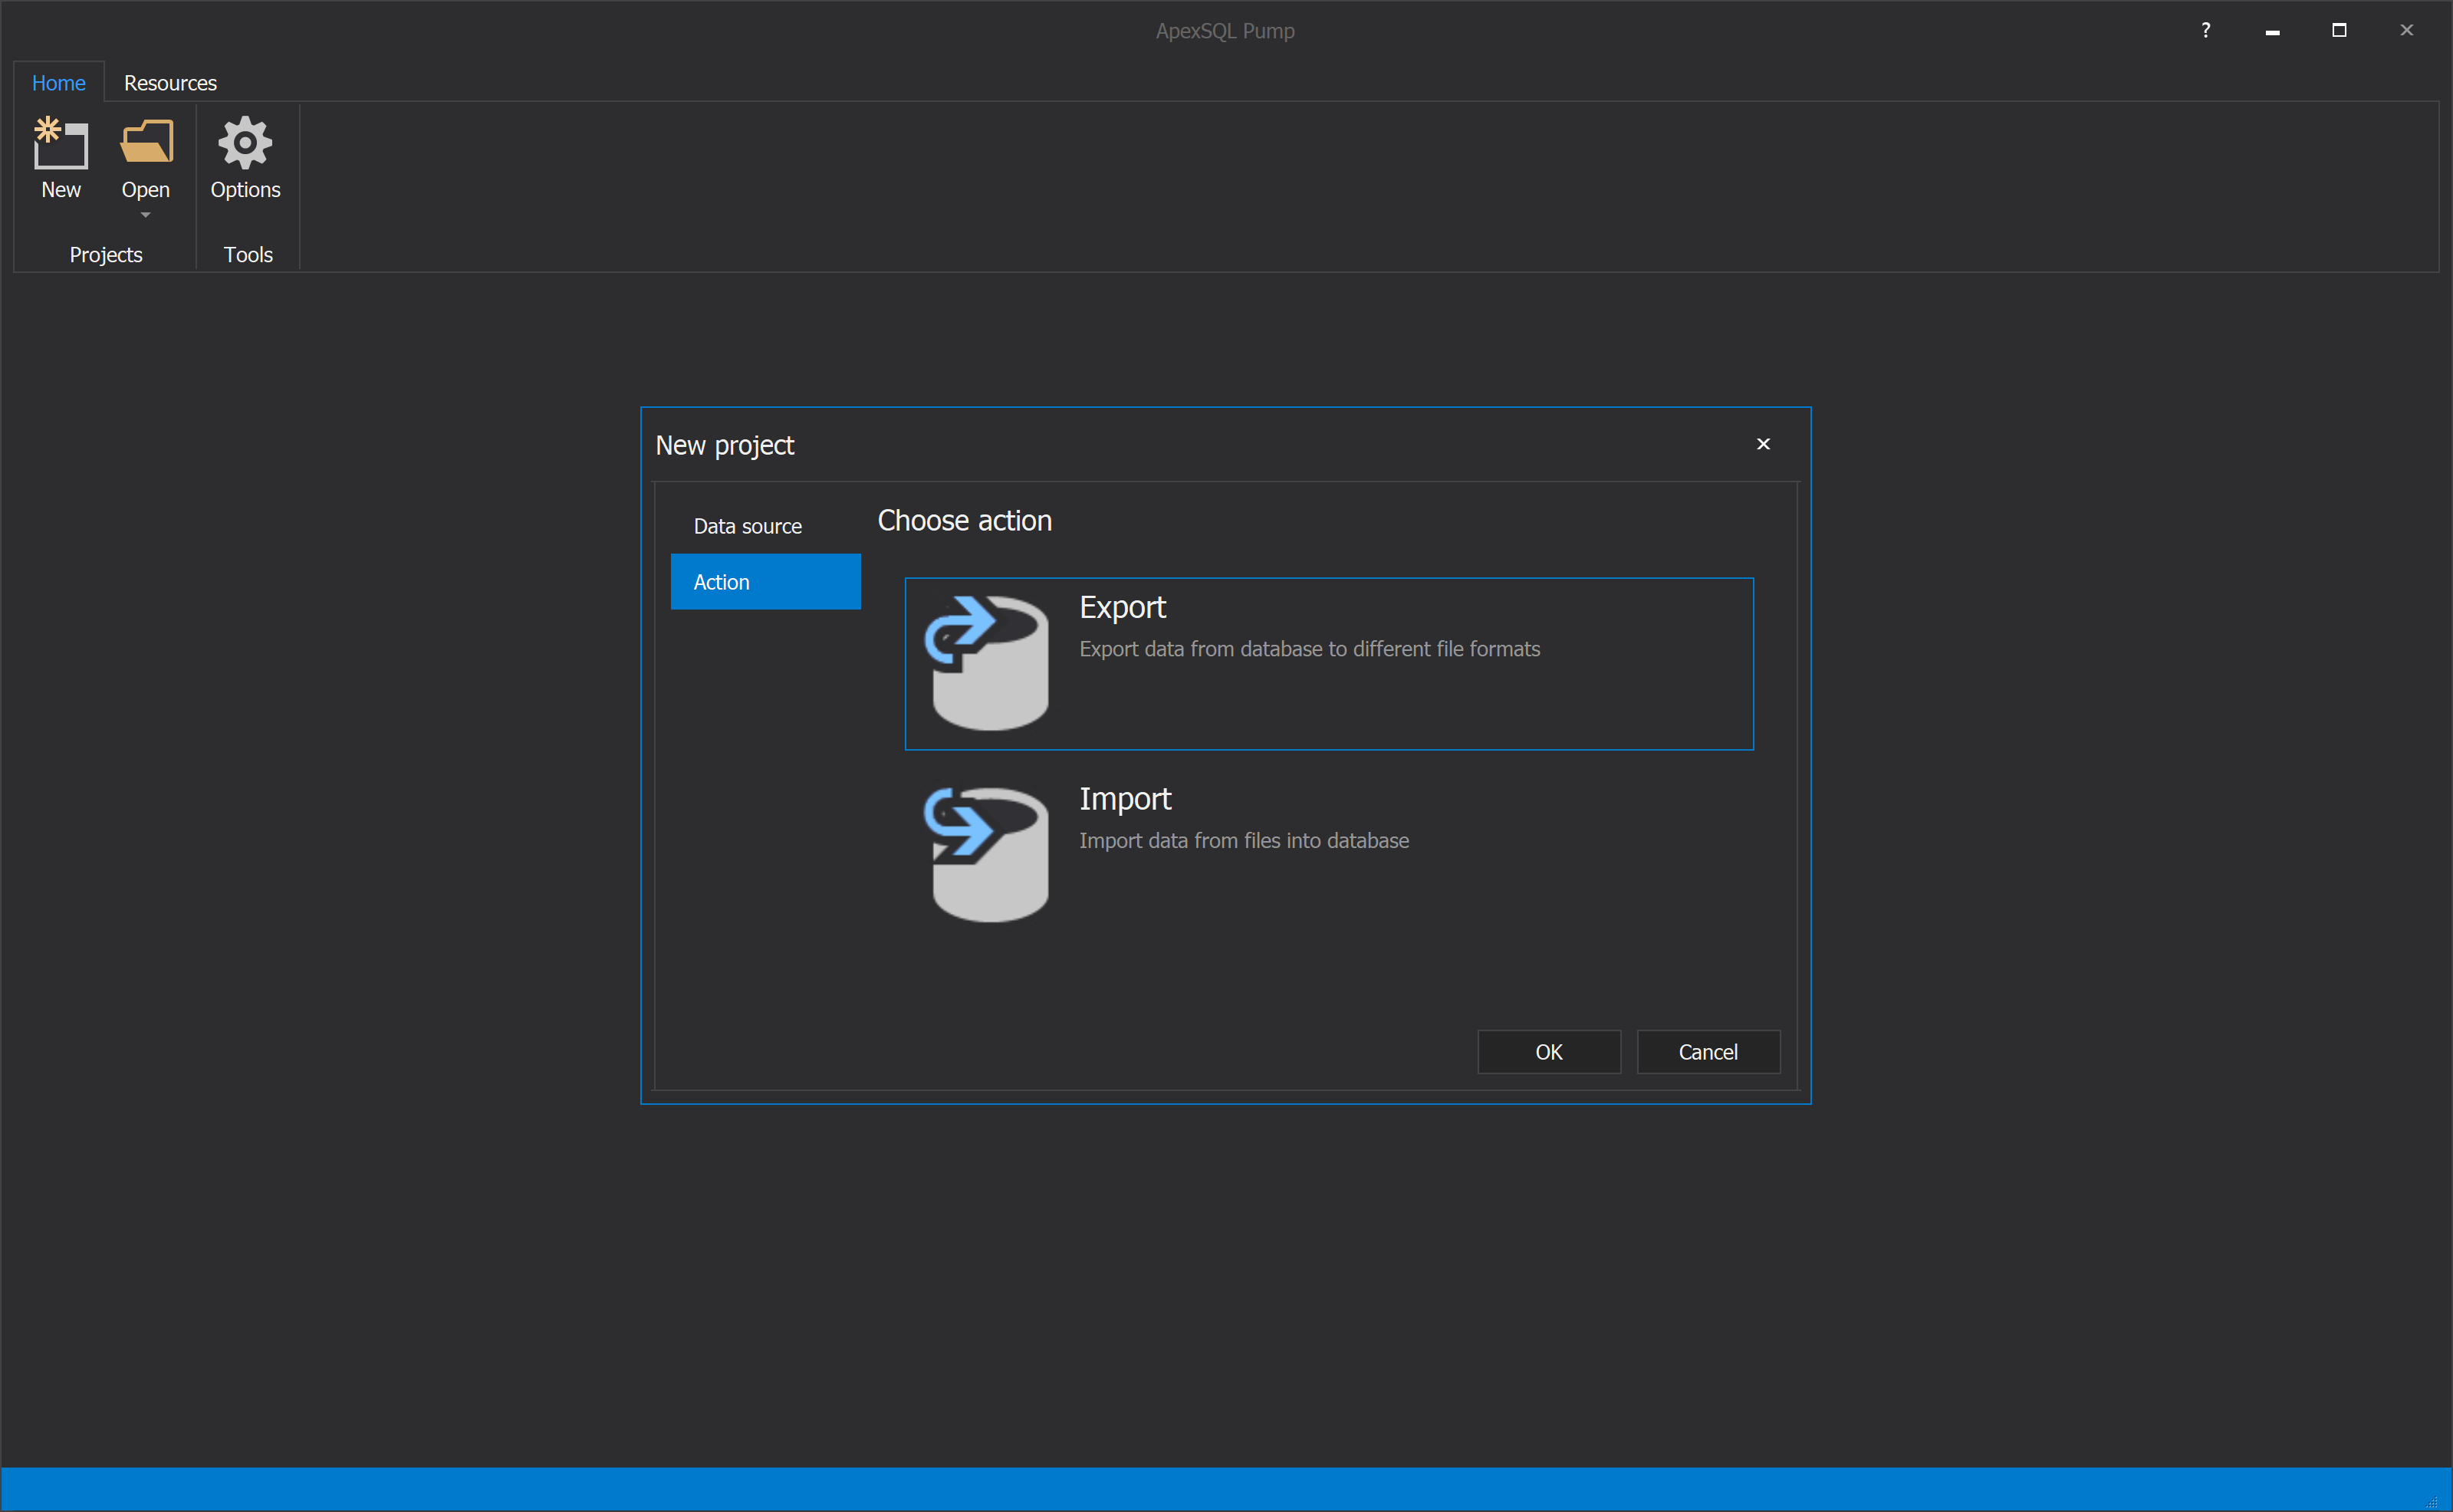
Clicking the Next button will guide us to the Action tab which will show the Export and Import options. The Export option is able to export data from SQL database to different file formats and The Import option can import data from different files into the SQL database:
First, we will use the Export feature to show how can be a SQL data be exported to the different file formats. Click the OK button, to load the database data in the main grid:

By default, the Show all option is chosen, and the all SQL data will be checked. For the purpose of this video only some of the SQL data will be checked and we will switch to the Show checked mode to see only what we want to export:
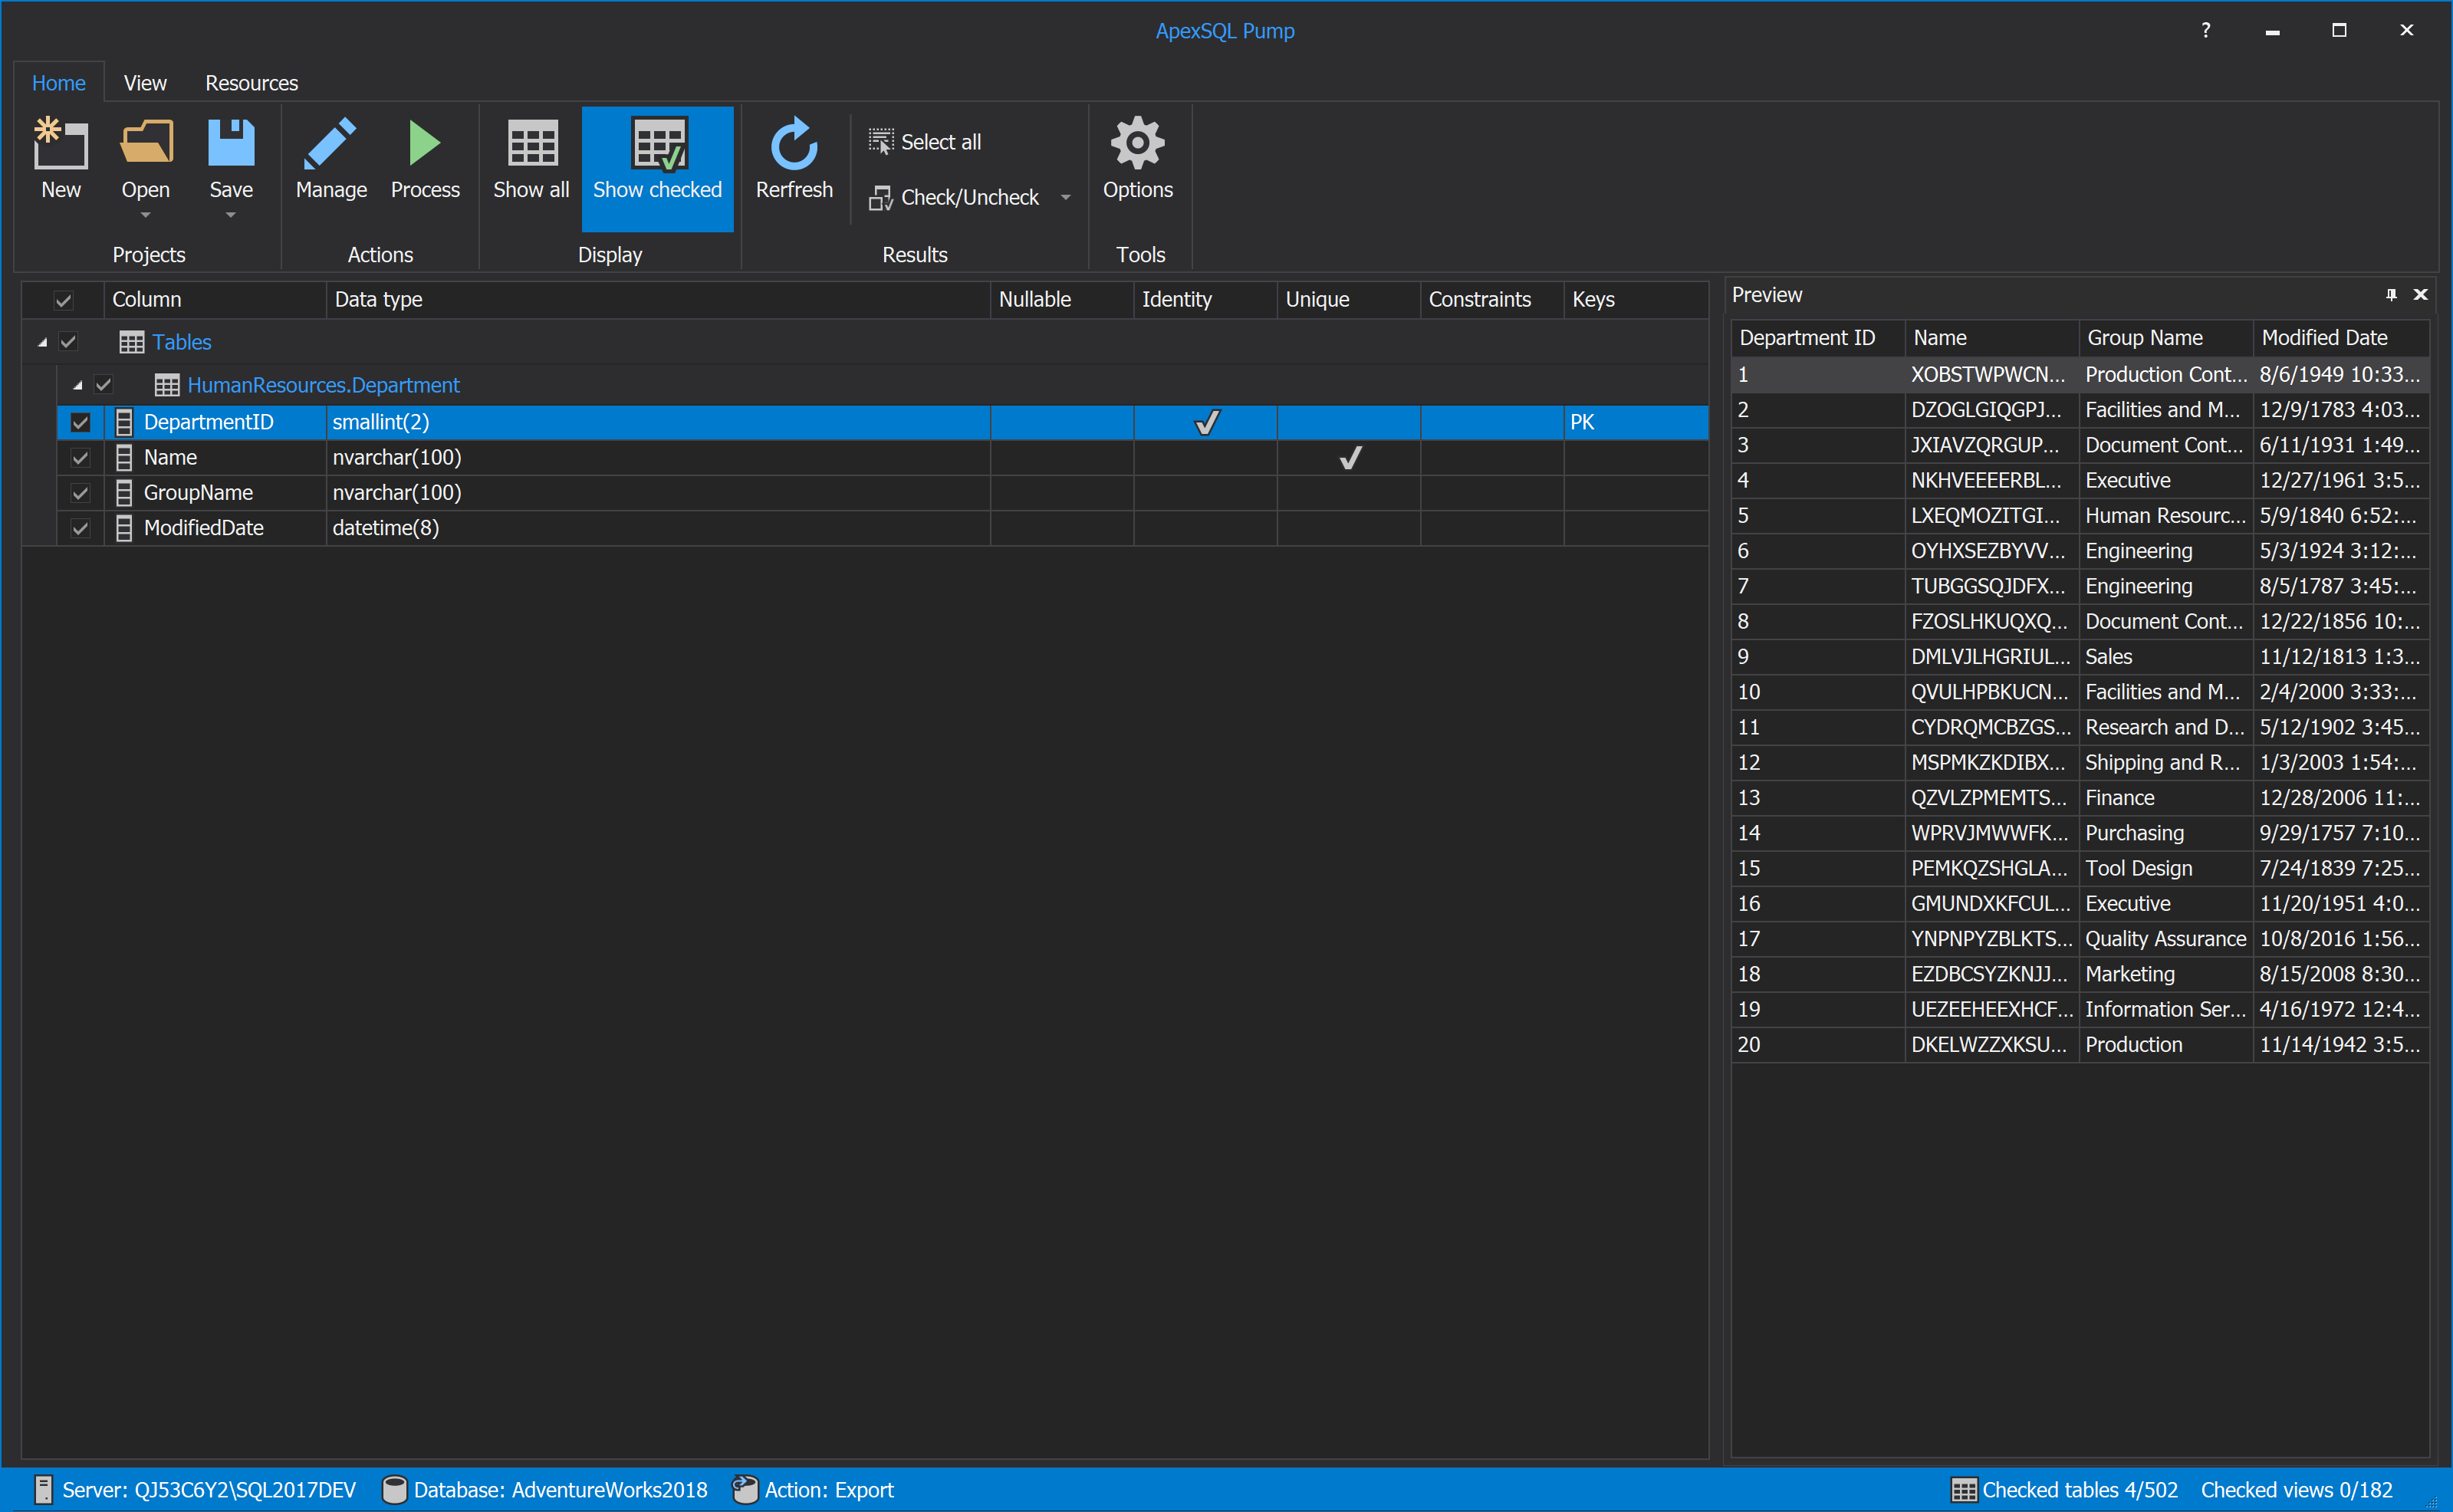
On the right side, in the Preview panel the SQL data is shown (Note: the Preview panel can be moved to the different positions in the application):

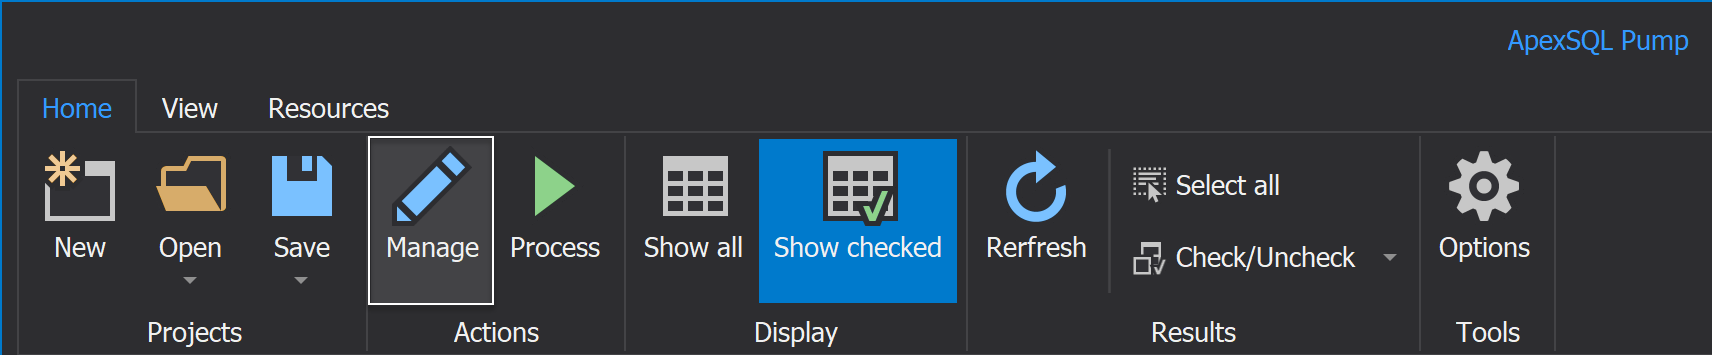
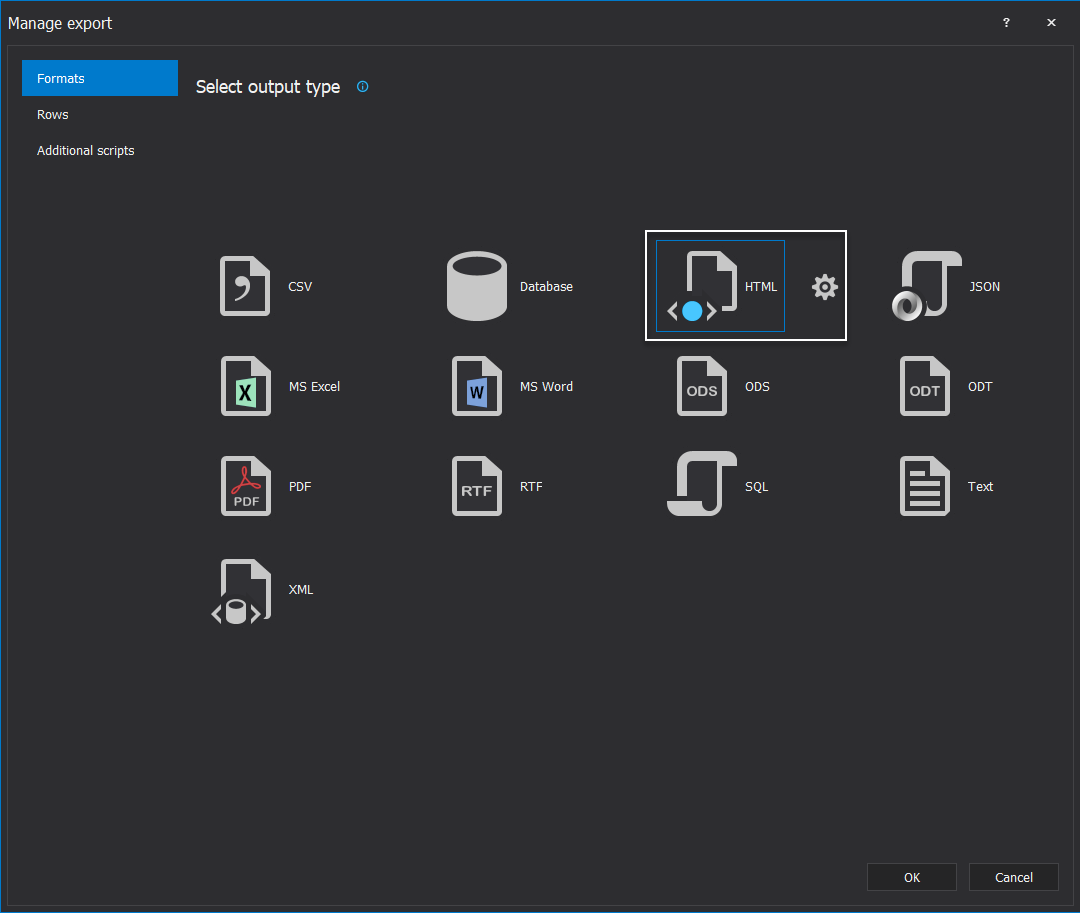
Before we start to export the data, an export file format need to be chosen, by clicking the Manage button from the Home tab:
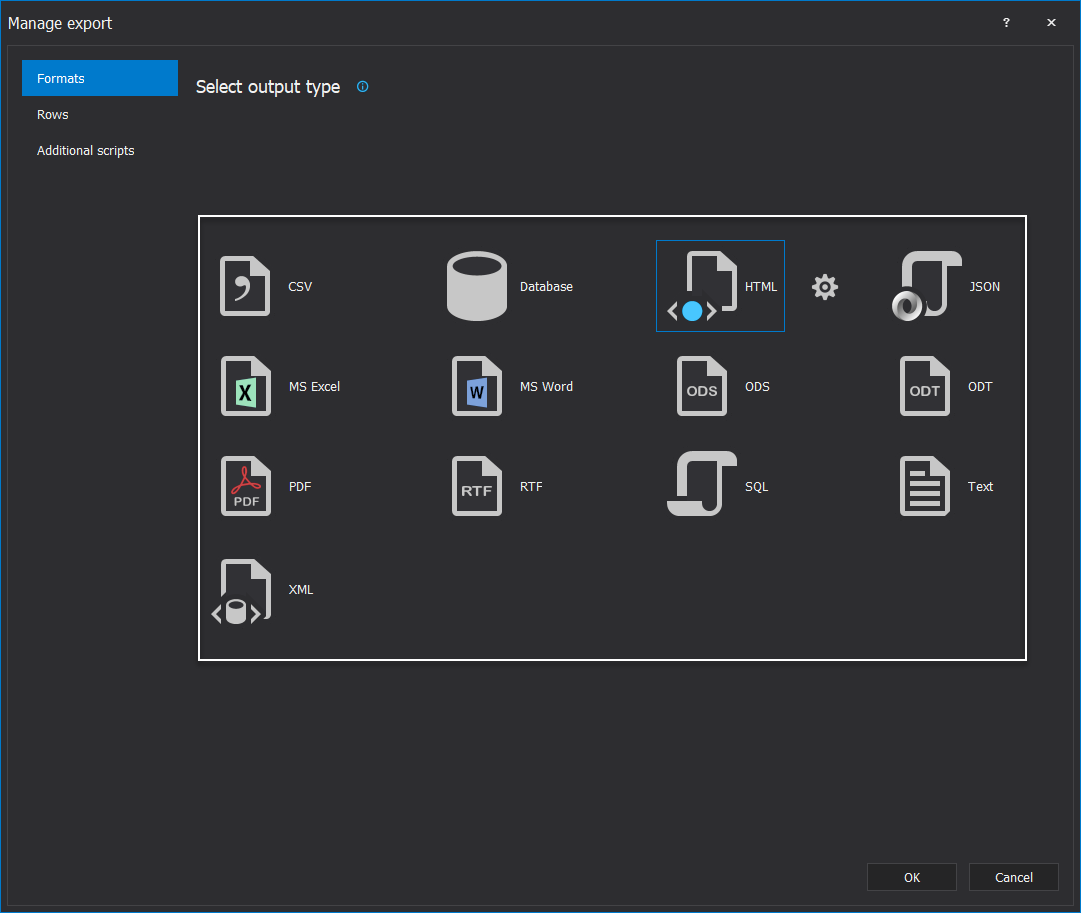
Under the Manage export window there are three tabs.
In the Formats tab, one of the available output file types can be selected:
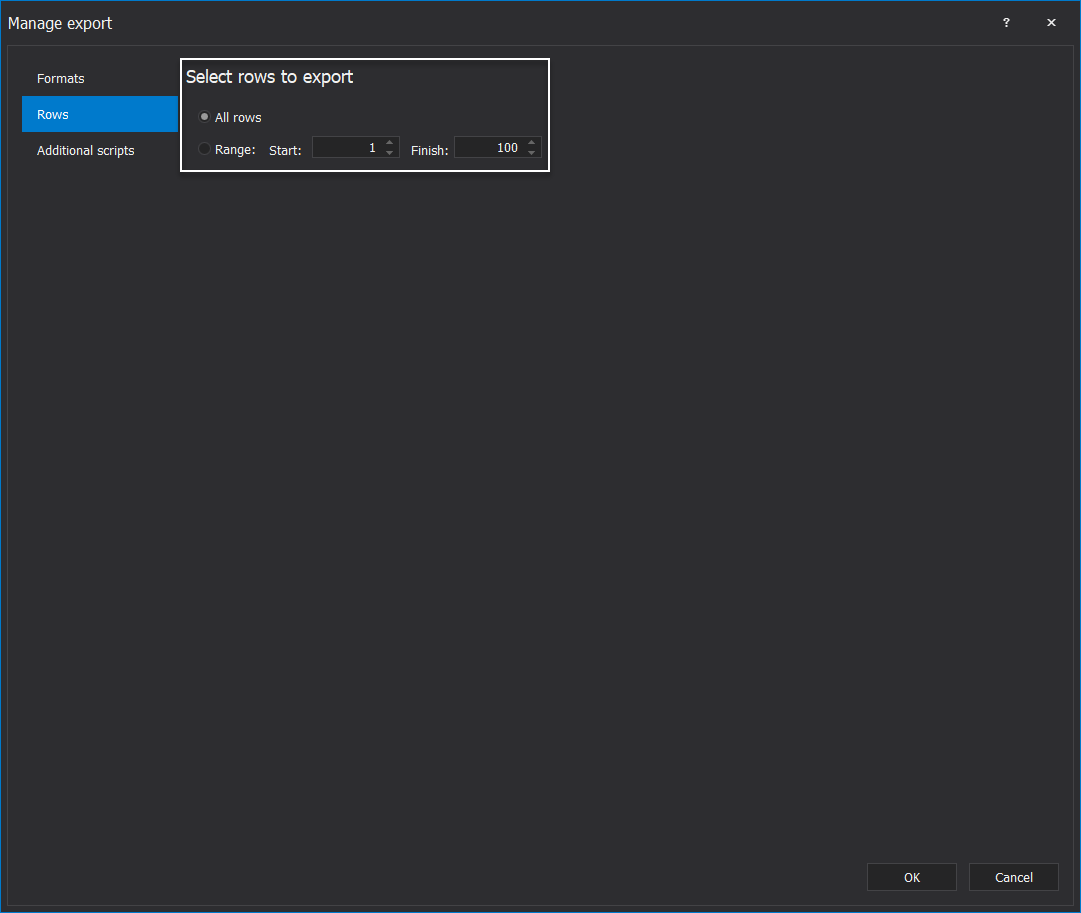
Under the Rows tab, it can be chosen how many rows of data will be exported. To export all data rows, select the All rows radio button. To export just certain numbers or rows, select the Range radio button and, in the Start and Finish boxes, enter a started and ended number of the rows:
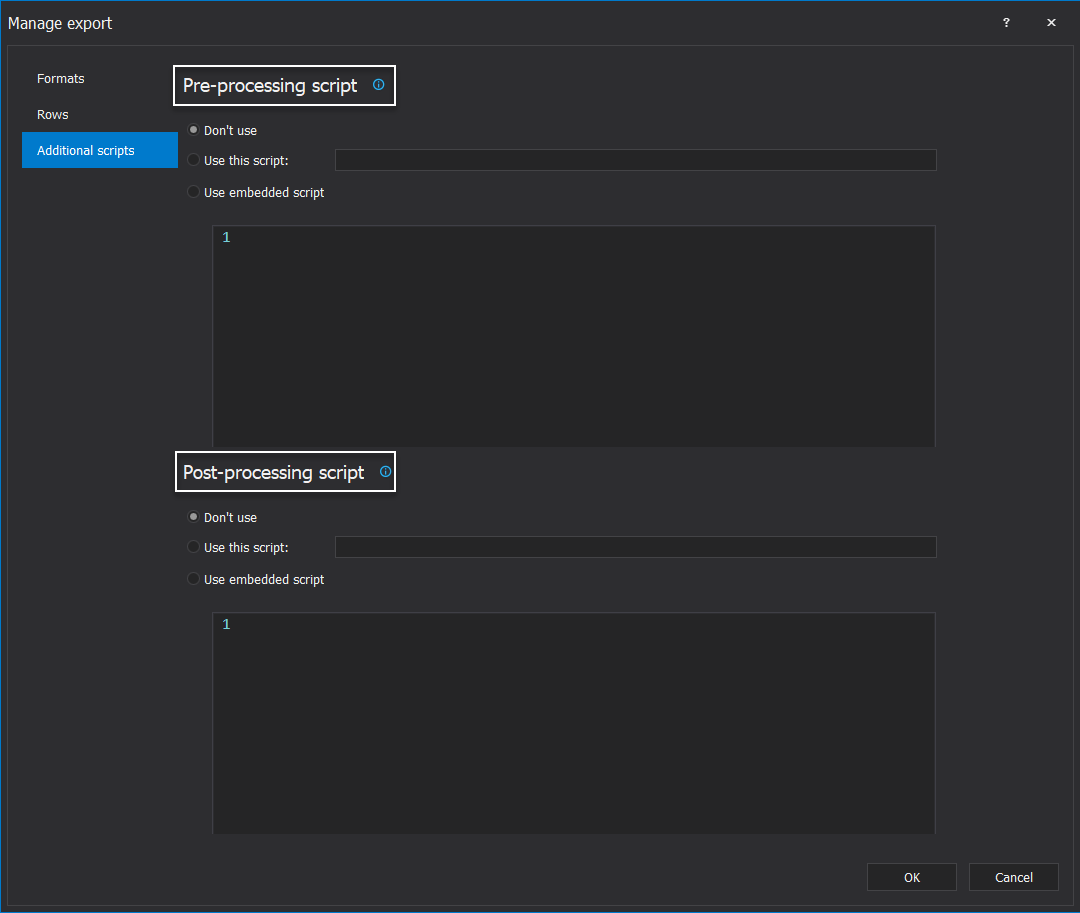
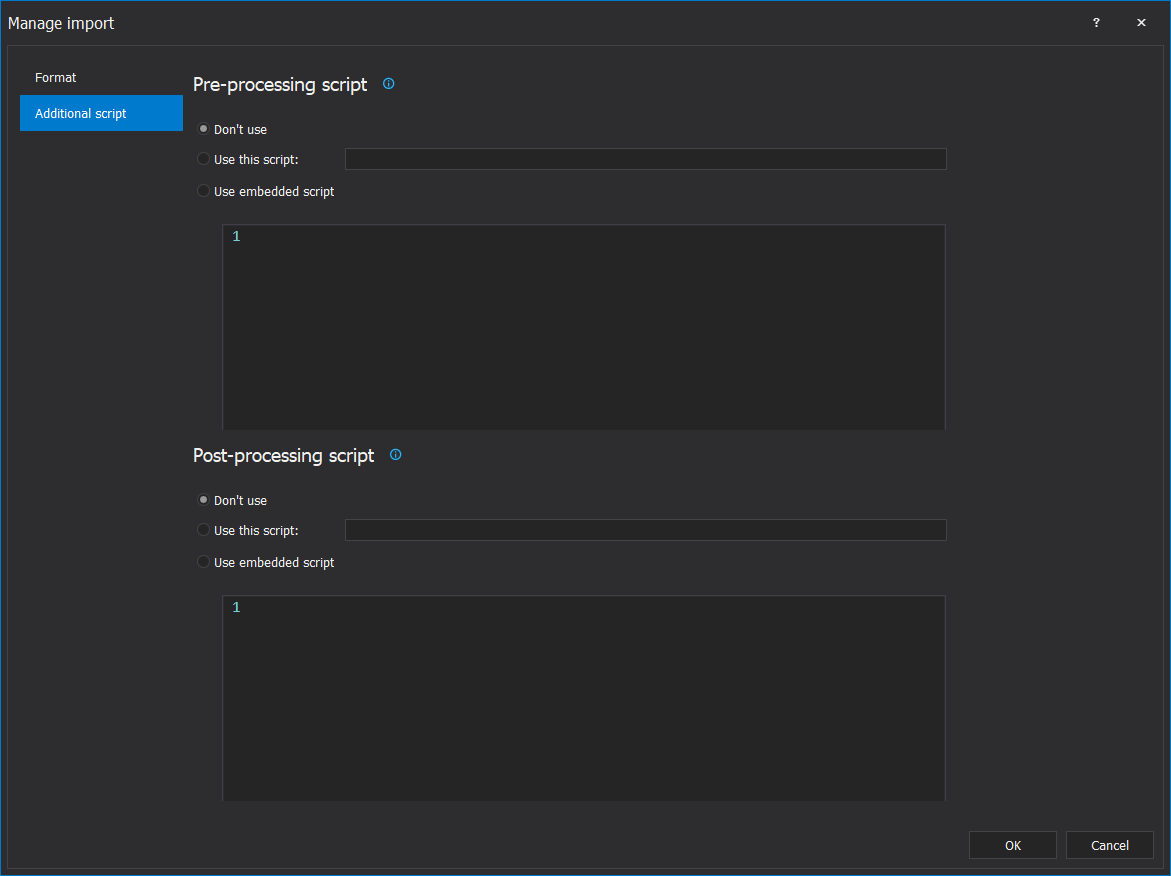
The last tab in the Manage export window is the Additional scripts tab where the pre or post processing scripts can be included:
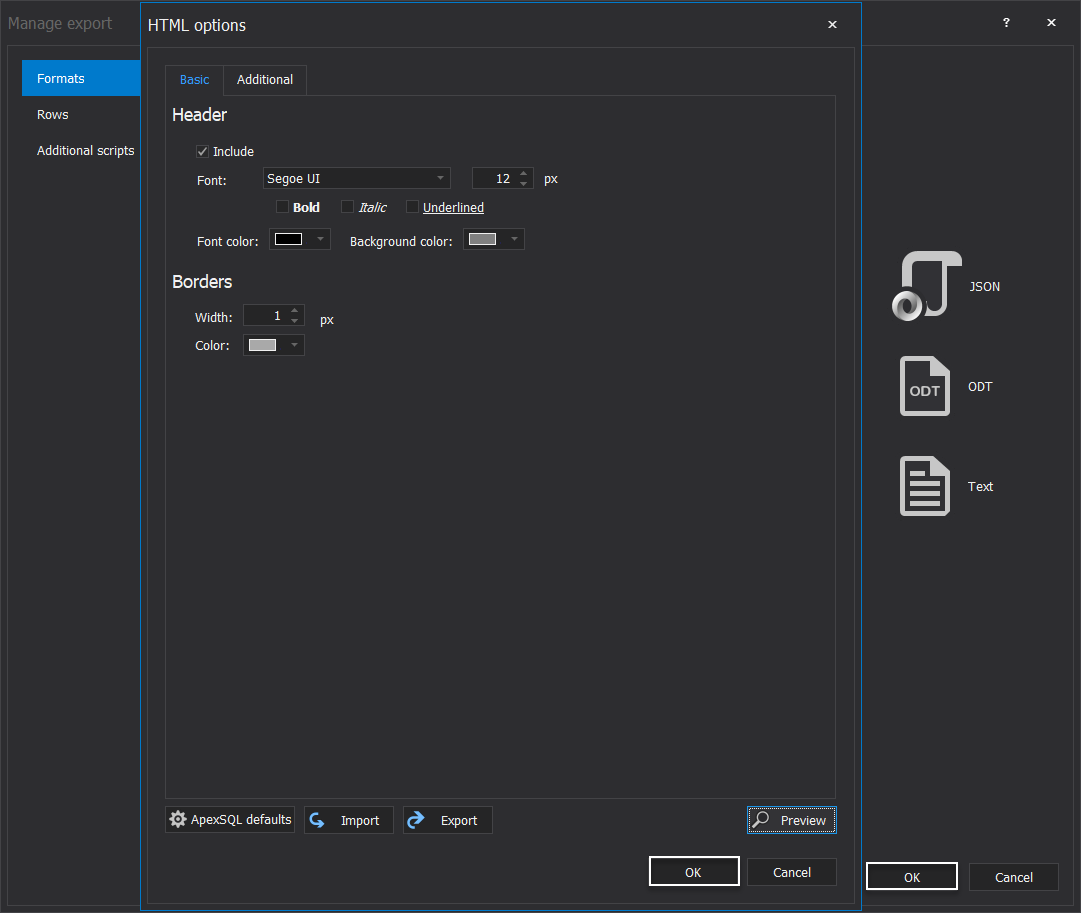
For the purpose of this video, we will go back to the Formats tab, choose the HTML export format and open the settings for it:
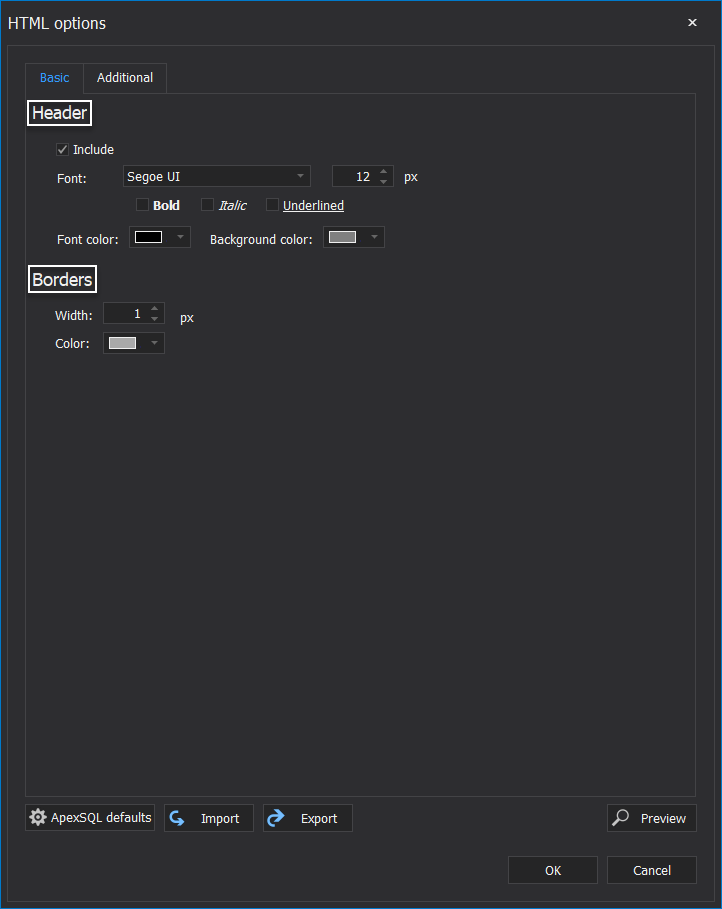
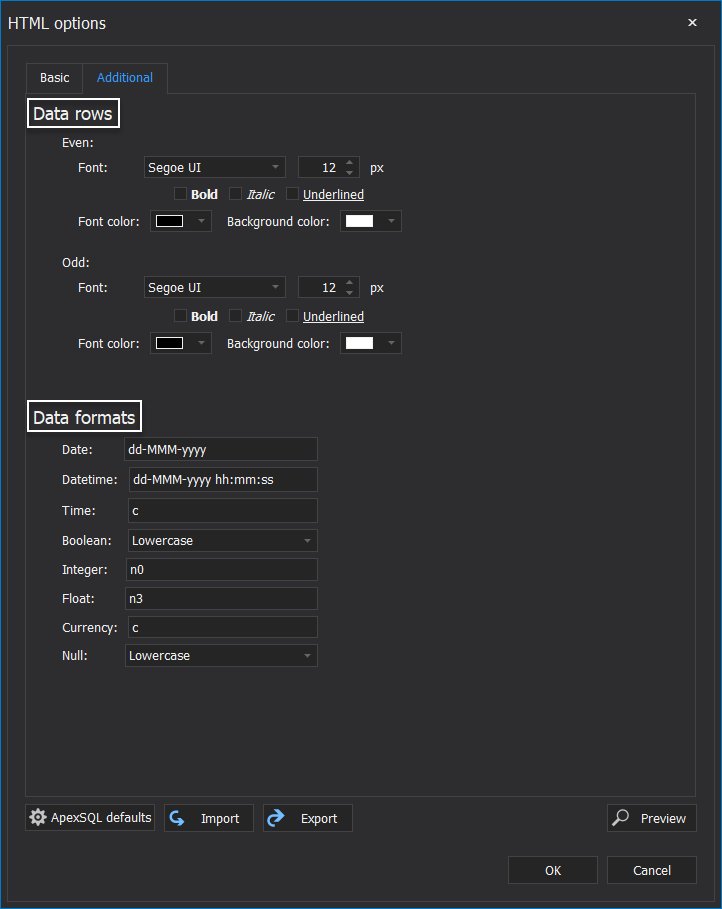
Under the HTML options window, there are the Basic and Additional tabs where the options such as Header, Borders, Data Rows and Data formats can be set:
When everything is set in the HTML options window there is the Preview button on the bottom right side to check if the desired settings are set before the export process is started:
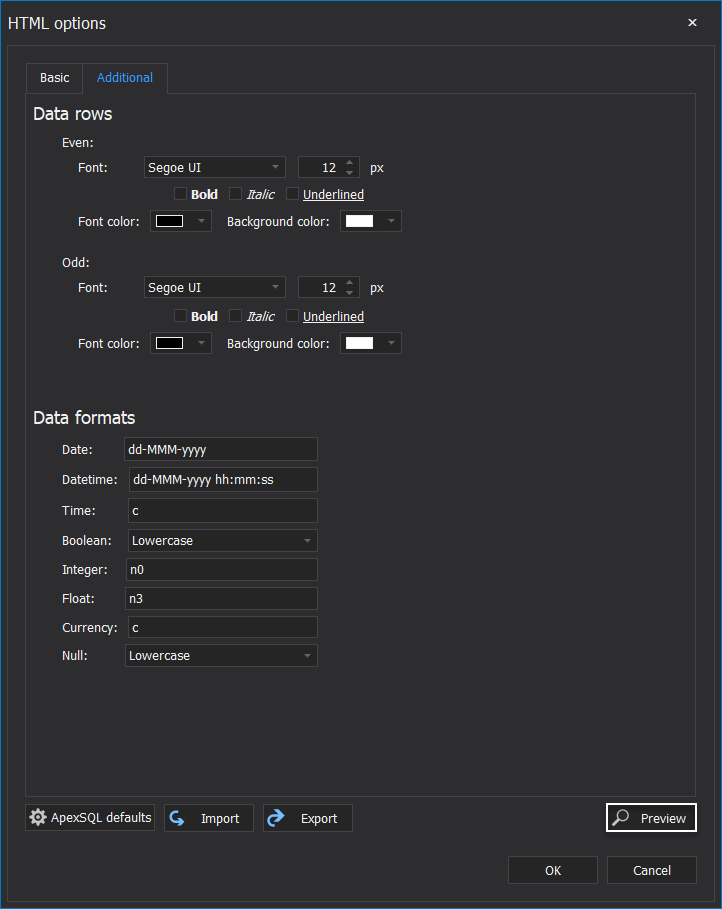
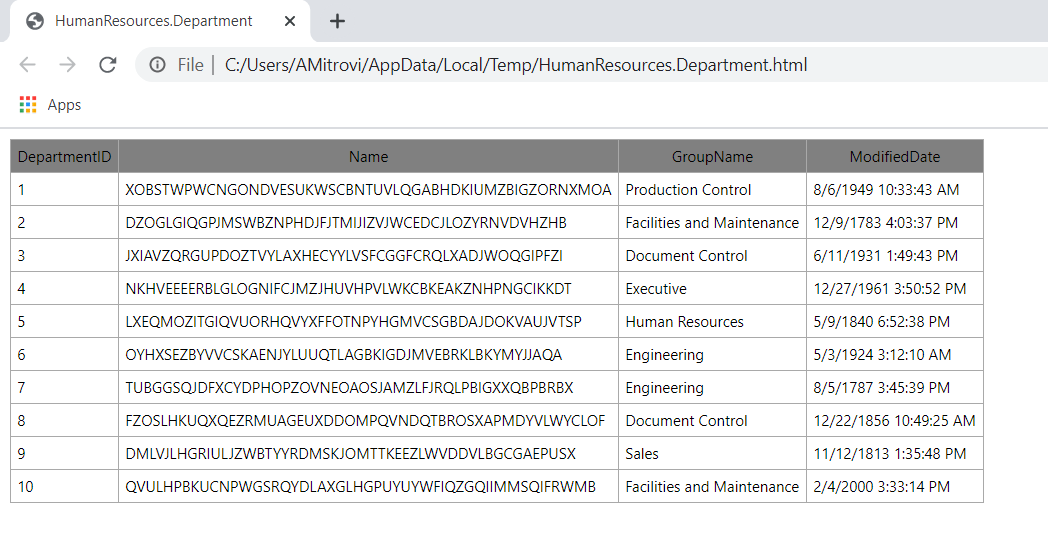
Using the Preview button will show, in the default browser, how the export HTML file will look like for the checked SQL table from the main grid, in this case, the HumanResources.Department table:
If everything is okay, proceed by clicking the OK buttons in the HTML options and in the Manage export windows:
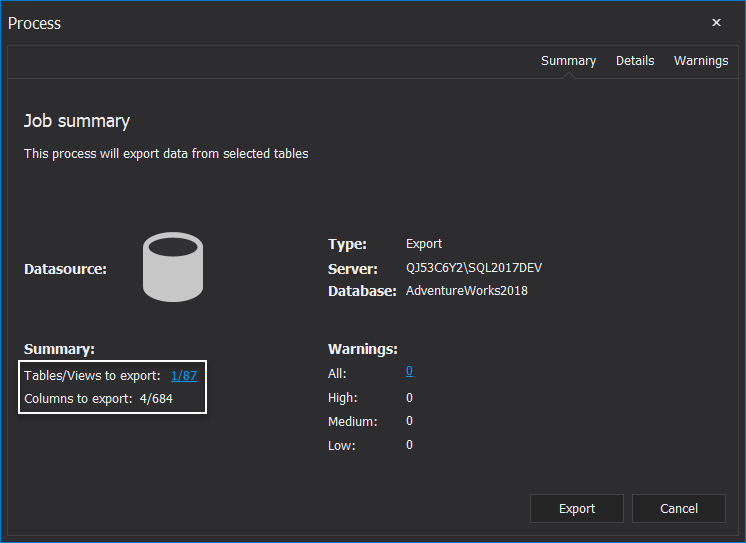
Now, the next step is using the Process button from the Home tab. The Job summary window will be shown to check if everything is correct;. our example shows that one table will be exported including 4 columns:
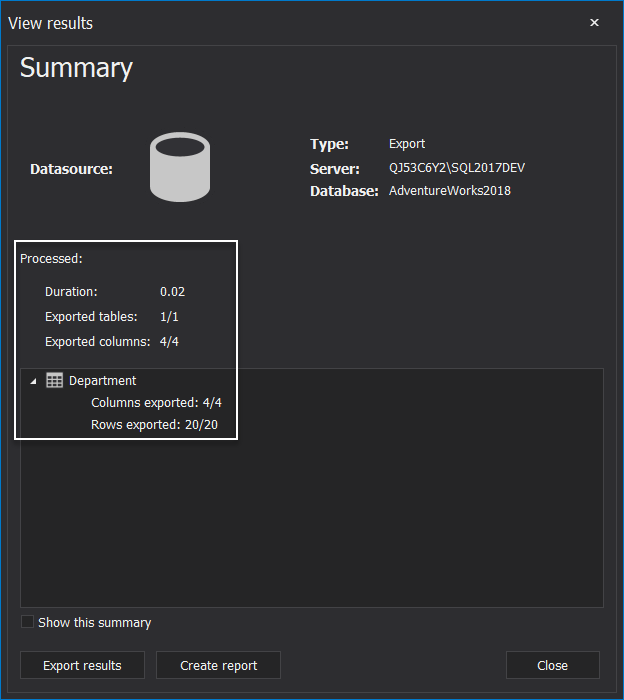
Click the Export button to start exporting the SQL data. When is finished the View results window will be shown with the complete summary of the export process. Here can be seen the duration of the exporting process, exported tables, exported columns and exported rows:
If wanted, the export results can be exported, or a report can be created by clicking Export results or Create report buttons
The next that will be shown is an Import action from the application. Using the New project window.
Again, the connection, authentication and the database have to be set and then proceed to the Import action by clicking the Next button:
In this Action tab, choose the Import option and click OK button:

When the SQL database is loaded, it will be shown in the main grid:
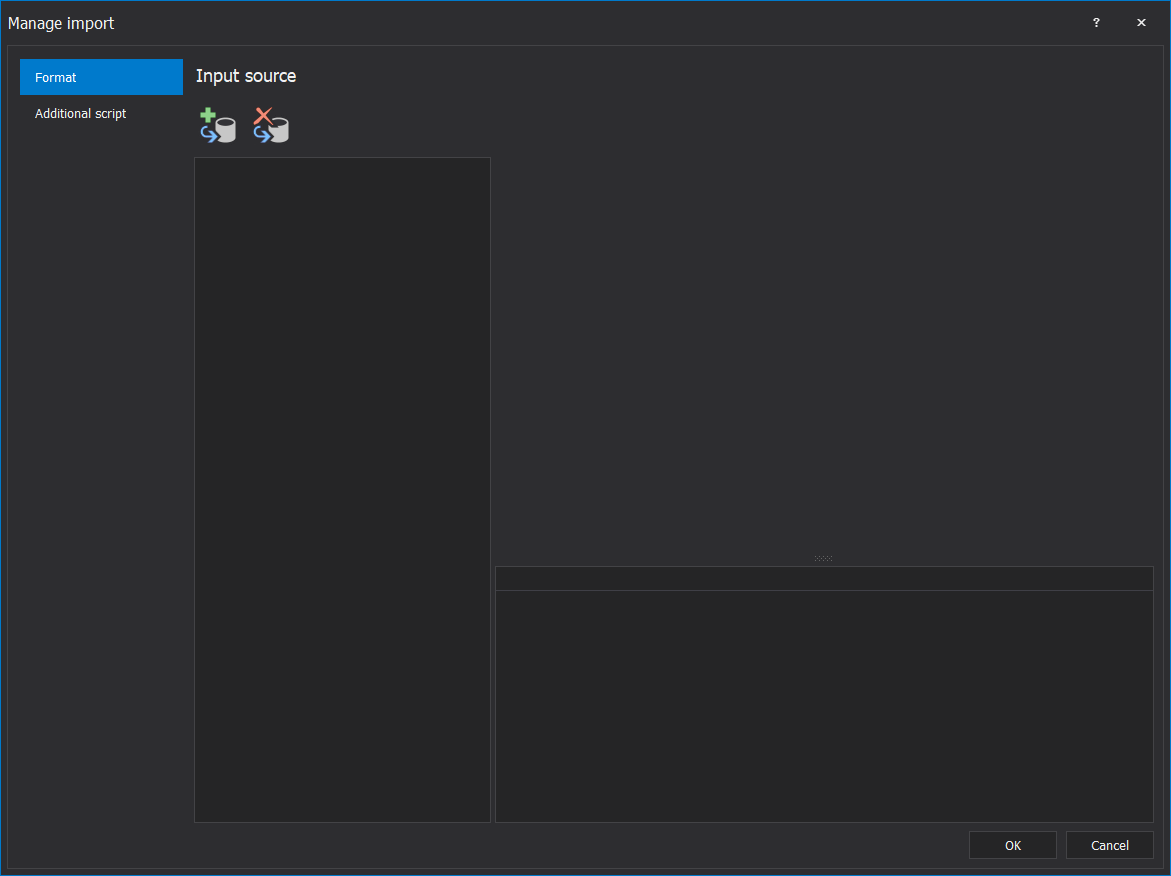
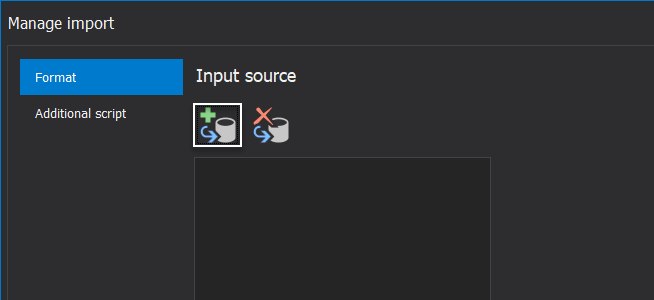
Once the main grid is shown with SQL objects, the first step is to add import sources by clicking the Manage button from the Home tab:
The Manage import window contains two tabs, the first one is the Format tab where the import source need to be added and the second one is the Additional scripts tab for potential adding the pre and post processing scripts:
In this example, for the import source the file that we exported in the previous example will be used.
Clicking the Add button under the Format tab will open the window where the import data source between SQL database and File can be chosen:
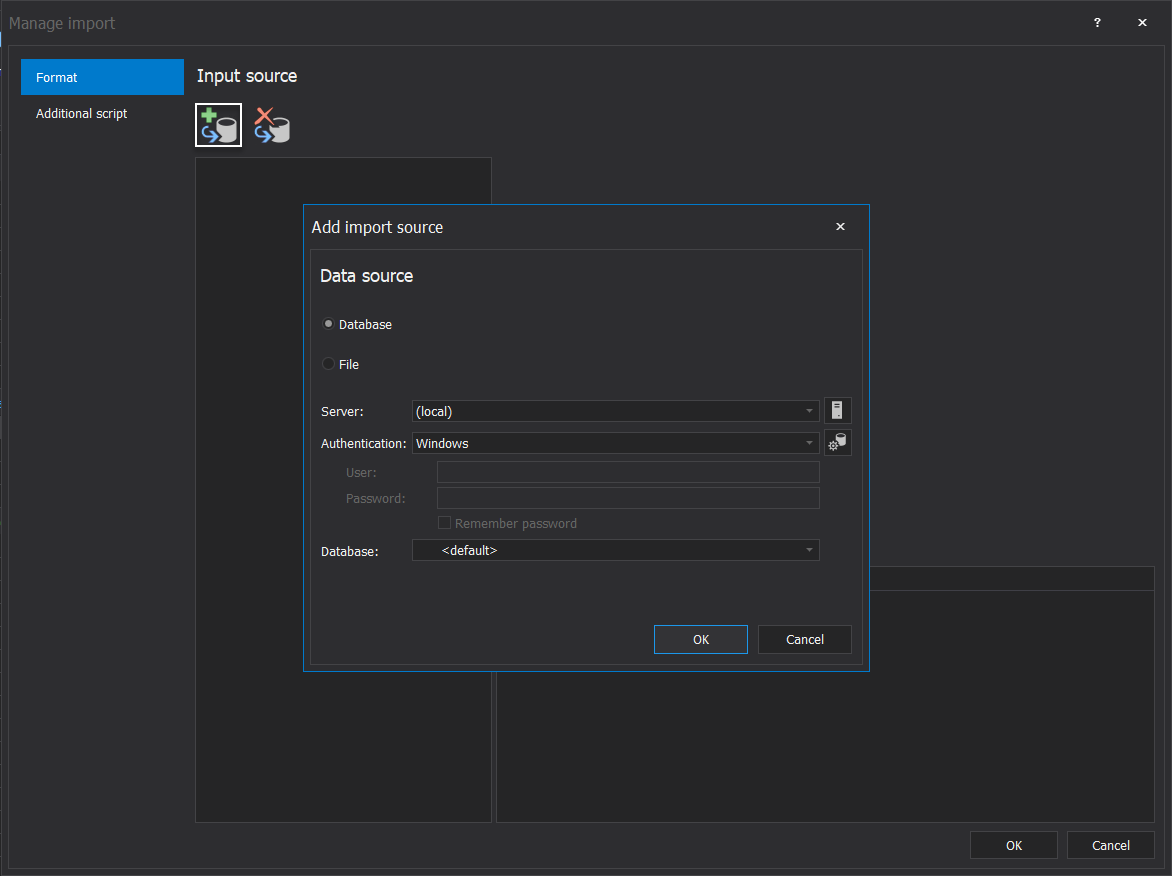
For this example, the File data source will be used and the HumanResources.Departmen.html will be loaded as the import source:

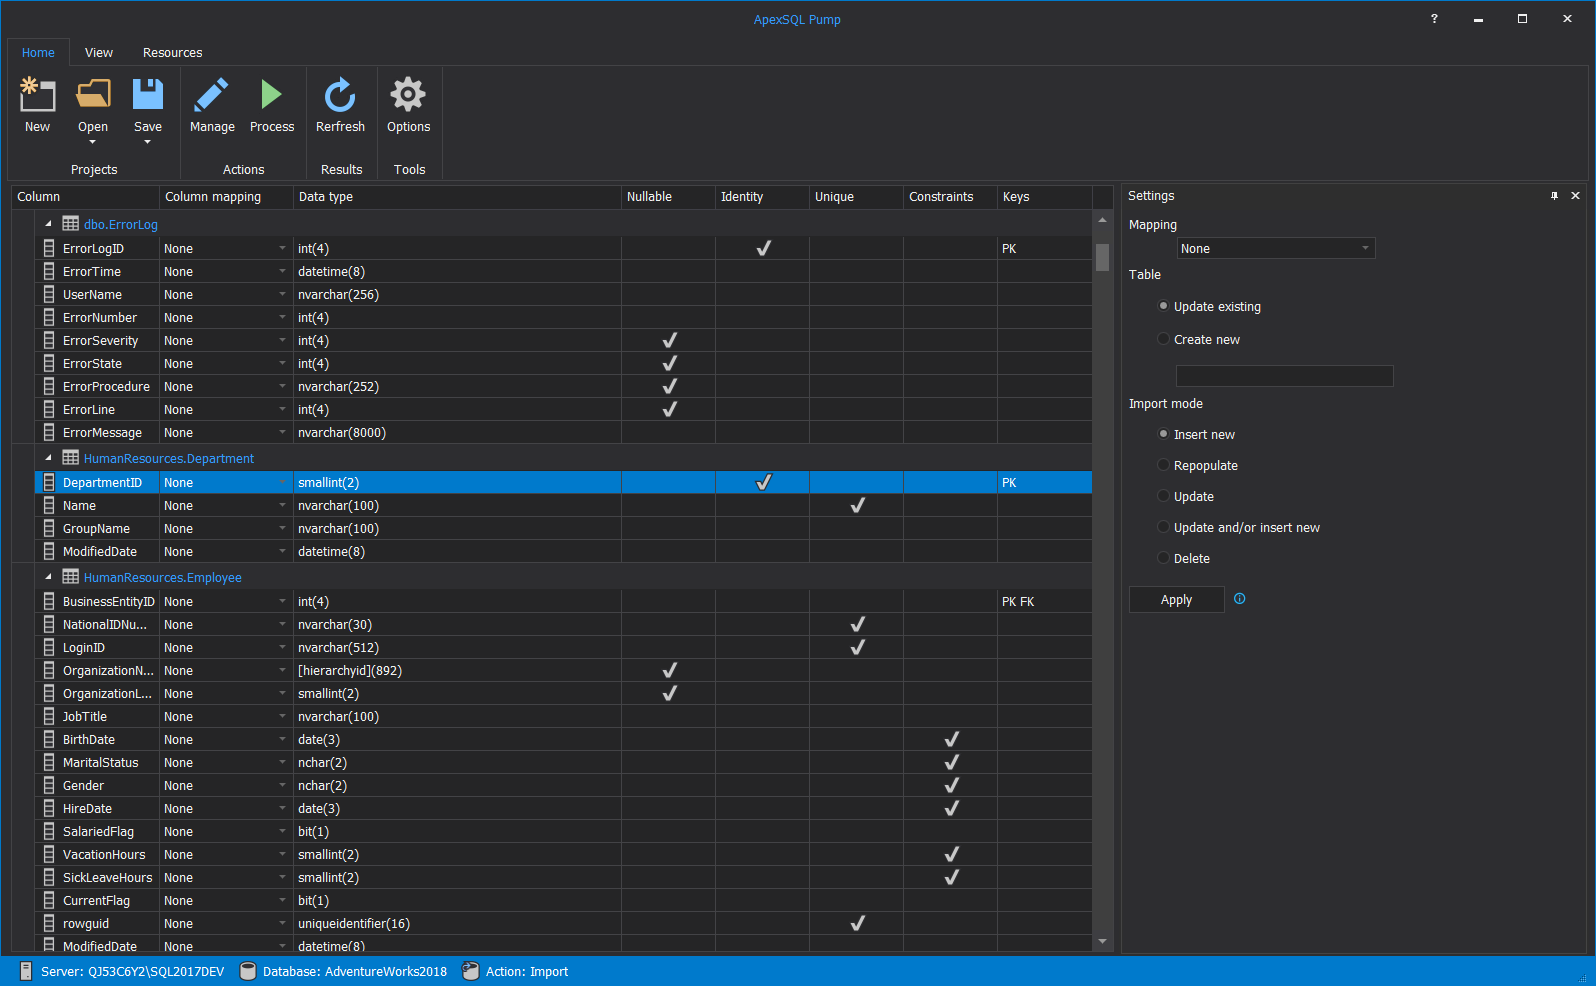
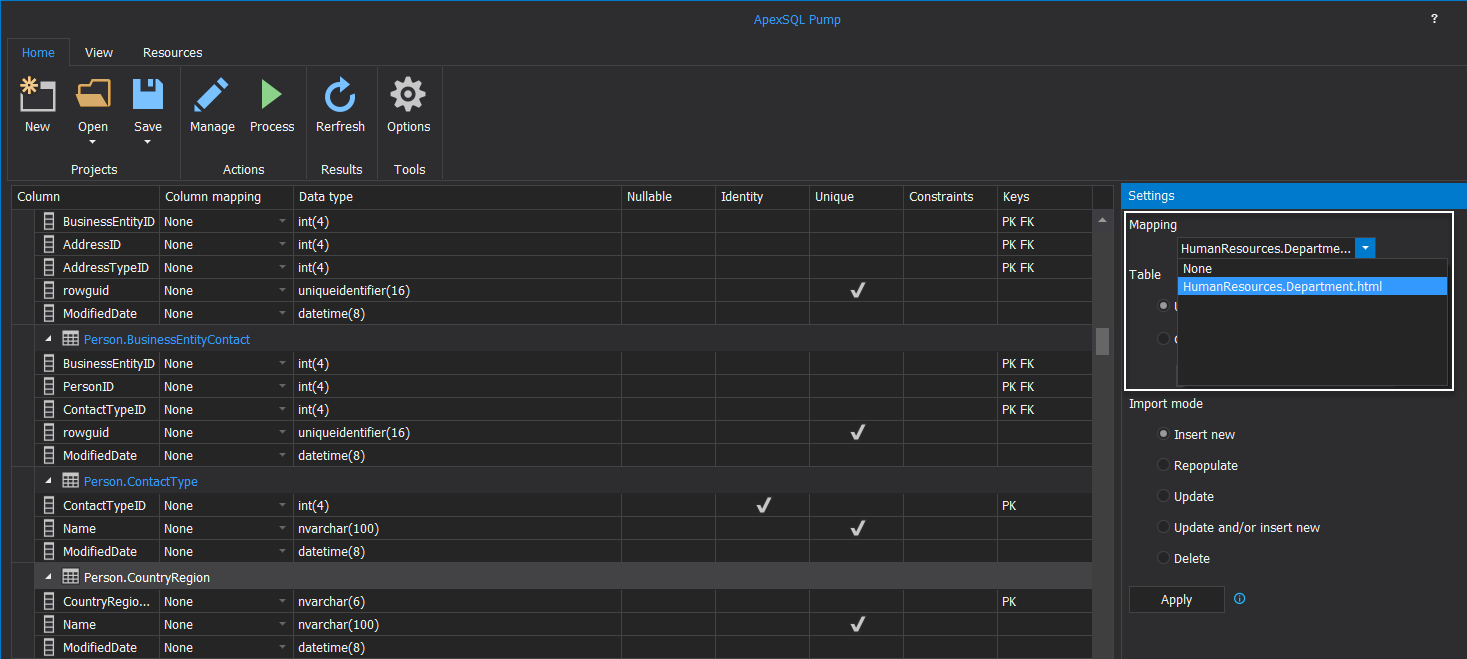
To continue the process, click the OK button in the Manage import window and it will show you again the main grid. To map the table or the column, please select from the main grid a desired one, in this case, the Person.CountryRegion table is selected:
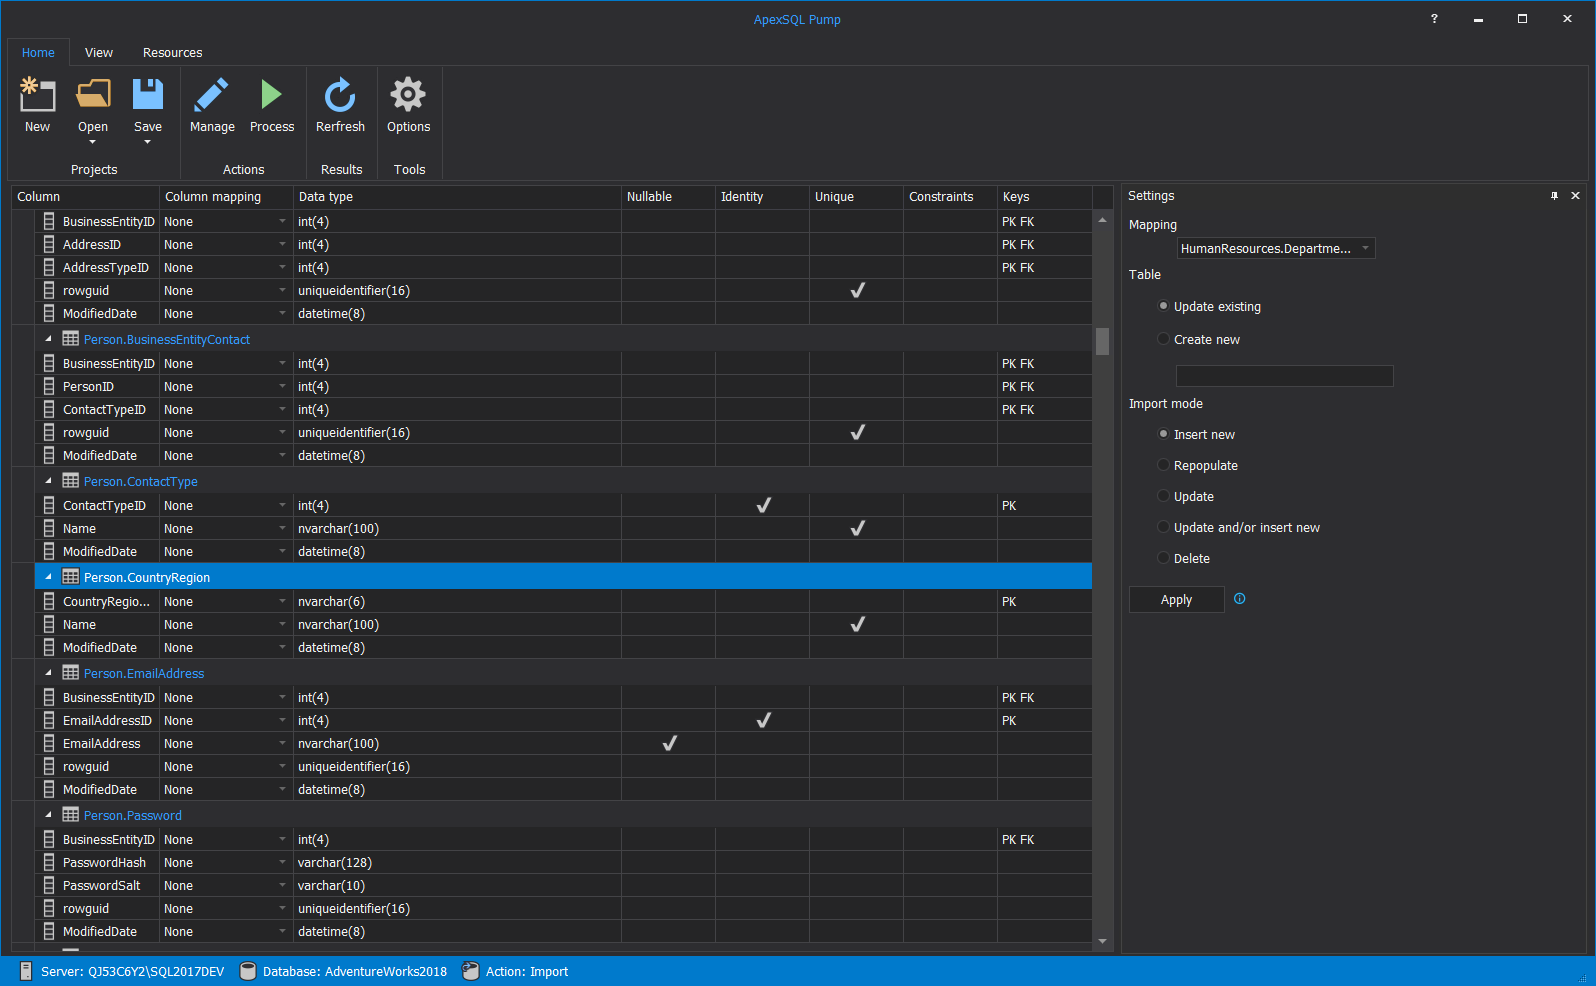
The selected table will be mapped by loaded imported source file HumanResources.Department and to do that, go to the Settings panel on the right side of the application and, under the Mapping section, click the drop down menu and select the mentioned file:
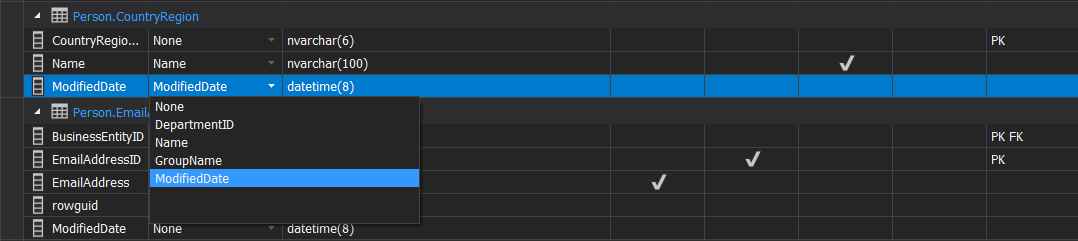
The next step is to map the columns and, to do that, use the drop down menu in the Column Mapping, under the main grid, select the desired column and map it. In this example the Name and ModifiedDate columns will be mapped:
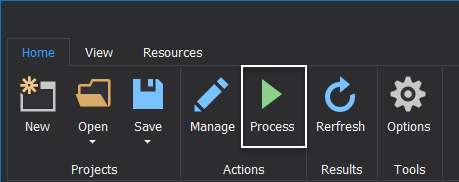
When everything is set to proceed further please use the Process button from the Home tab:
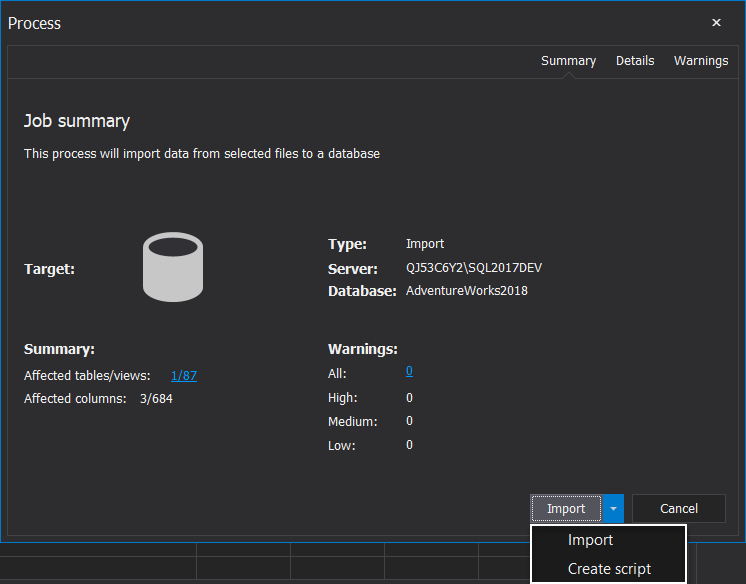
Job summary will be shown before the import process is started where all the summary, details and warnings can be seen:

There are two options under the Job summary, to import the data directly into the SQL database or to create the script and run it whenever is needed:
For the purpose of the video, the Import option will be used, and when the import process is finished, the View results window will be shown with the complete summary of how many tables and columns are affected, and rows updated:
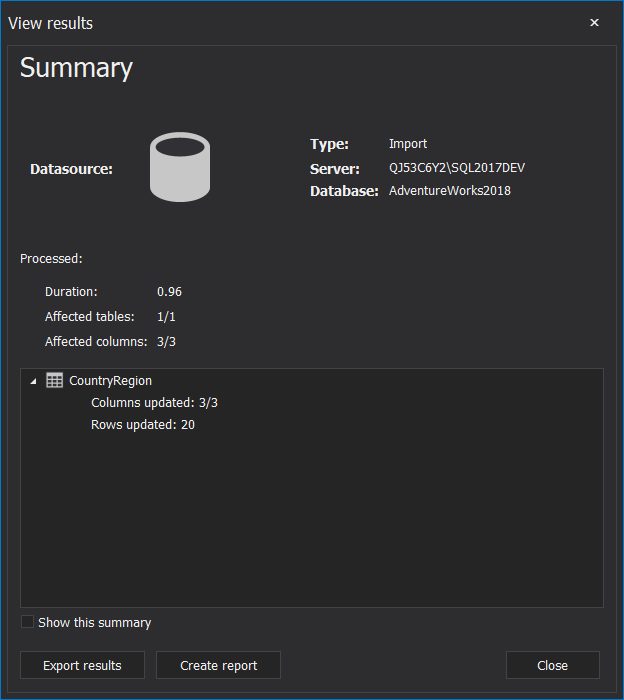
Also, here the results can be exported, or reports can be created by using the Export results or Create report buttons.
Thanks for watching. For more information please visit www.apexsql.com


