


Transcript
Hello and welcome to ApexSQL Diff for MySQL overview video. ApexSQL Diff for MySQL is a standalone application capable of doing comparison and synchronization between two live databases on both the same and different MySQL servers.
The application consists of two main components:
GUI – Graphic user interface where the user can manually choose which objects will be compared and synchronized
CLI – Command-line interface which can be used to automate the system of the comparison and synchronization between two live MySQL databases
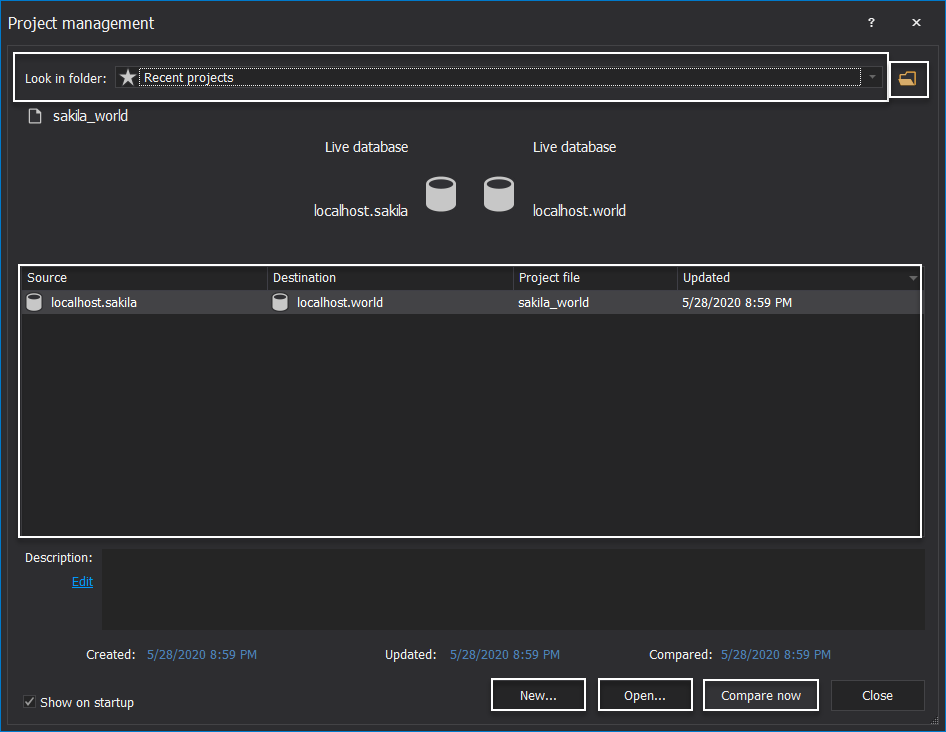
When the application is started, by default, the Project management window will be shown where previously saved projects can be found. The location of the project can be navigated through the drop-down menu or by clicking the folder browse button. Right below these settings, saved projects are shown which can be directly opened by clicking the Open button or they can be compared right away by clicking the Compare now button.
For this introduction, a new project will be created and to do that let’s click the New button:
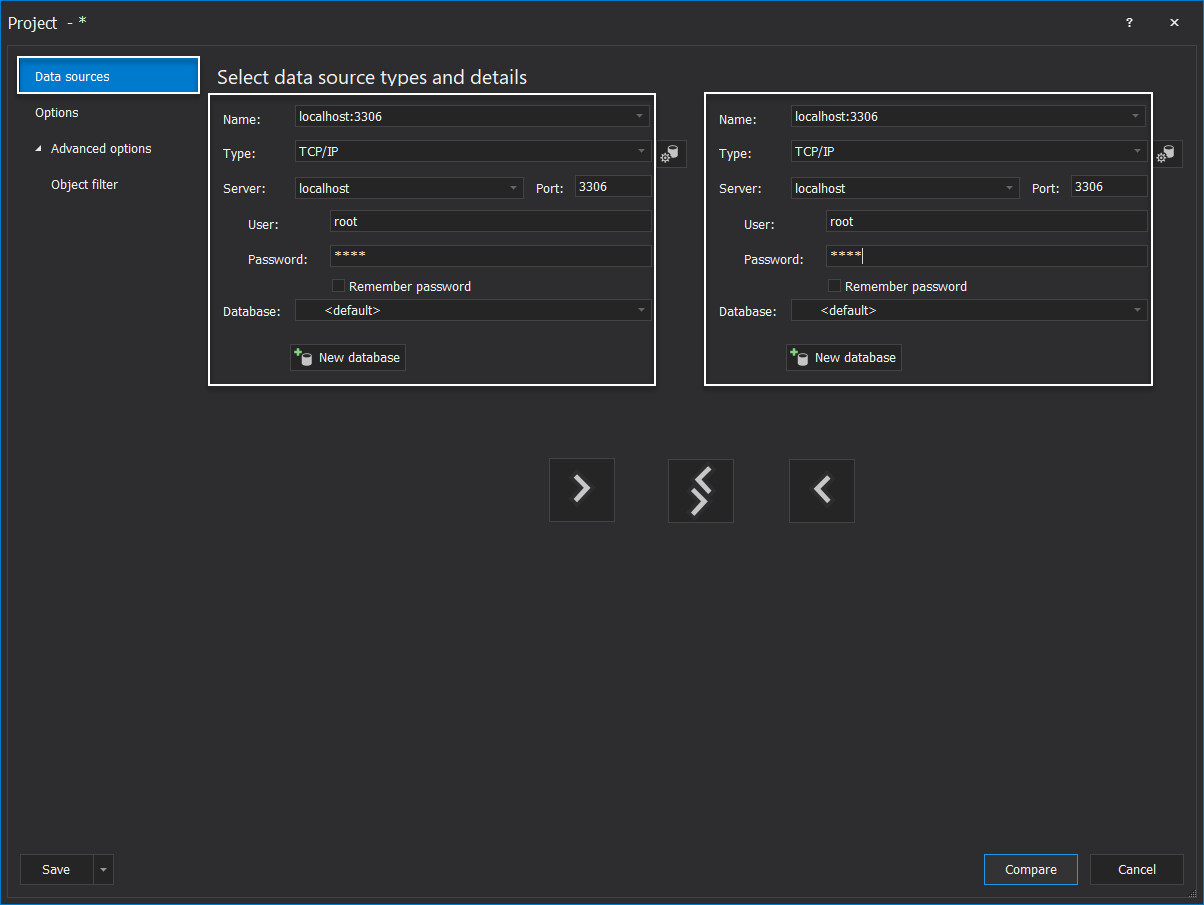
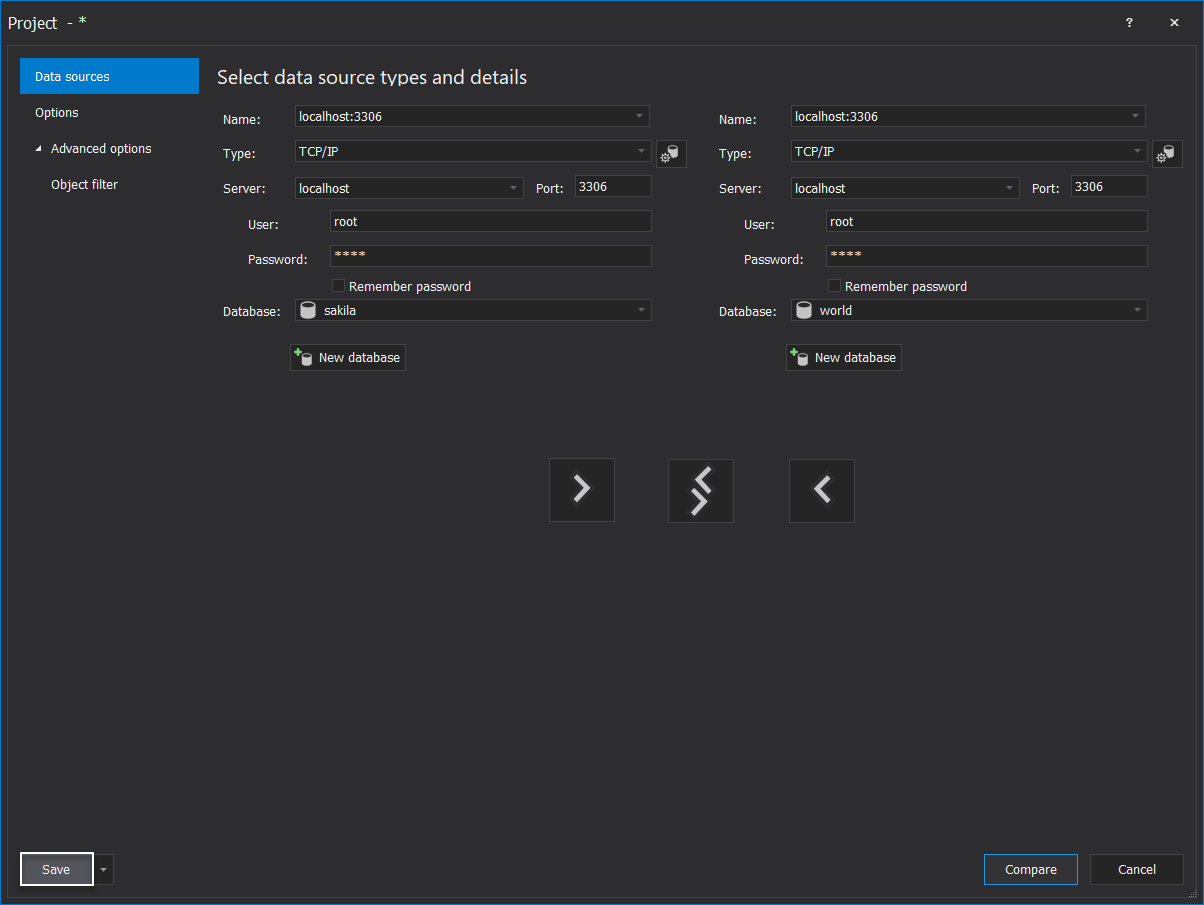
The New project window will be opened showing the first tab which is Data sources that consists of necessary fields to start the comparison process.
The first thing is to set the Name and for this example, a local MySQL Server instance will be used that is installed on port 3306.
To establish a connection to your own local instance, just leave it as localhost:3306 in the Name field. The second step is to choose the Type of connection between TCP/IP or Named pipe.
This MySQL Server is installed on the local machine, so there is no need to specify Server and Port.
The root will be used for logging in and appropriate password for that user which is necessary to access MySQL Server.
The password can be saved by checking the Remember password option.
The last step in this tab is to select the MySQL database from the drop-down menu to use for the comparison and synchronization. Every step has to be repeated for the destination on the right side:
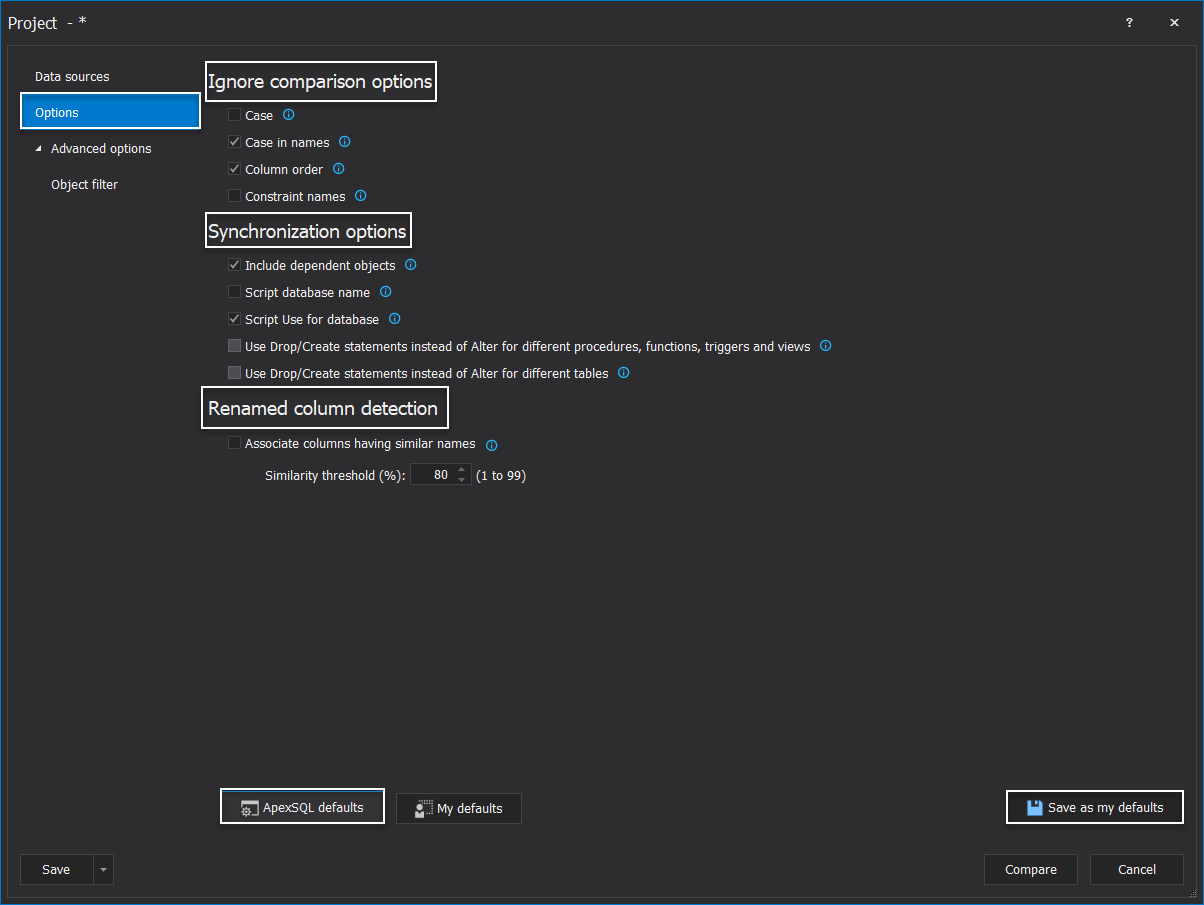
Moving on, the next tab is Options where Ignore comparison options, Synchronization options, and Renamed column detection can be set.
These options can be changed by checking or unchecking them or by editing values in the field. Also, there is a possibility to save your own settings using the Save as my defaults option. These settings can be restored to defaults using the ApexSQL defaults option at any time:
For the sake of this video length, we will skip the Advanced options tab and move on to the next one.
The last tab is Object filter where specific objects or objects types can be selected for the comparison by checking and unchecking them. Let’s just leave all objects selected:
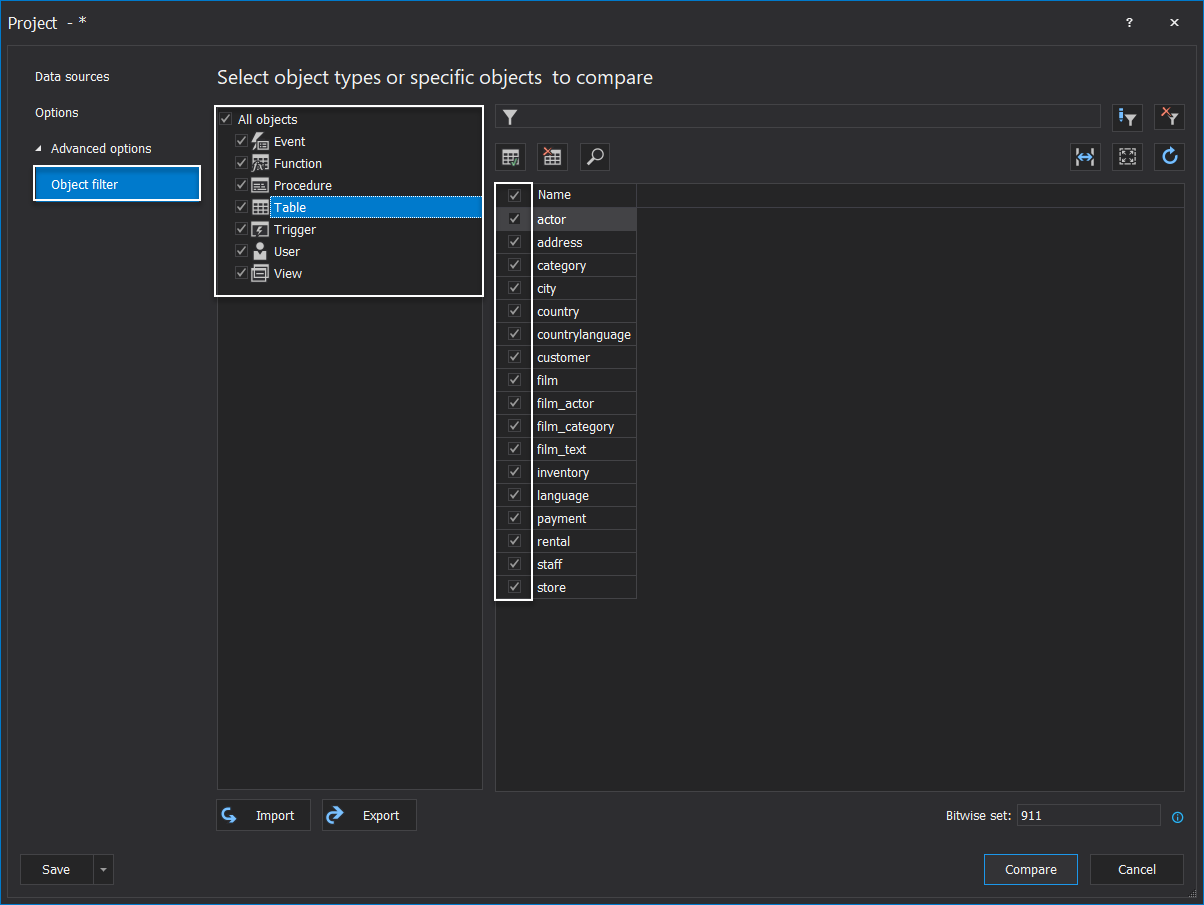
In the bottom left corner of the New project window, you can use the Save option and all of the current project settings will be saved and can be used later:
In this example, MySQL databases will be used for comparison and synchronization from the same MySQL instance.
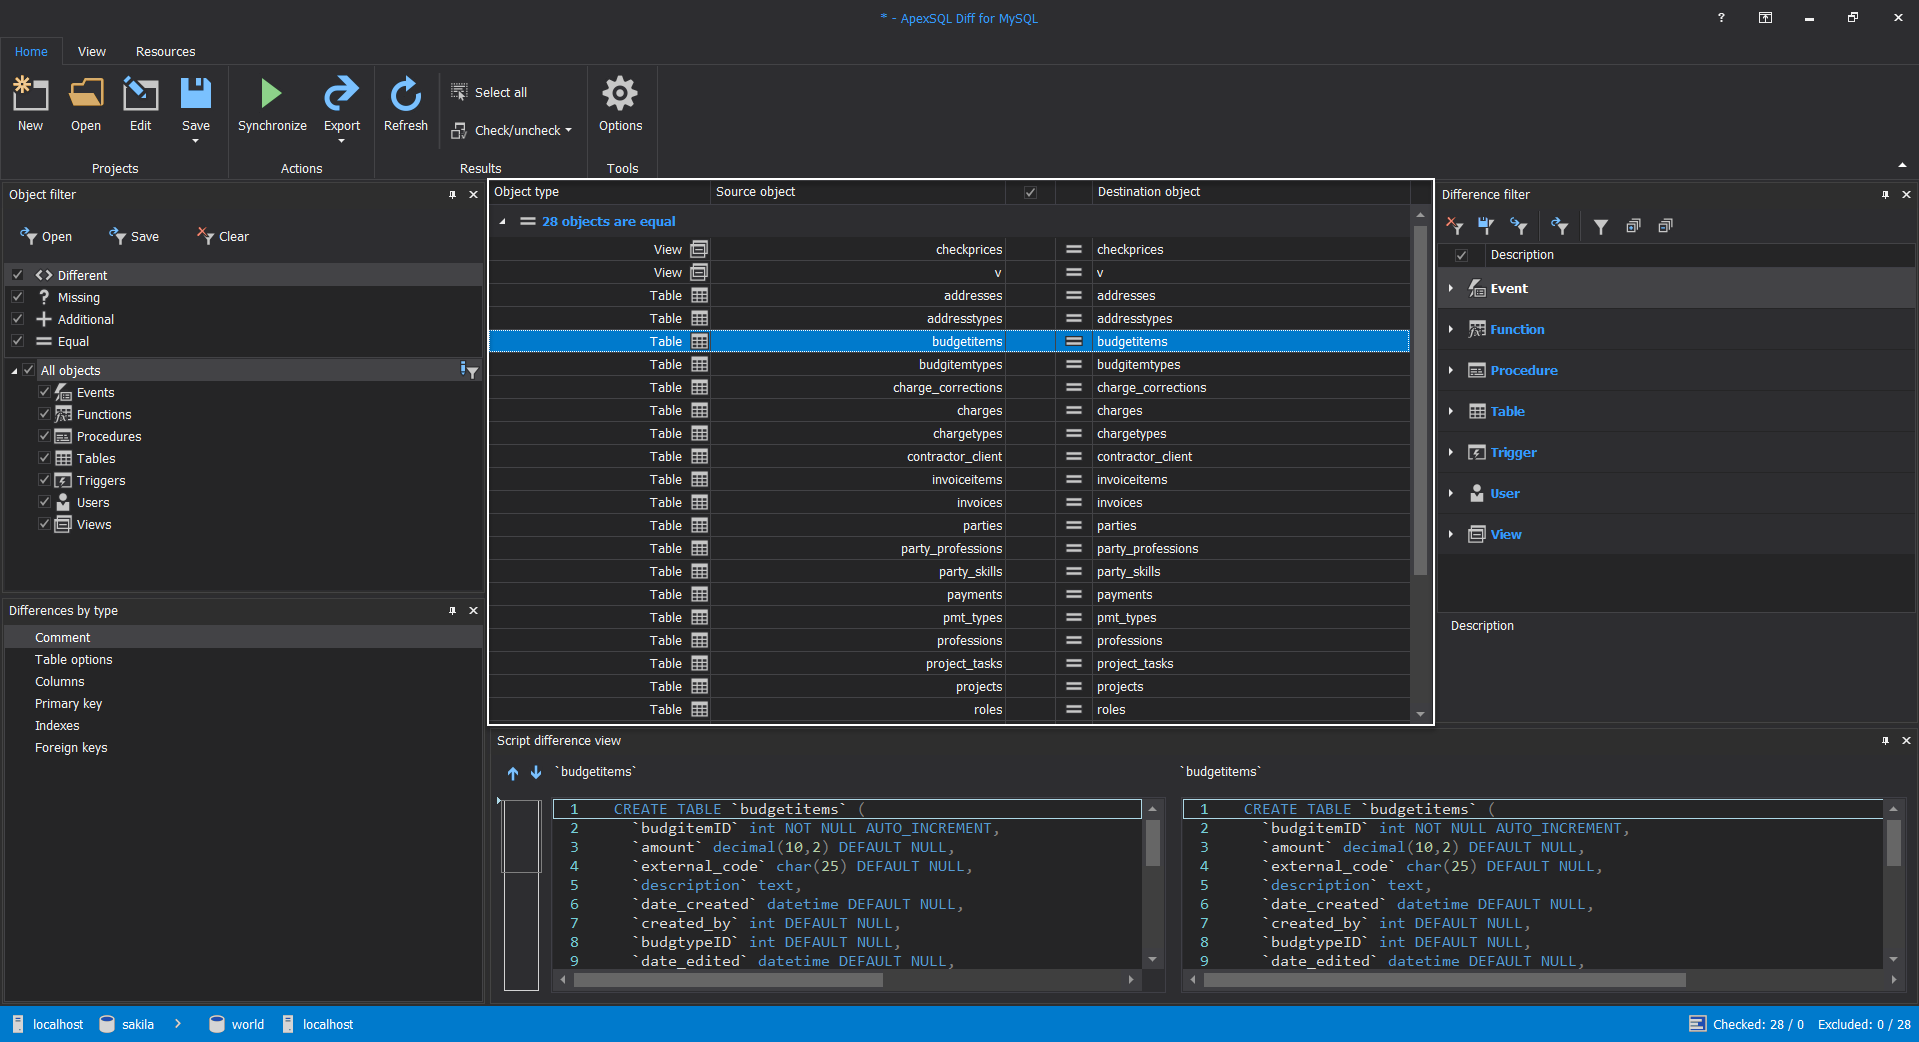
When everything is set, click the Compare option on the bottom right of the New project window and the main grid will load two previously selected MySQL databases, in our case MySQL database sakila and world:
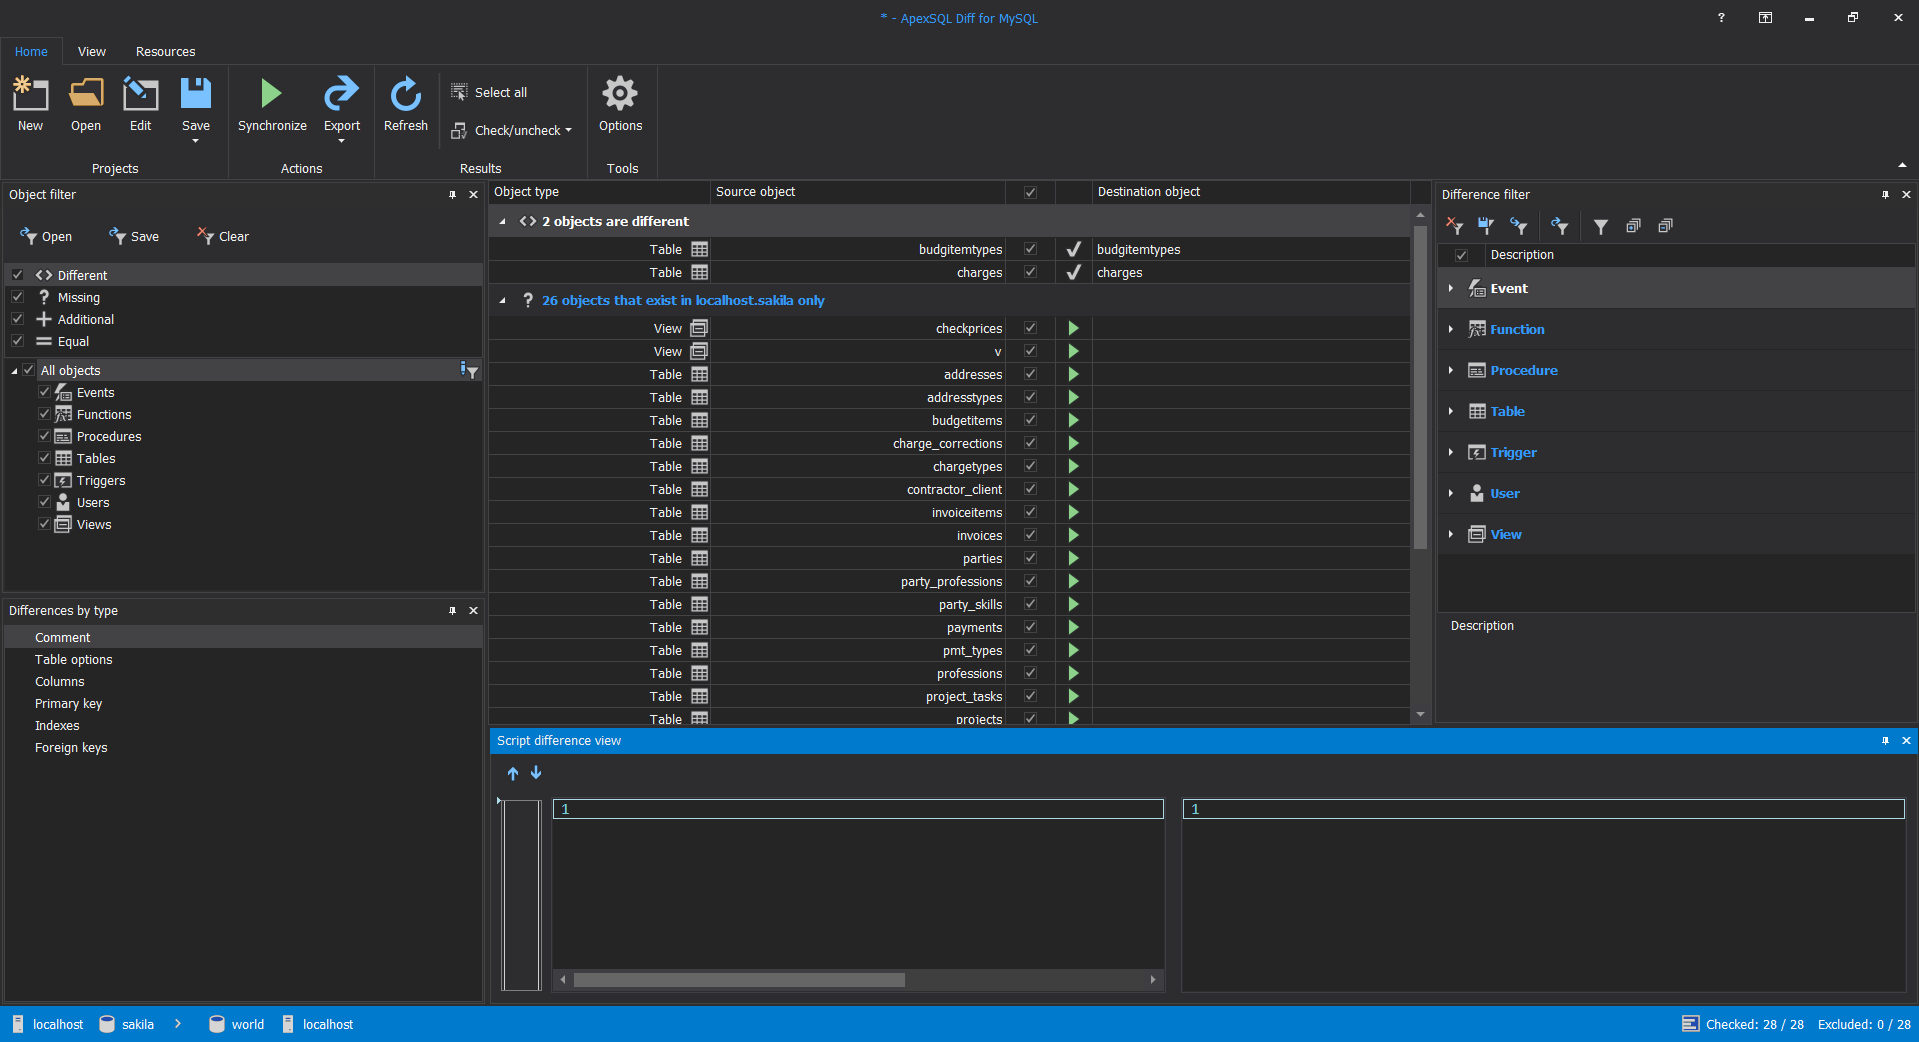
By default, the main grid consists of five panels.
On the left side are Object filter and Differences by type panels.
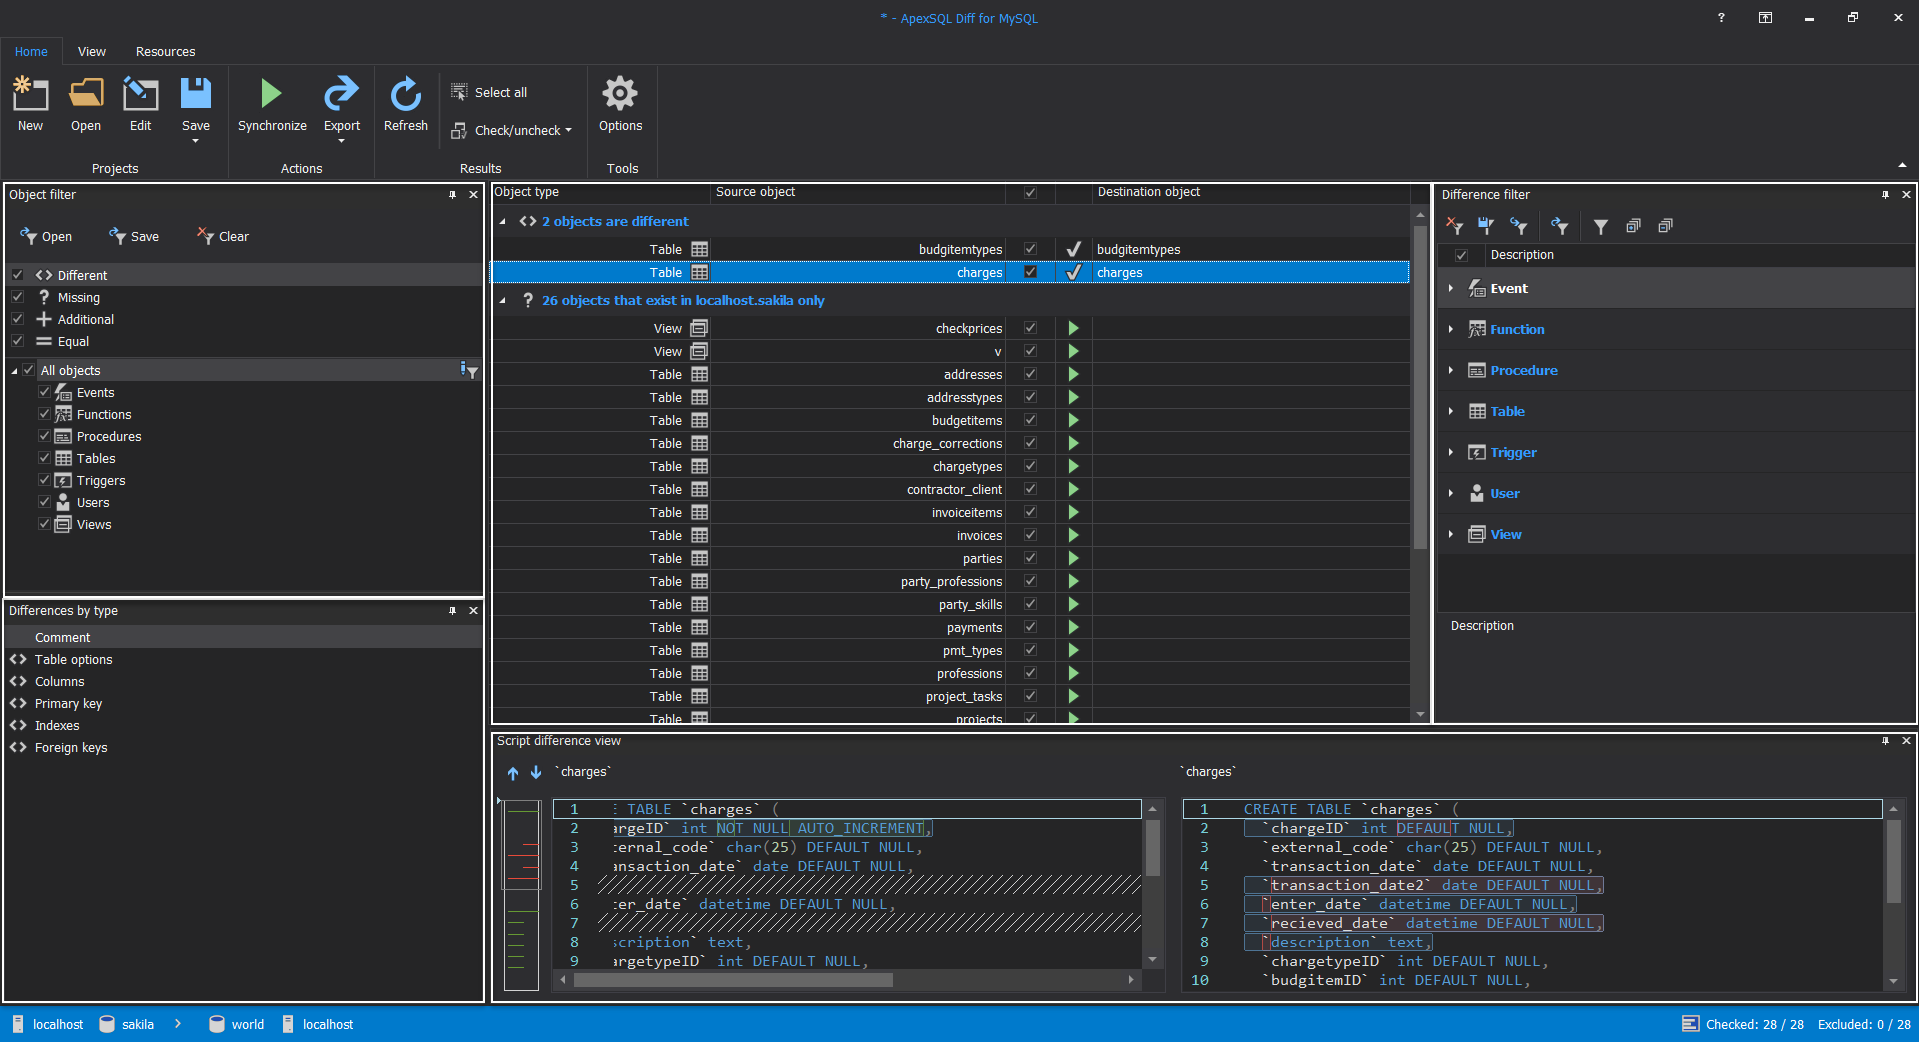
On the bottom is Script difference view, on the right side is Difference filter, and in the middle is the main panel where MySQL databases with different, missing, additional, and equal objects are shown:
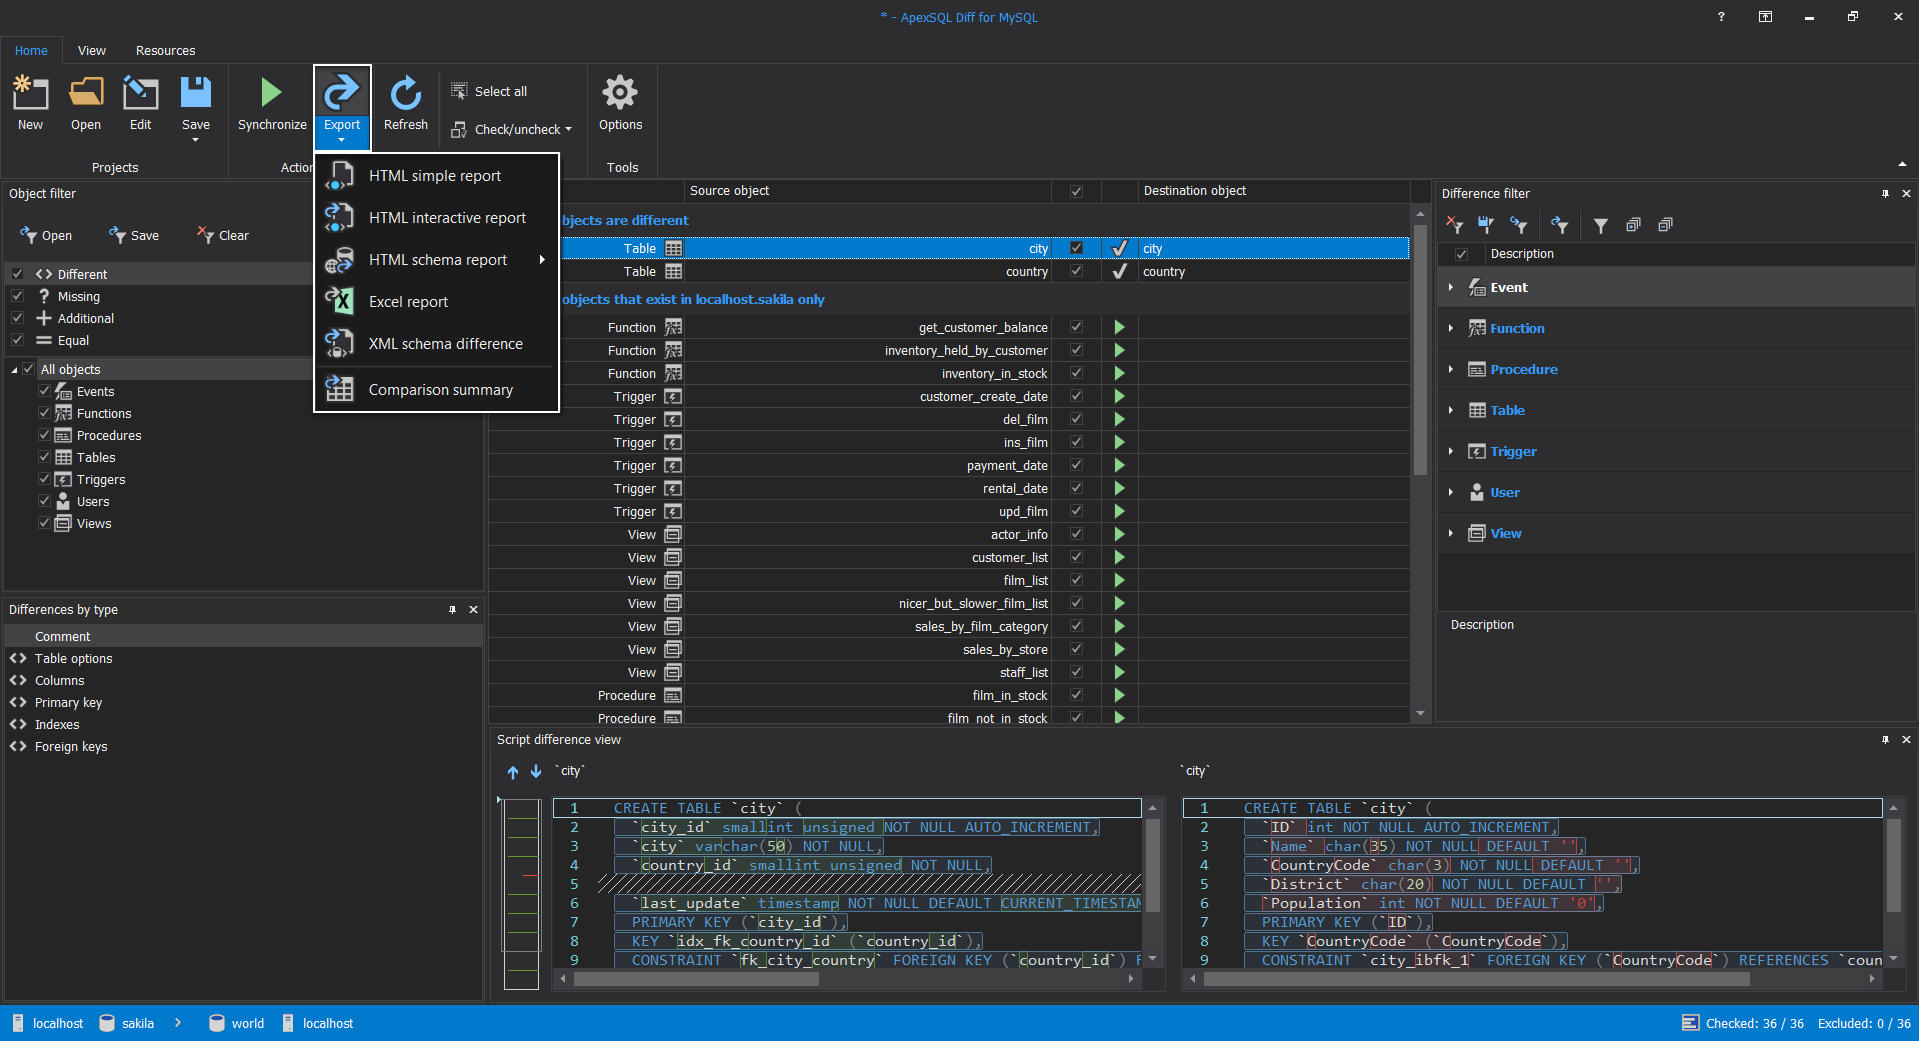
ApexSQL Diff for MySQL has the option to export the comparison results and to do that click the Export option from the Home tab. It will show six different export types:
- HTML simple report
- HTML interactive report
- HTML schema report for source or destination objects
- Excel report
- XML schema difference
- Comparison summary
In this example, HTML simple report will be used to show the example of the exported source and destination objects.
Options checked by default will be used which essentially will show all objects from both MySQL databases.
When everything is set, just click OK, choose the folder where to save the report, and once the report is generated successfully, the application will prompt to open the file in a web browser:
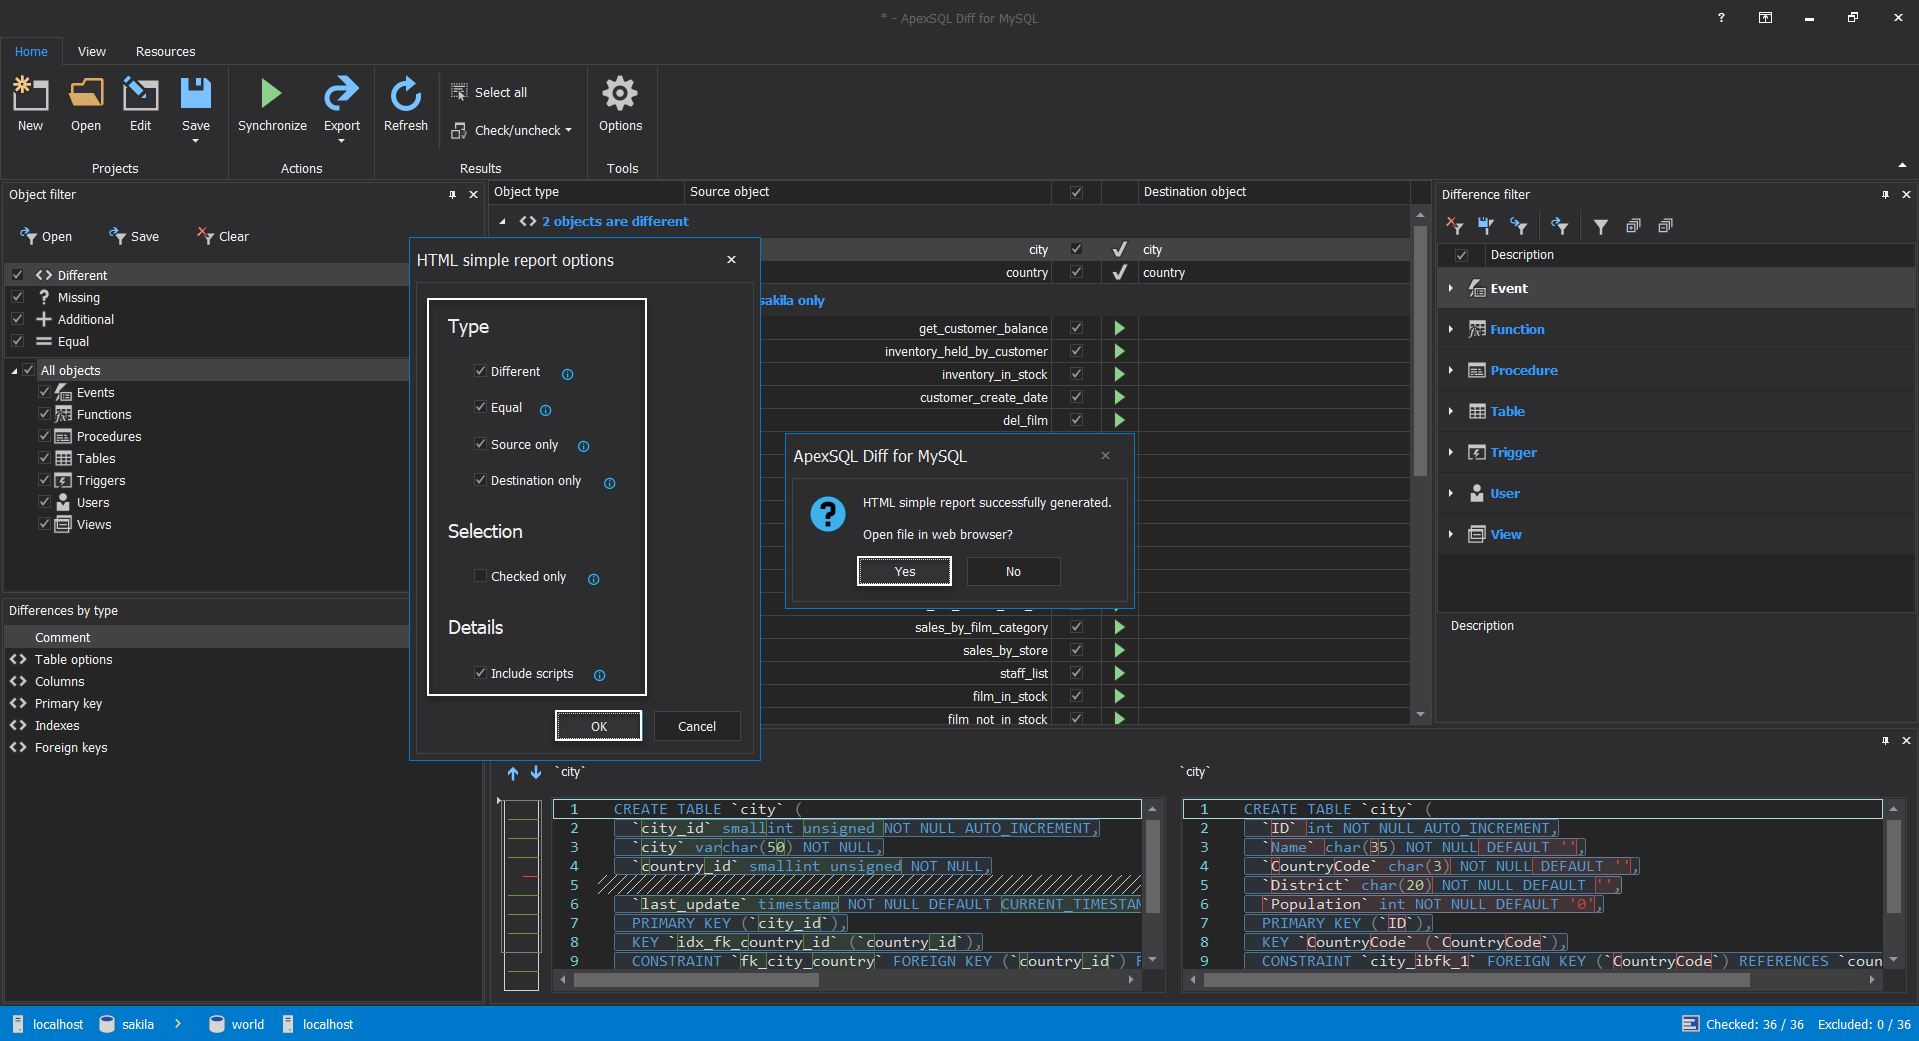
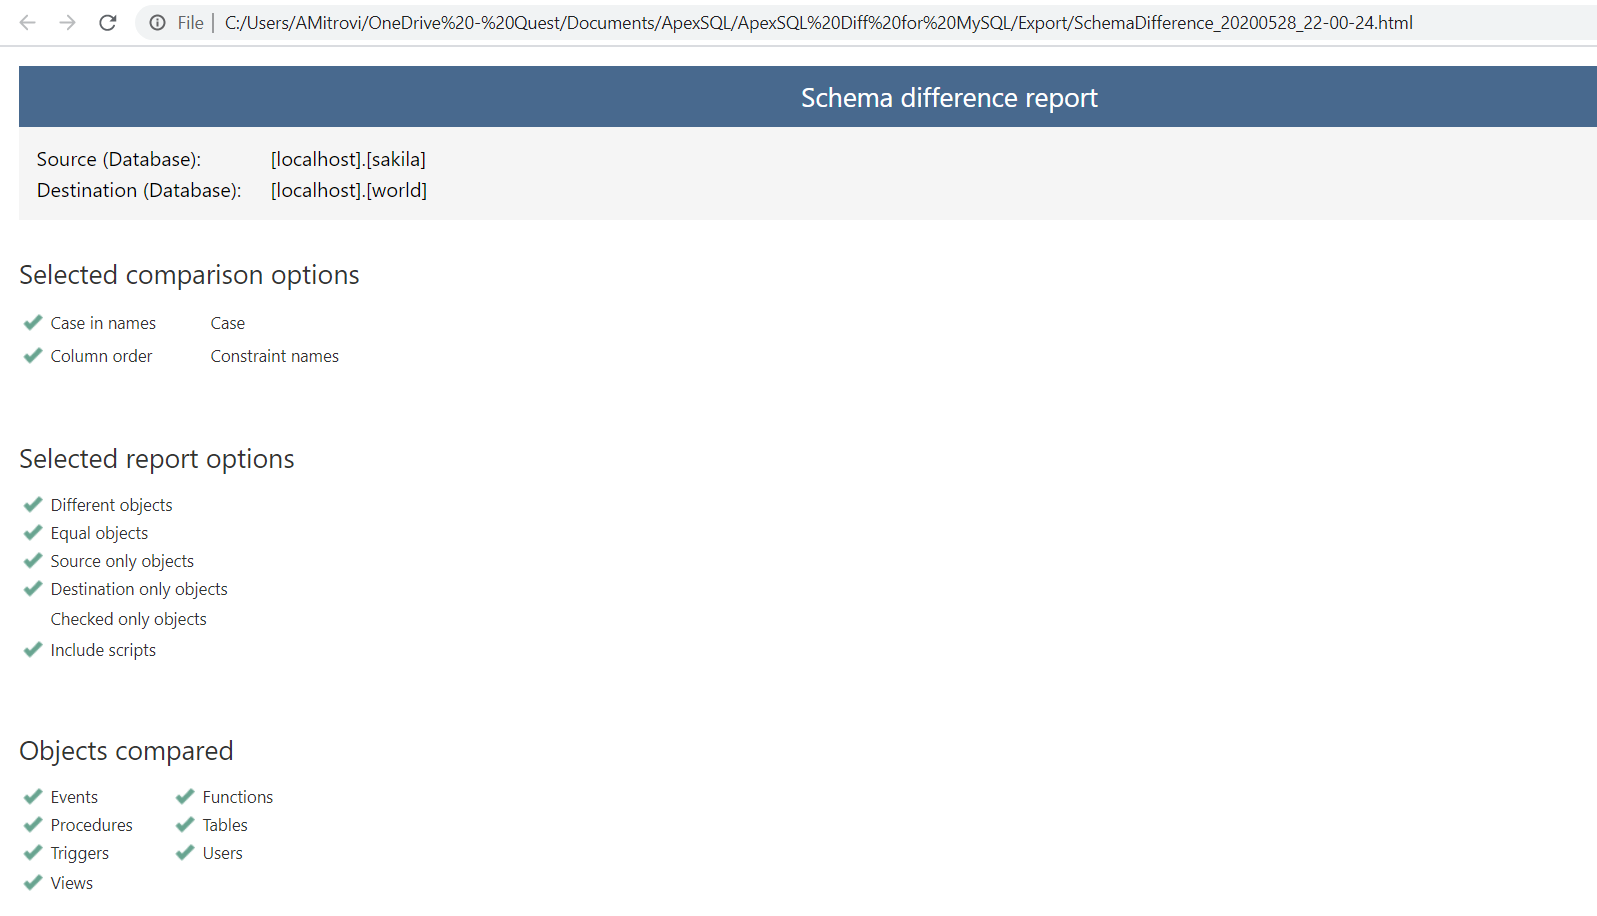
Click Yes and the HTML simple report will be opened in the default browser displaying:
- Selected comparison options,
- Selected report options,
- Objects compared,
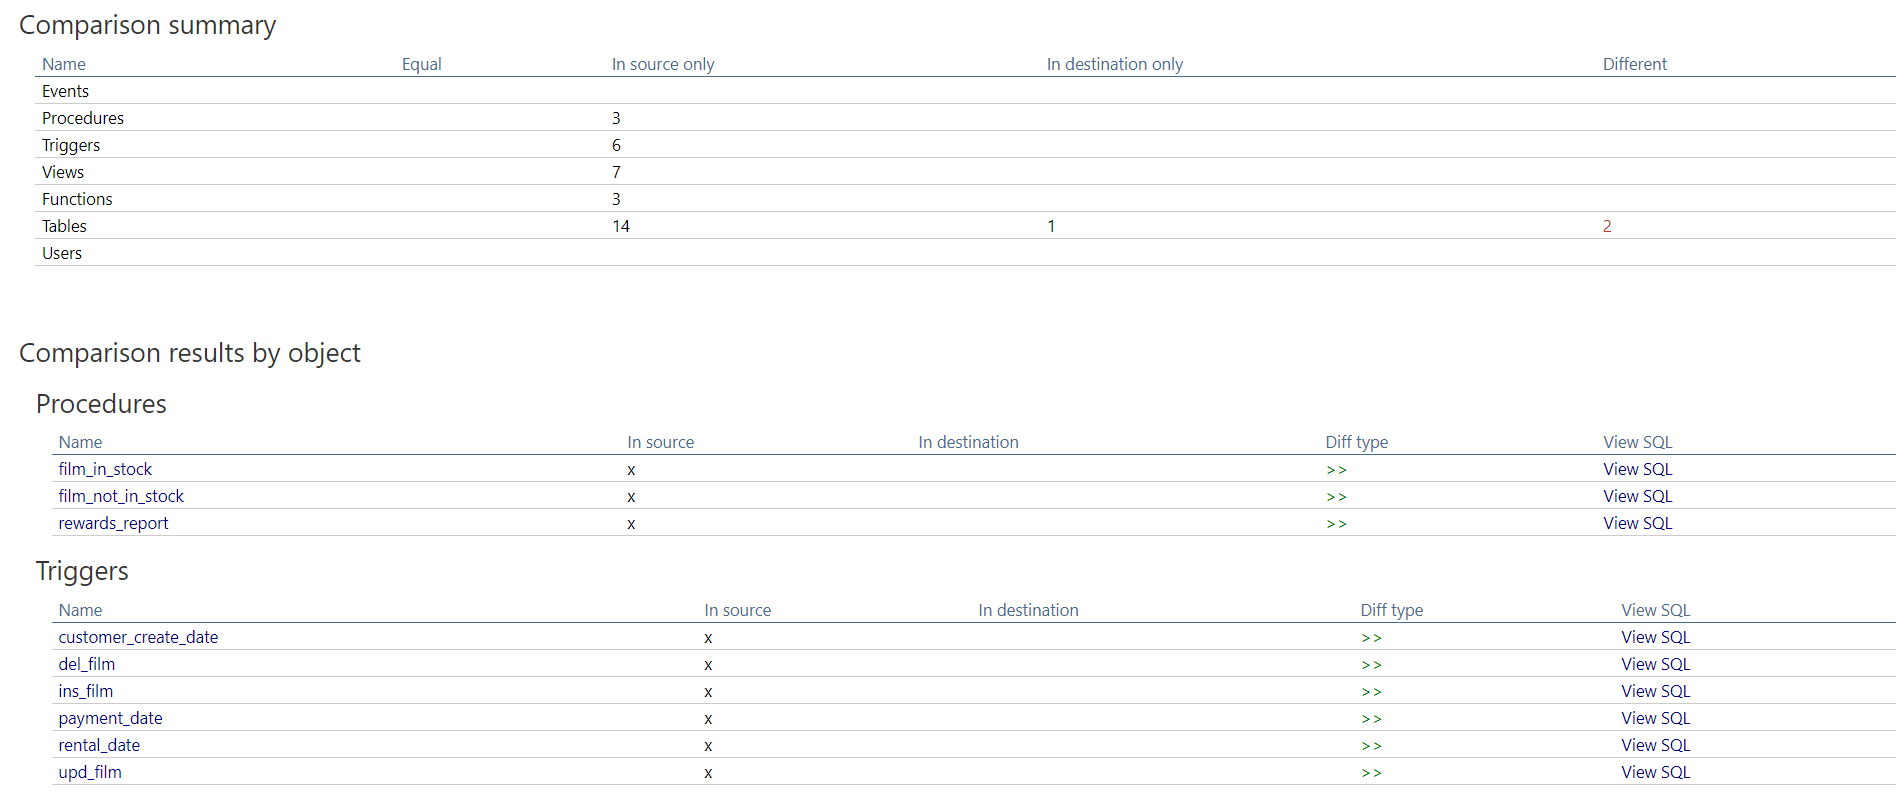
- Comparison summary,
- Comparison results by objects,
- and much more:
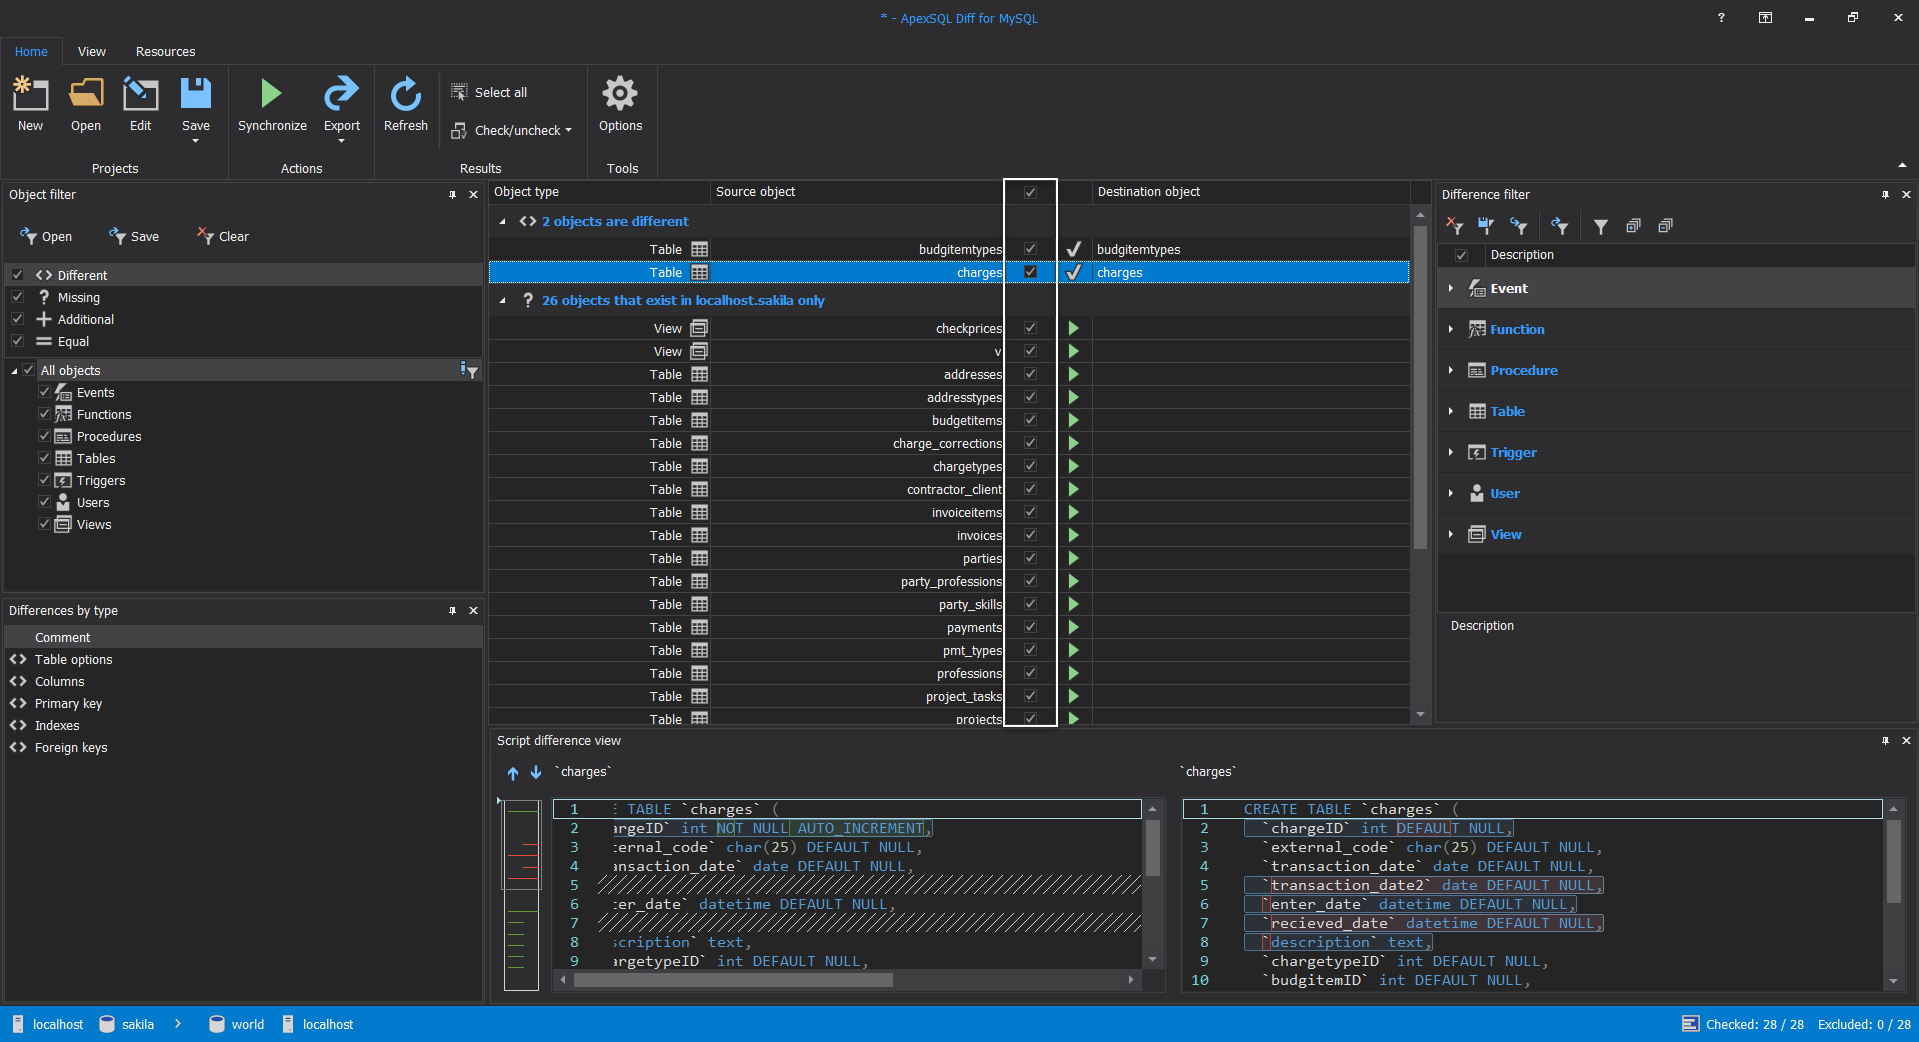
Let’s go back to the application and the main grid. Here, desired objects can be selected for synchronization. In some cases, users want to synchronize only specific objects from one MySQL database to another and to do that check only desired objects:
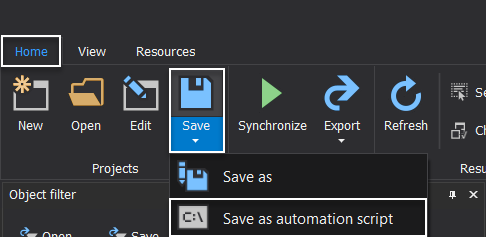
Comparison and synchronization steps can be also automated and to do that, click the Save as automation script option under the Home tab:
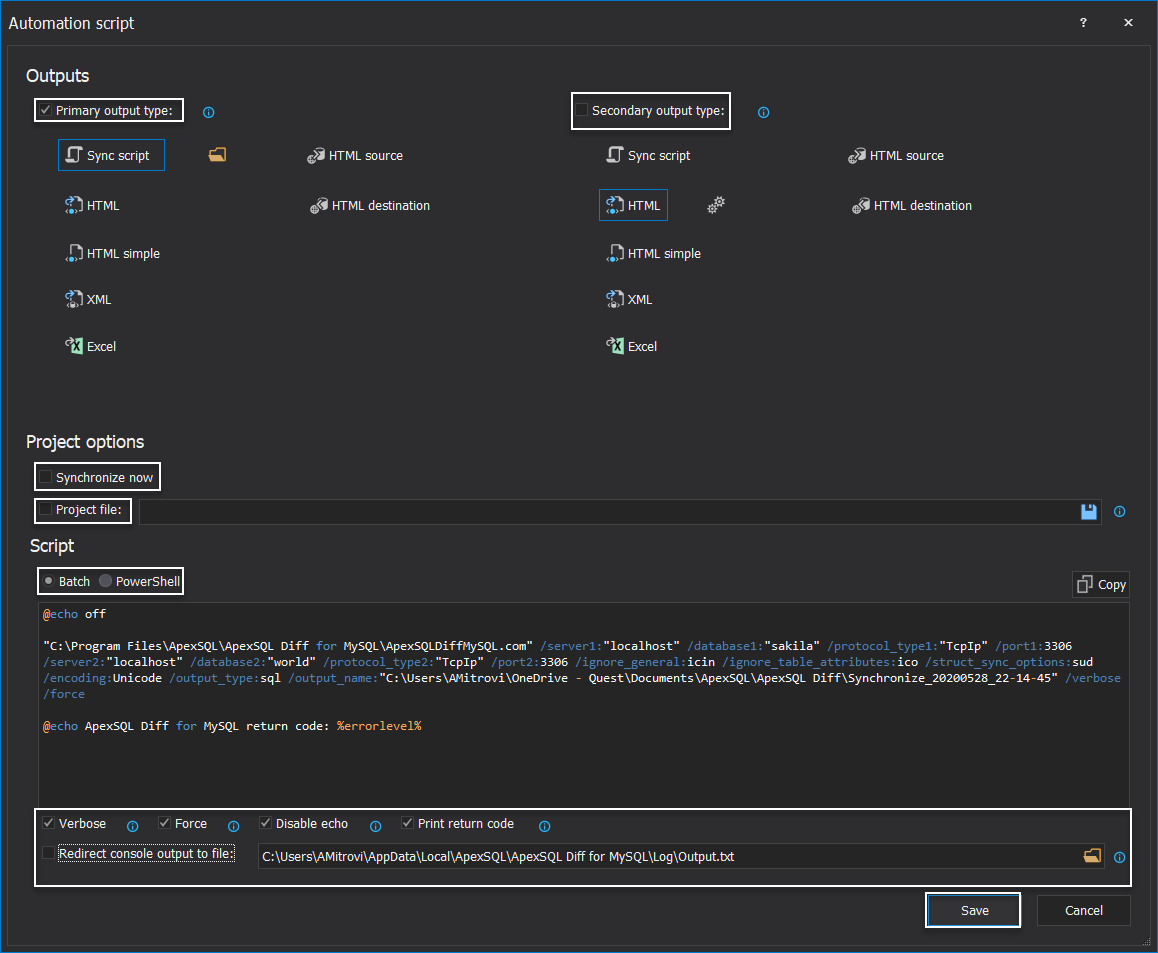
When the Automation script window is opened, you will find different options that have to be specified before saving the file.
Under Outputs, primary and secondary types can be selected.
Under Project options, two options can be set; synchronize immediately databases or use the saved project file.
Under the Script section, it can be chosen between Batch or PowerShell. More options can be found at the bottom, and if you are in doubt what they do, just hover the mouse over like this, and a tooltip will be shown indicating what the option does.
When everything is set, the file can be saved using the Save option from the bottom right of the Automation script window and the script can be used whenever is needed:
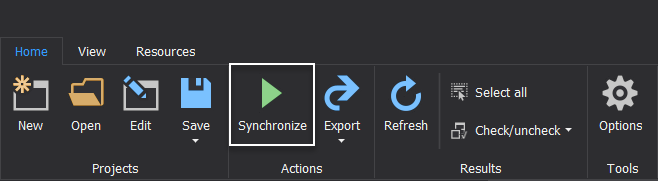
Let’s also see how we can initiate the manual synchronization process. To start the process, click the Synchronize option from the Home tab:
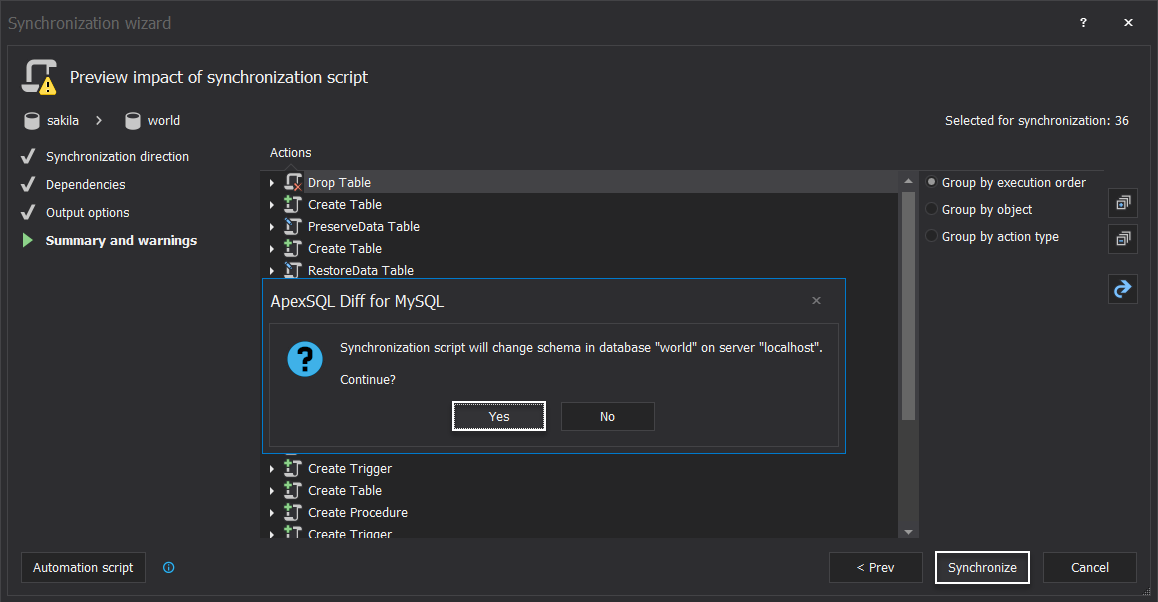
Synchronization wizard window will be opened and there are four steps before synchronization is finished:
- Synchronization direction is basically telling the application from which MySQL database will data be synchronized to. In this case, data from the sakila database will be synchronized to the world database
- Dependencies is where dependent objects can be included
- Output options is where different actions can be set, such as creating the synchronization script. For this video, Synchronization now action will be used in a moment
- Summary and warnings step is where all actions are shown that will take place when the synchronization process is started
Since everything is set, click the Synchronize option and a prompt dialog will be shown indicating the schema on the destination MySQL database that will be changed. Confirm by clicking Yes and synchronization process will start:
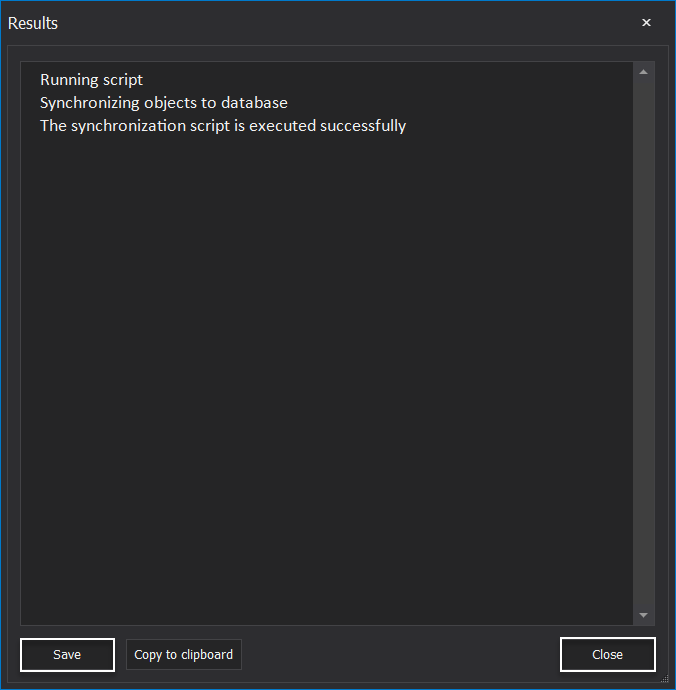
When the synchronization process is finished, the results will be shown in the Results window. From here, the results can be saved using the Save option.
Close the window to start the re-comparison of the two synchronized MySQL databases:
After the re-comparison, check and verify that all objects are synchronized in the main grid:
Thanks for watching. For more information please visit www.apexsql.com


