


Introduction to ApexSQL Defrag
-
Hello, and welcome to this ApexSQL Defrag DEMO introduction. ApexSQL Defrag is a powerful application used for scheduled analyzing and defragmenting of SQL Server database indexes. It’s wide range of features allows users to create and manage custom policies, monitor index fragmentation on multiple servers as well as to create index fragmentation reports.
In this video, we’ll demonstrate some of its features and capabilities:
-
To begin, let’s first connect to a SQL Server by clicking on Add button from Servers group in Home tab.
Select the SQL Server and choose the authentication type:
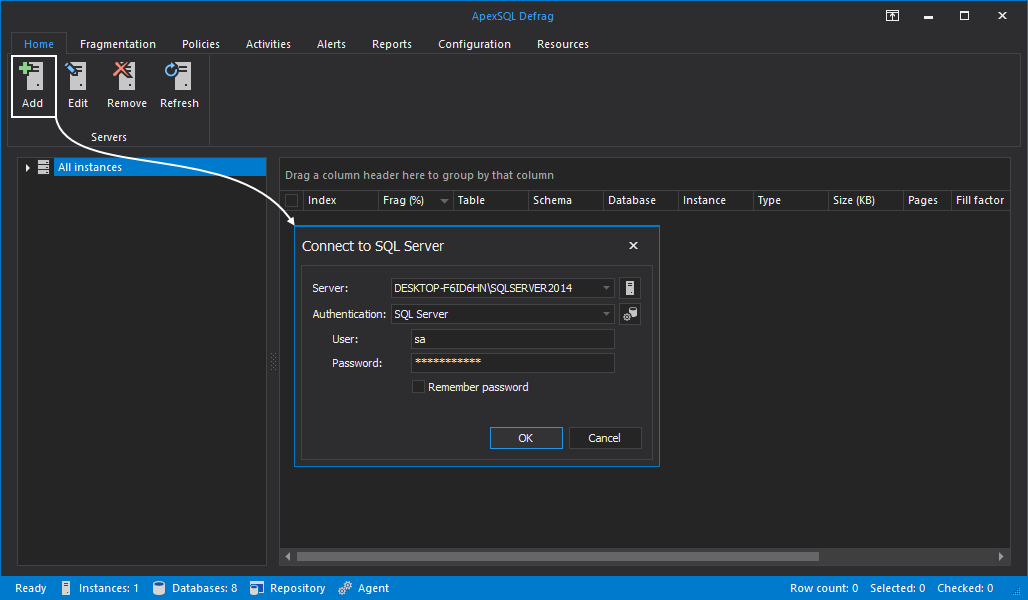
To add more SQL Servers, click on the Add button again, and repeat the same steps.
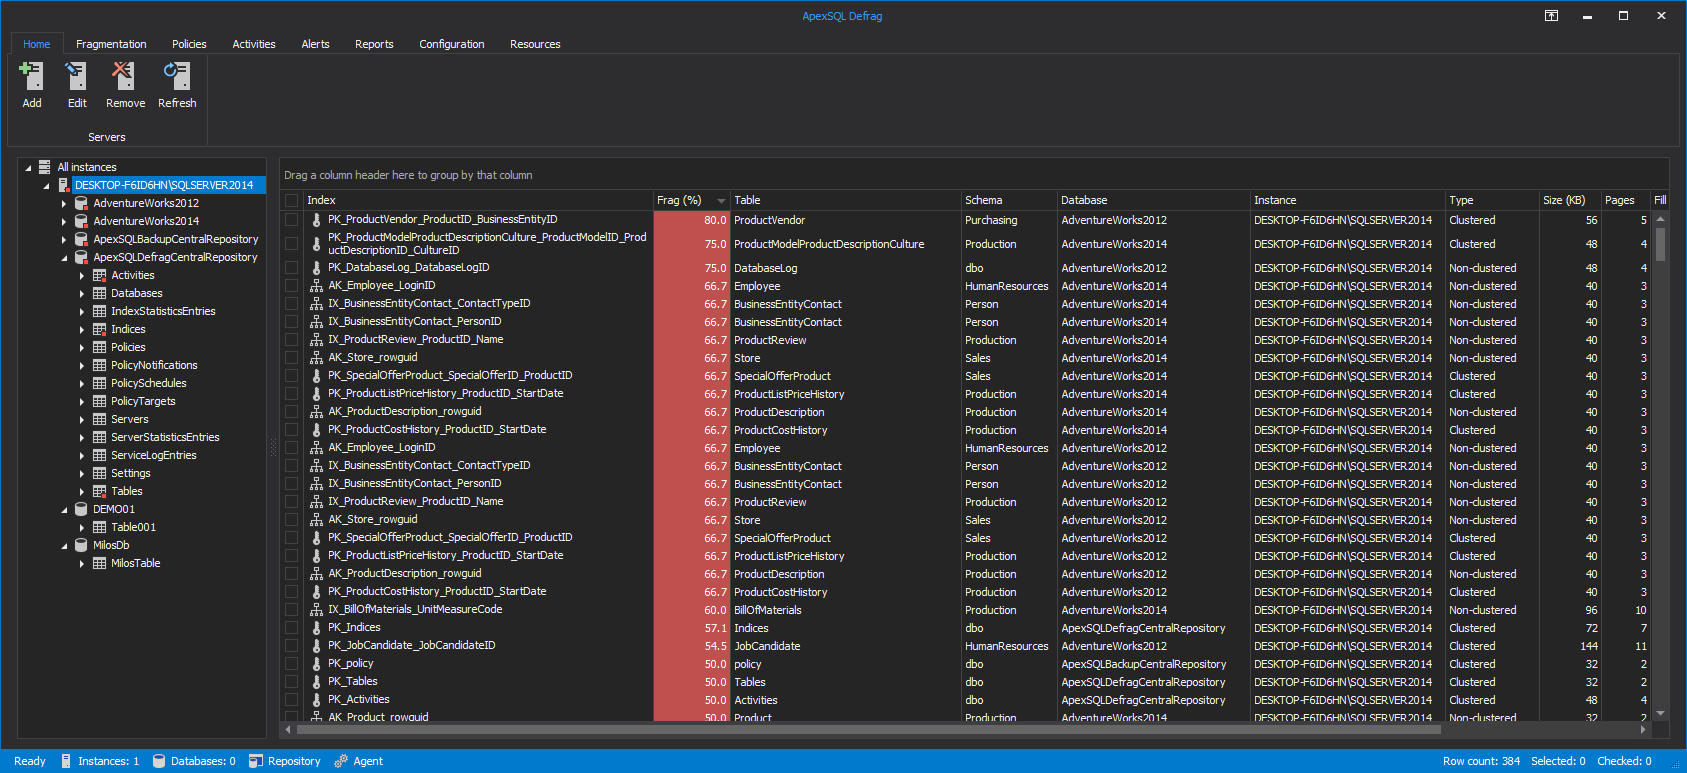
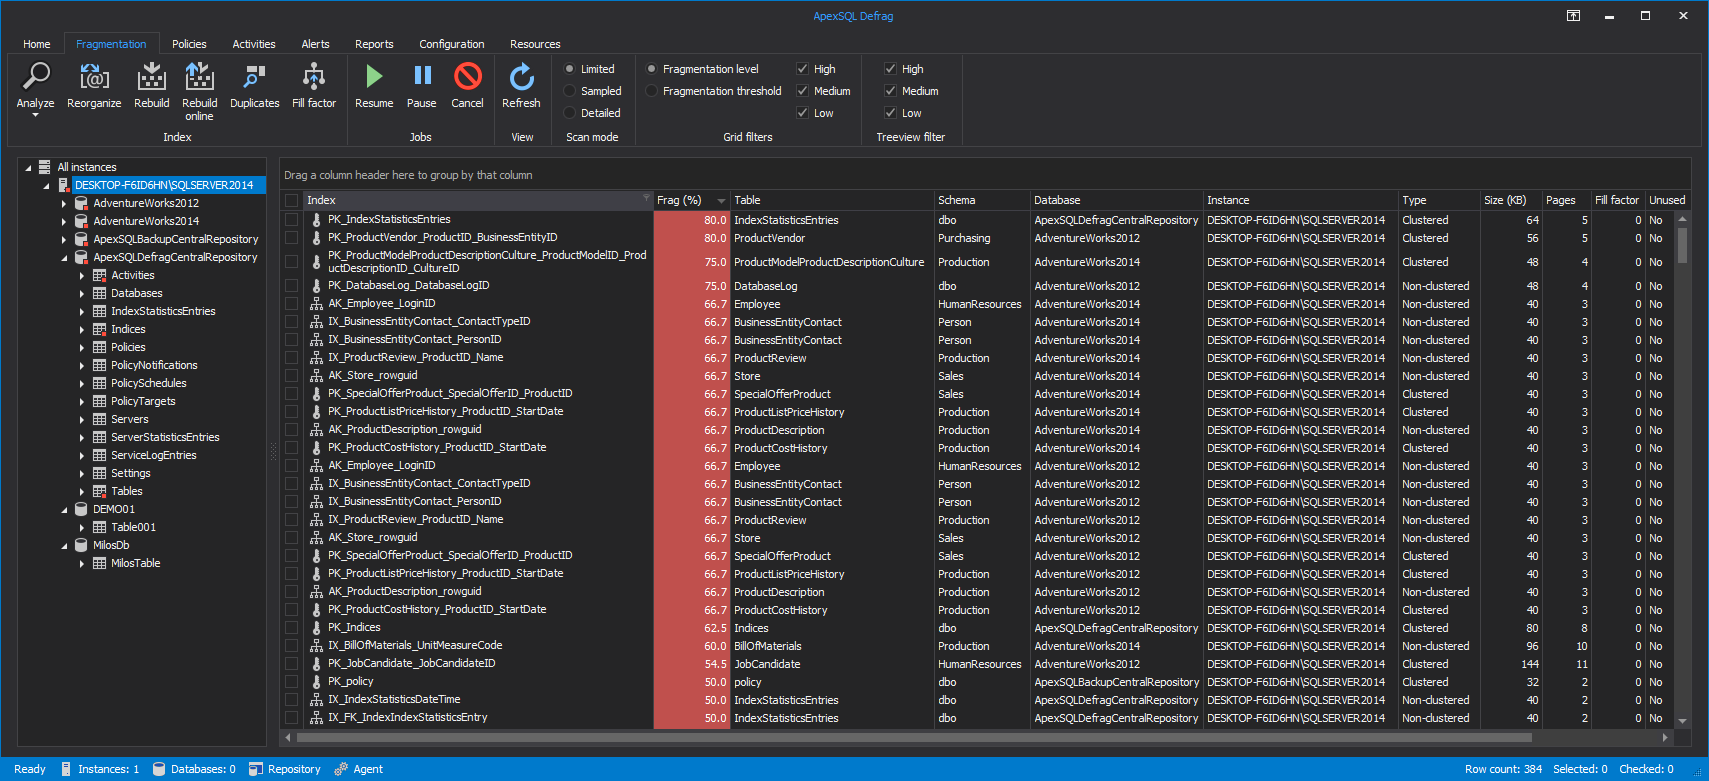
After connecting to a SQL Server, the main grid will appear, showing information like names of indexes, from which table indexes are and type of indexes, database they belong to
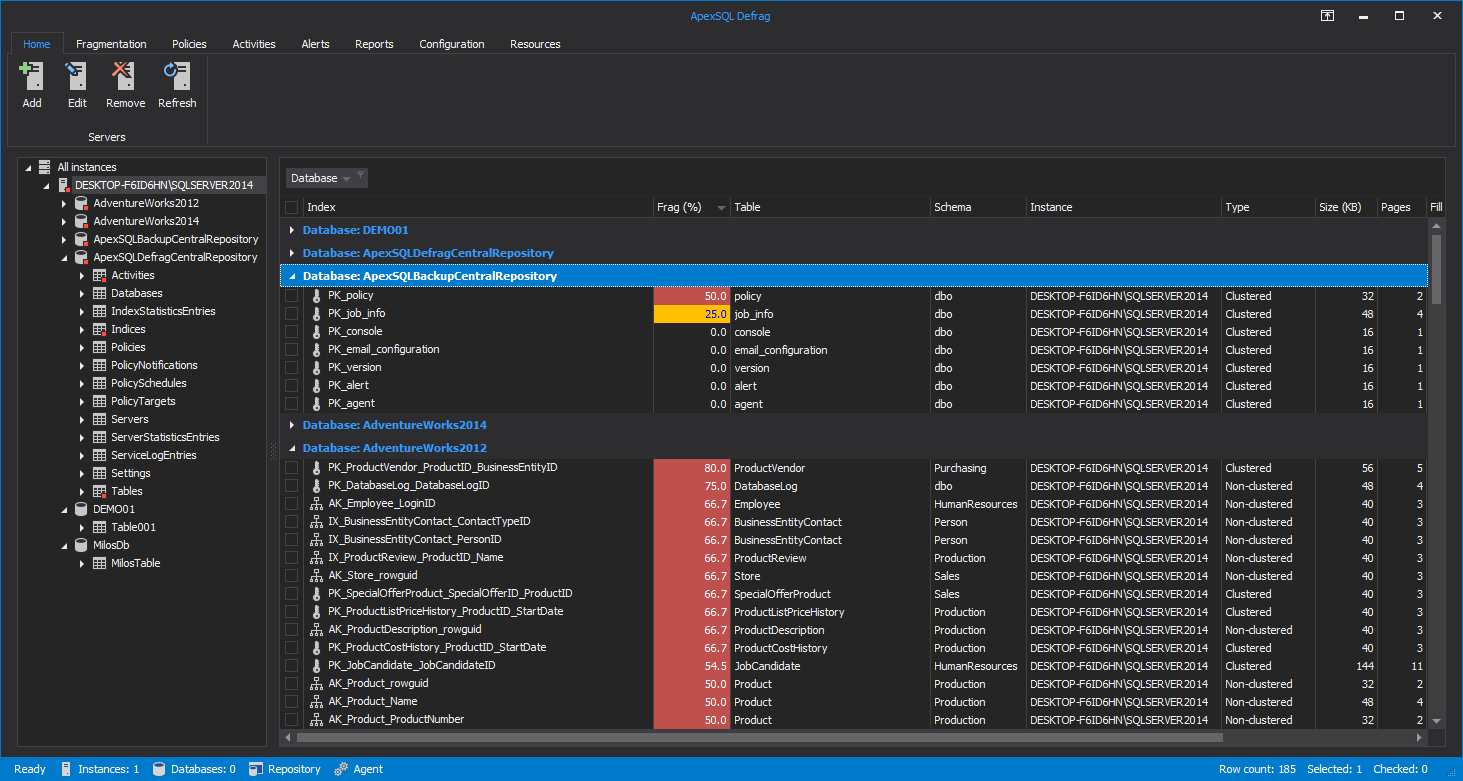
Here, this data can further be filtered by any of the presented grid columns. Let’s group them by Database column which provides insight into index fragmentation percentage level by our databases:
-
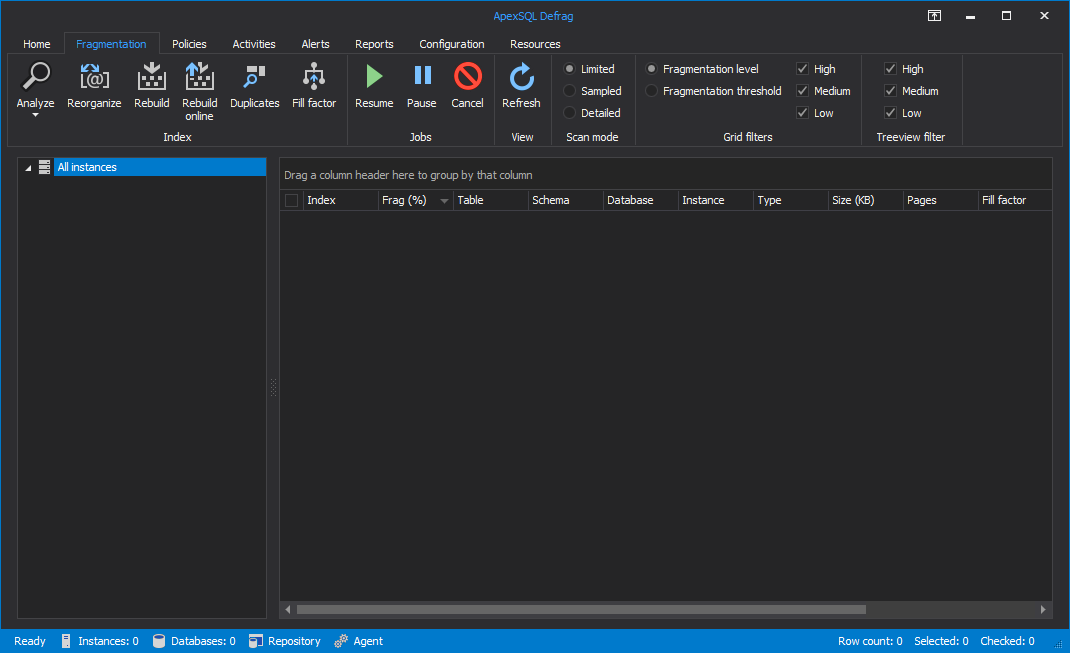
In the Fragmentation tab Index, Job and Scan mode related options are presented as well as Grid and Treeview filters:
The final result of index fragmentation analysis depends on the selected scan mode. Choose between limited, sampled and detailed scan mode.
- Limited mode – this is the fastest mode that scans the smallest number of pages. In limited mode, only the pages above leaf level of an index get scanned
- Sample mode – only 1% of all pages in an index or a heap get scanned
- Detailed mode – all pages are scanned and included in statistics. It is the slowest mode and takes the most resources when compared with other modes, but it returns the most accurate statistics
Let us now select AdventureWorks 2014 database from the server panel, check the Index checkbox from the grid to include all its indexes, leave, by default Limited scan mode checked, click on the Analyze button and from drop-down menu choose the Fast analysis option:

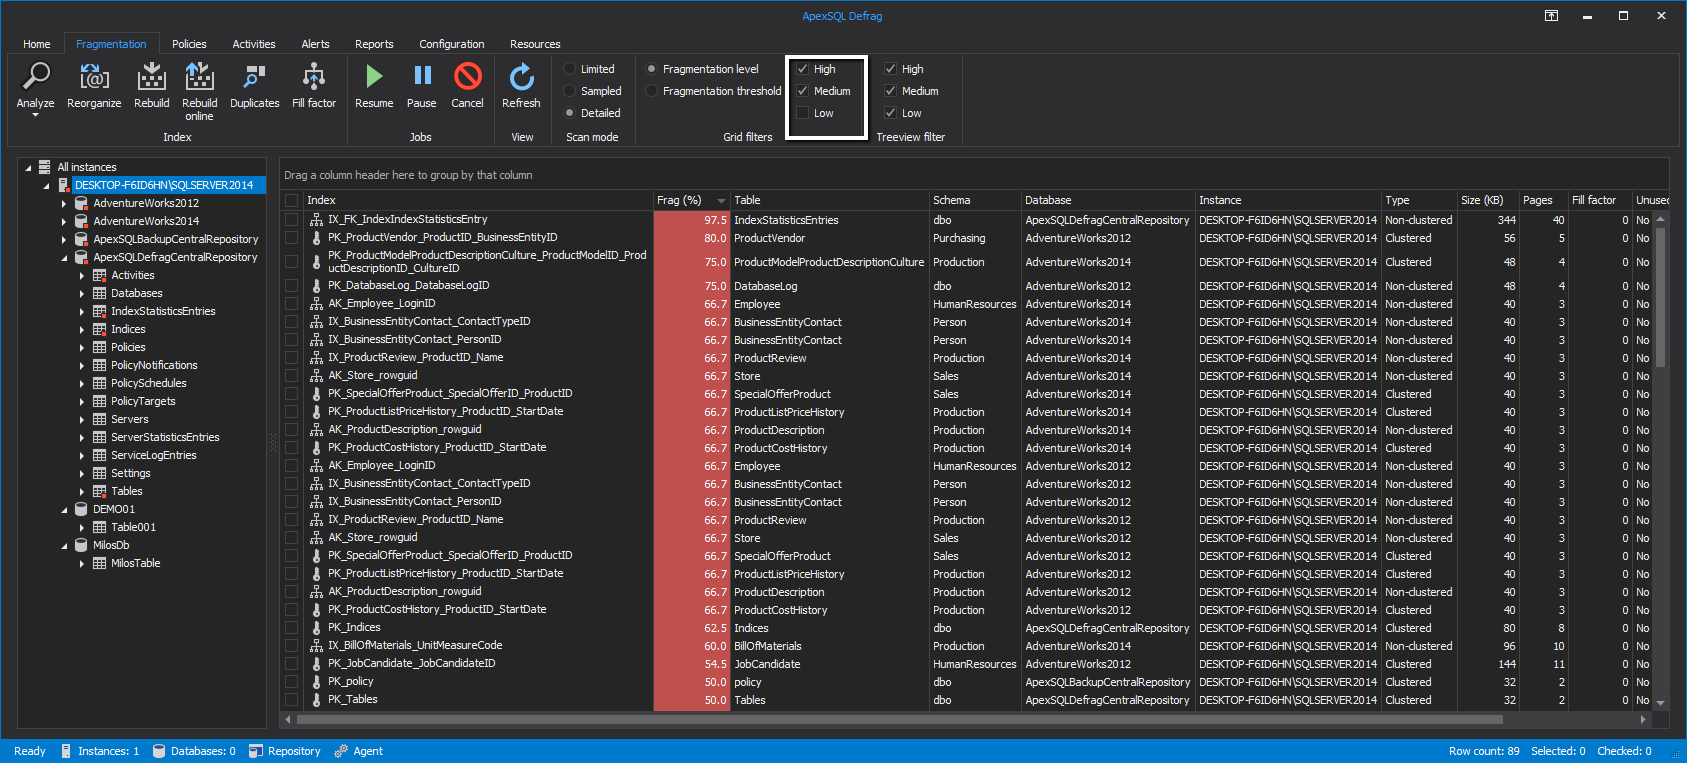
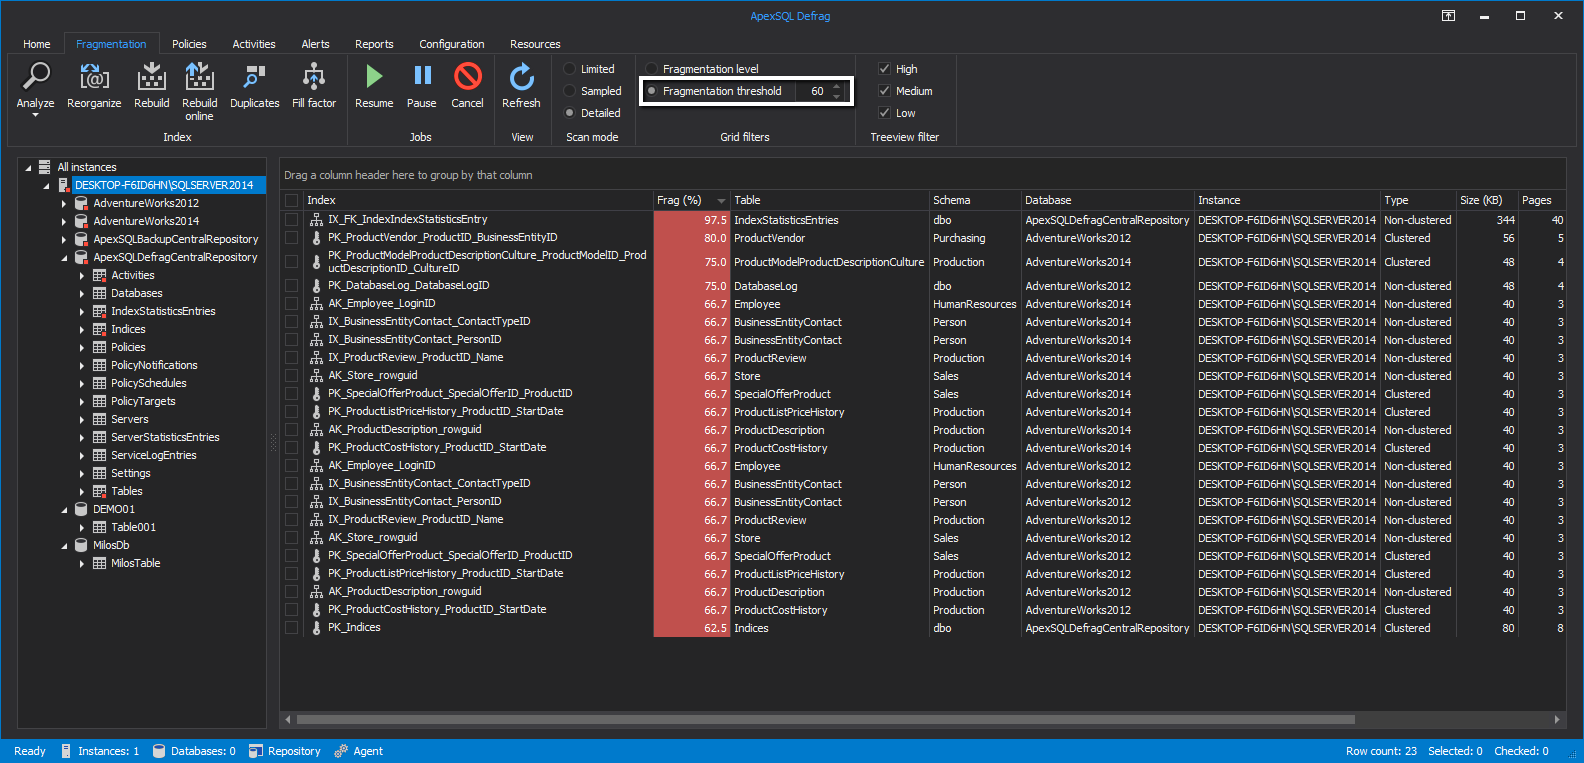
The Main grid displays the result of the performed fast scan. In the Grid filters group, the fragmentation grid view can be customized to show indexes based on their fragmentation level (High, Medium or Low). Results can also be filtered by fragmentation threshold, where the user can manually specify the percentage of index fragmentation threshold so indexes with the percentage below the specified won’t be shown:
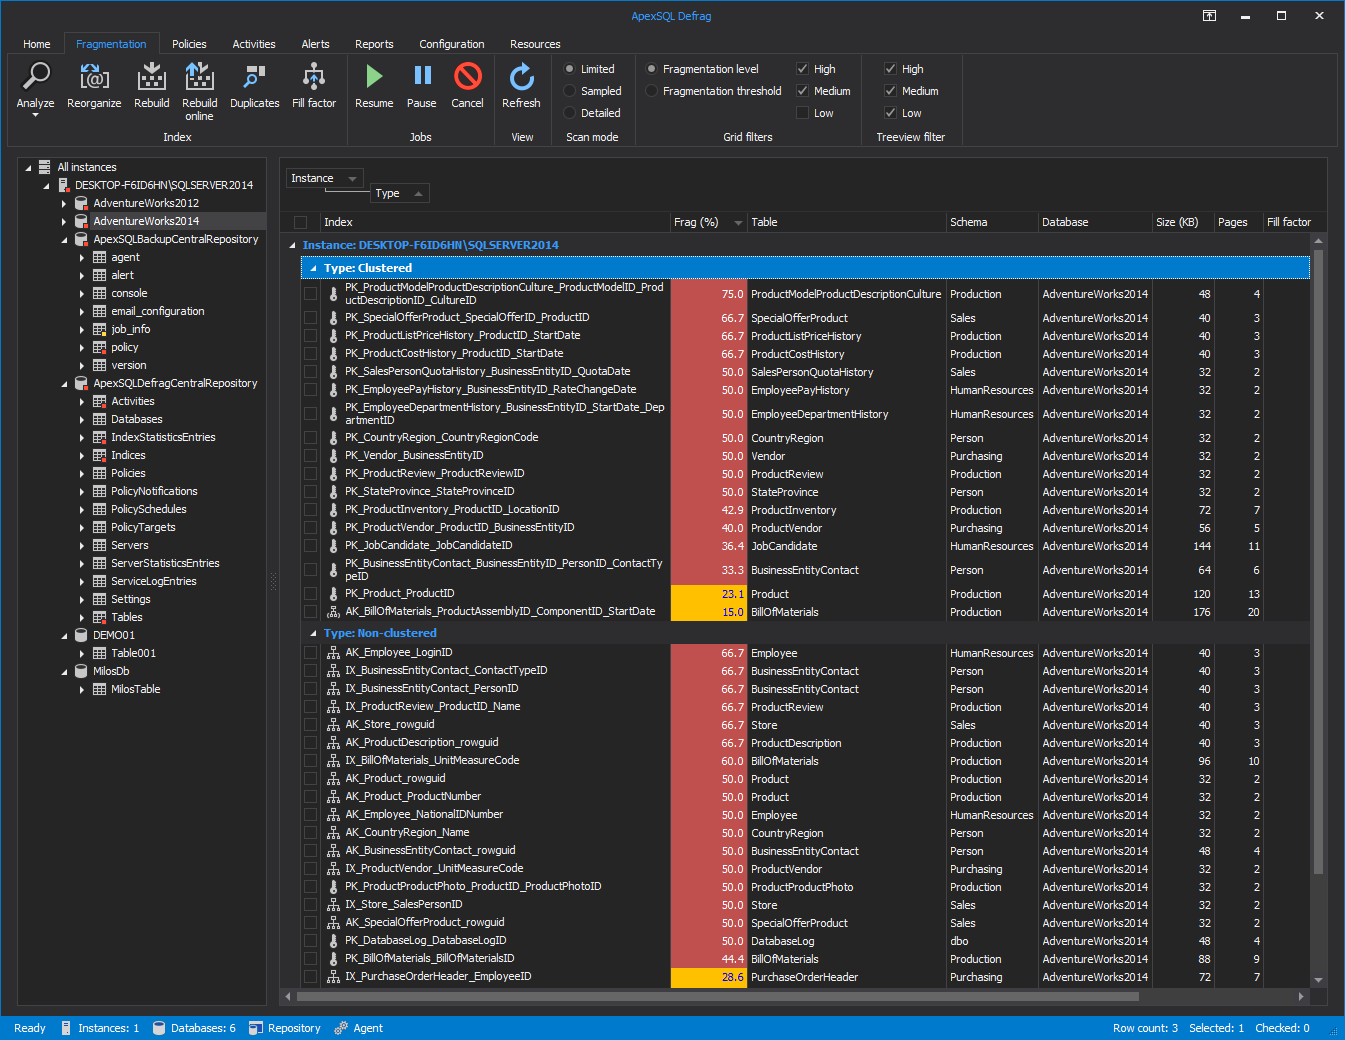
We can further group the main grid by any of the displayed columns. To group data indexes by instance they belong to and index type, let’s drag into group area both Instance and Type column headers respectively:
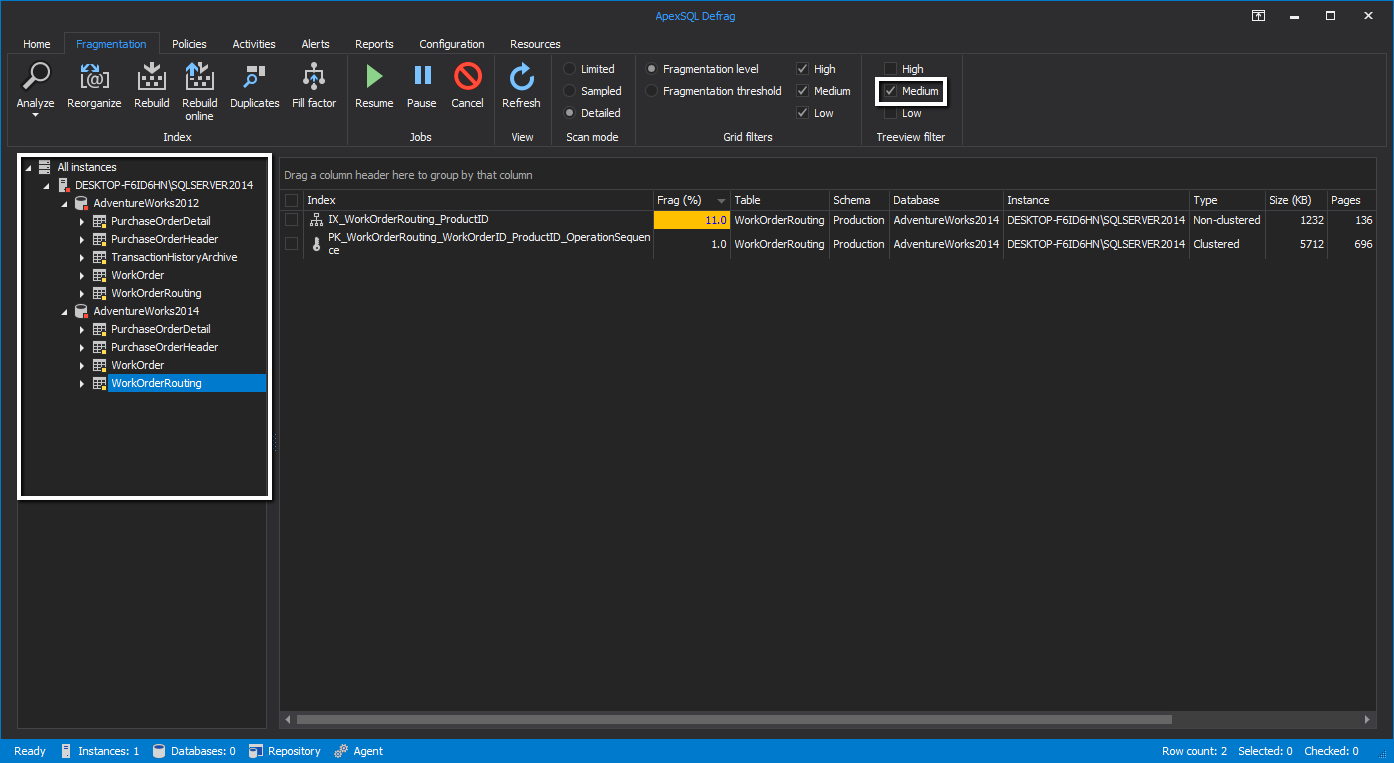
Treeview filters filter which databases are going to be shown in the treeview explorer based on their fragmentation. For instance, if we deselect High and Low filters than in treeview explorer only databases with medium fragmented indexes, will be shown:
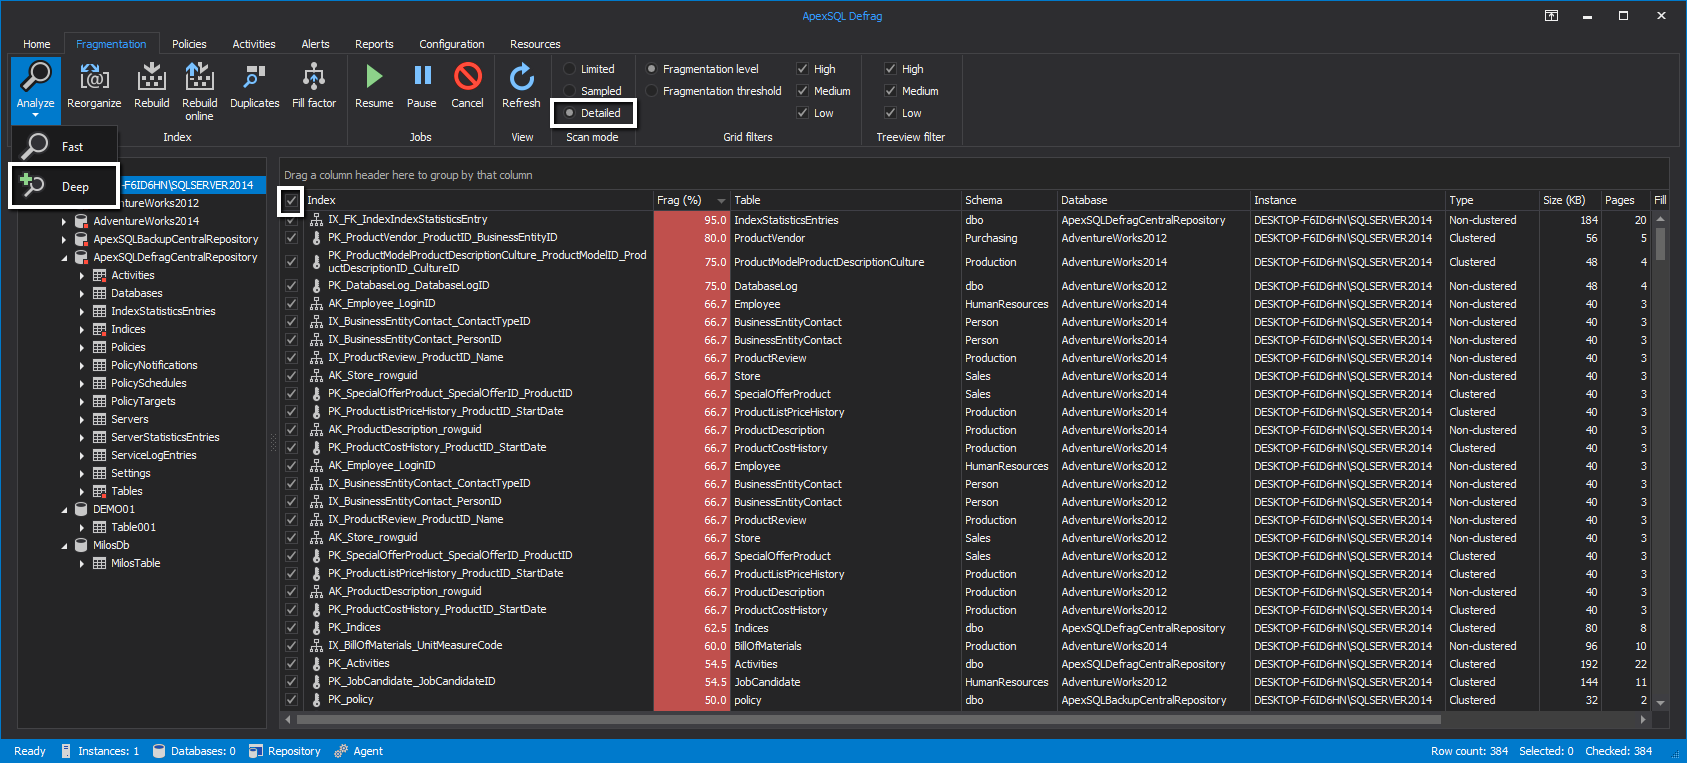
Let’s now perform a deep detailed scan of All instance indexes by selecting All instances from server panel, checking the Index checkbox from the grid, selecting Detailed scan mode and choosing the Deep analysis option from Analyze drop-down menu:
The solution to fragmented indexes is to rebuild or reorganize indexes. So, let us delve a little deeper into these two terms:
Index reorganization is a process where the SQL Server goes through an existing index and optimizes it, mitigating index fragmentation more quickly but not as effectively as a complete re-build.
Index rebuilds are a more heavy-duty process where the index is deleted and then recreated from scratch with an entirely new structure, free from accumulated fragments and empty space.
While index reorganization is a robust cleanup operation which leaves the system state intact, ie without locking-out affected tables and views, the rebuild process locks affected tables for the whole rebuild period, which may result in long down-time that could not be acceptable in some environments.
So which one should we choose? Well, answer to that question lies in fragmentation percentage level:
- If Fragmentation is less than 10% no defragmentation is required. It is generally accepted that in majority of environments index fragmentation less than 10% is negligible and its performance impact on the SQL Server is minimal
- If Fragmentation is between 10-30% then it is suggested to perform index reorganization
- And lastly if Fragmentation is higher than 30% then it is highly suggested to perform an index rebuild
These percentages are just rules of thumb and can be fully customized by the user
Let us now perform index defragmentation for indexes with moderate fragmentation. In order to perform that we should do the following, check only Medium fragmentation in the Grid filter, select SQL Server from the server panel if we want to defragment all its indexes or select a particular database to do the same. Now check all Indexes shown in the grid and click on the Rebuild online button, then on the Reorganize button, both from Index group:

We can pause, stop or cancel any running job. This is useful if we see any performance issues or blocking due to a particular index rebuild:

The end result will look like this:
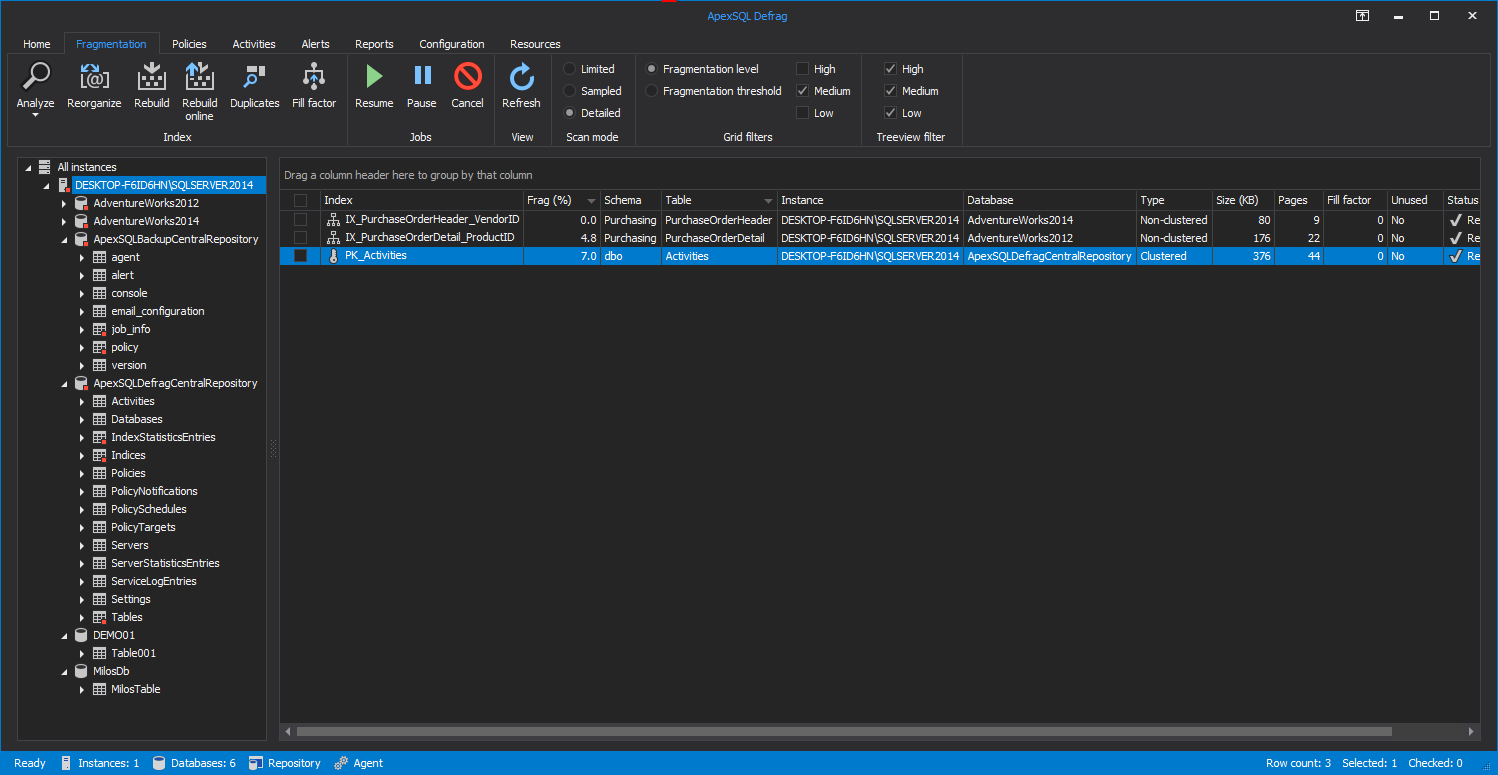
Now we have successfully defragmented the selected indexes. We did this manually but next we’d like to configure a process to do this automatically and unattended
-
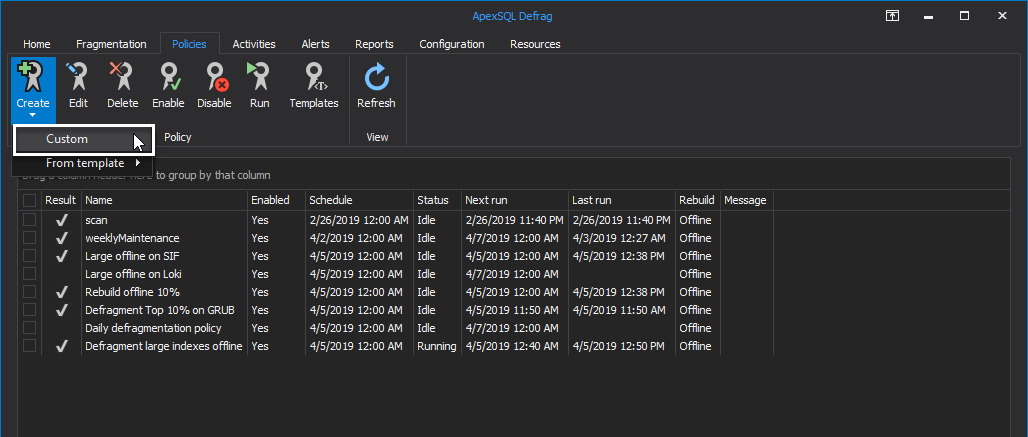
To automate and schedule SQL Server index fragmentation, let’s navigate to the Policies tab and click on the Create button and from the drop-down menu choose Custom:
In the Create policy wizard, under the General tab, insert a policy name, optionally a description, and Targets — the select indexes to run defragmentation against.
By clicking on Targets browse button the Policy targets explorer opens and presents the opportunity to choose any amount of indexes for maintenance.
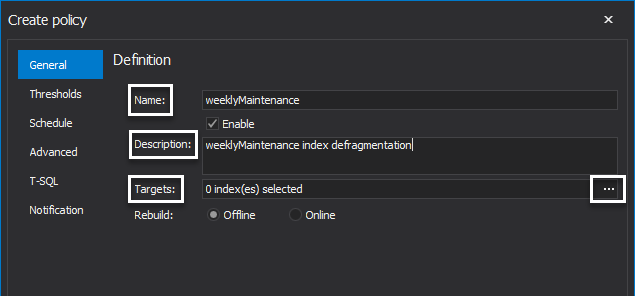
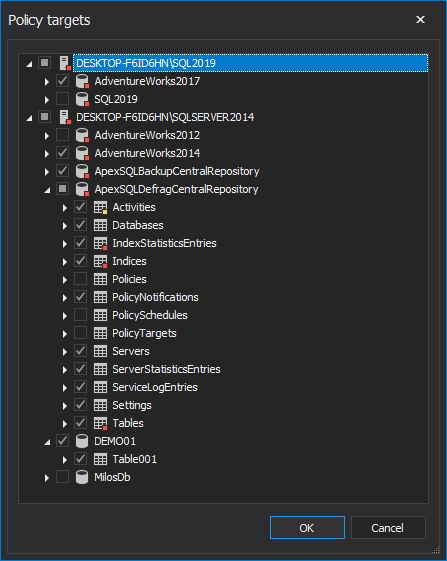
By clicking on OK button the number of all selected indexes is shown in the Targets box.
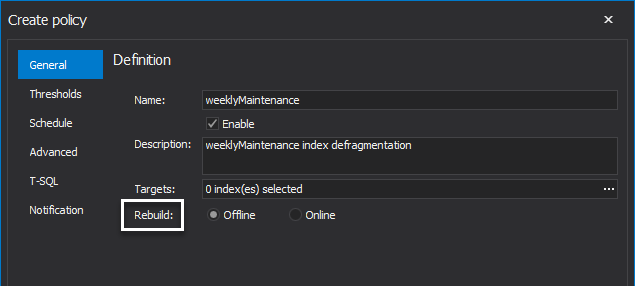
The only thing left to add here in the General tab is the Rebuild option, either offline or online.
But before selection, let’s first distinguish between online and offline index rebuilds.
An online index rebuild makes it possible to perform index maintenance while allowing the database to continue without interruption.
This is opposed to offline index rebuilds, where the operations acquire and hold exclusive locks on the underlying data and indexes associated with that data, which prevent any modifications to or queries against the underlying data as long as the index operation is in progress.
Offline index rebuild is selected by default:
After finishing up with General tab, let’s go to the Thresholds tab of the policy creation wizard.
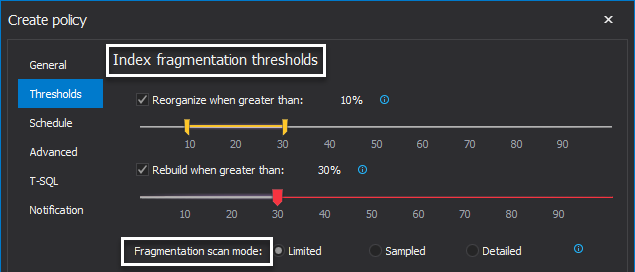
Here, under Index fragmentation thresholds, we see slider controls where we can select the percentage of fragmentation on which the index will be reorganized, the percentage when the index will be rebuilt, and the lower threshold percentage below under which the indexes won’t be rebuilt nor reorganized.
After that, we can select the Fragmentation scan mode between Limited, Sampled and Detailed:
Under Resource thresholds we are able to set thresholds for various System resources. That being said, ApexSQL Defrag will check values for any selected resource before starting the policy, so if it detects a value outside the parameters specified here, the job will not start.
Here we see tooltips for each and every setting, helping us to understand the variable.

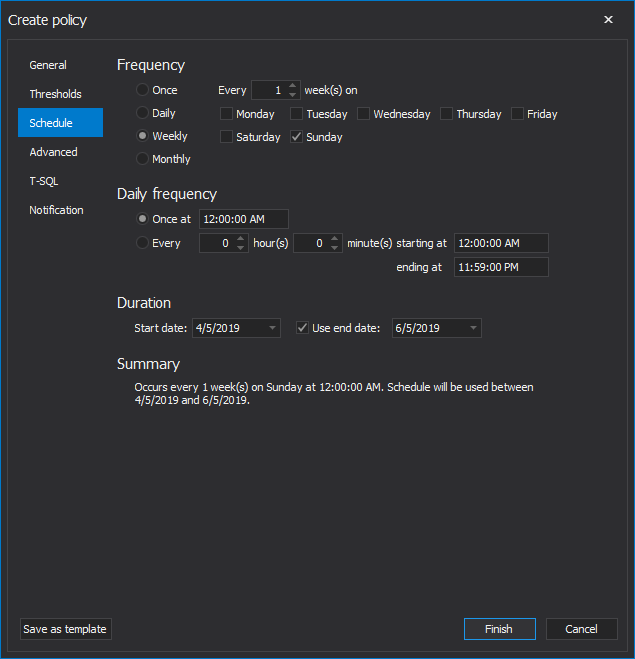
Under the Schedule tab, set the frequency for the defragmentation job. Under the Frequency area, choose the policy to be executed: Once, Daily, Weekly or Monthly. Set the Daily frequency and Duration.
Under the Summary section, the info about chosen schedule parameters is presented:
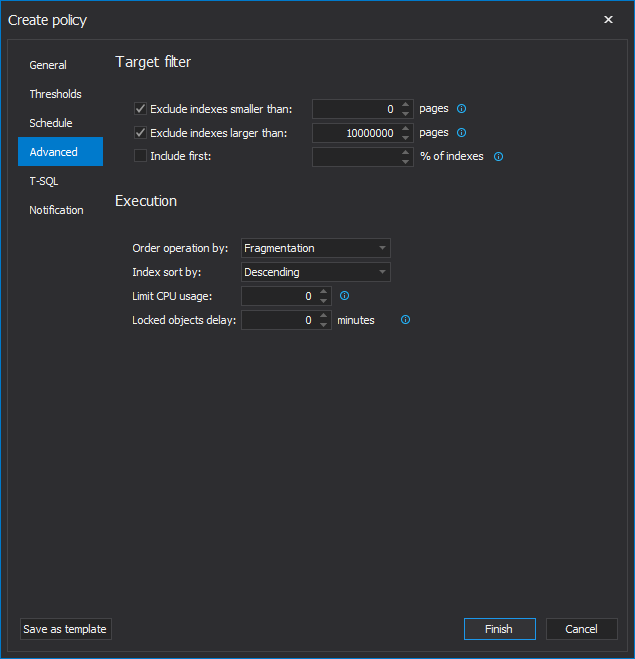
In the Advanced tab, filters for index page number and top percentage of indexes can be configured. A few additional features are also available on the form:
- Execution order of scheduled operations can be set by fragmentation value, page count or size of targeted indexes
- Number of CPU cores that will be used in policy execution can be limited
-
Execution delay on locked objects can be set
To choose if an email will be sent upon job completion, navigate to the Notification tab.
Specify to send notifications by checking the box in front of one or more job outcomes and provide at least one email recipient:
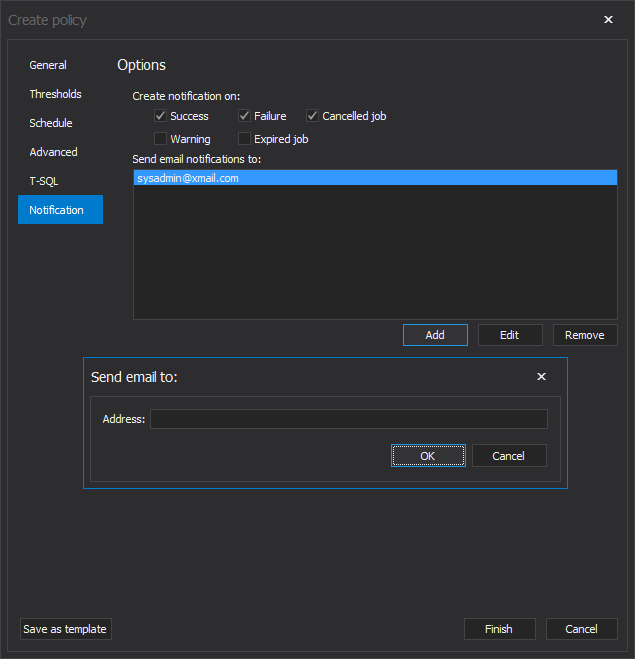
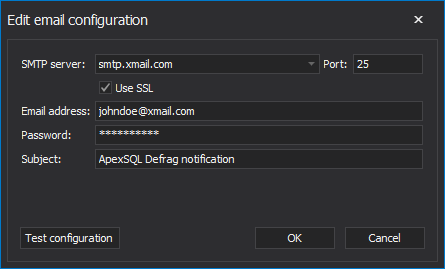
To be able to send notifications, the user must first configure email settings, either from the Options in the Configuration tab of the main window, or when prompted during the first creation of a policy:
Click Finish at the bottom to create the policy.
-
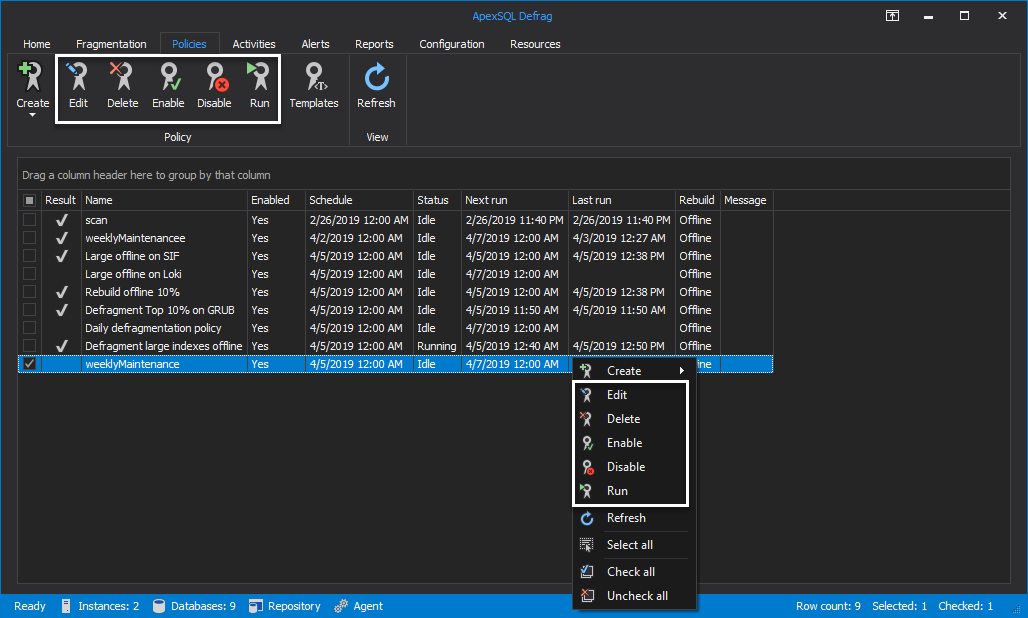
After creating the policy, we can see it in the Policies tab. Here, we can Edit, Delete, Enable, Disable or Run selected policy immediately, without waiting for its scheduled time to start:
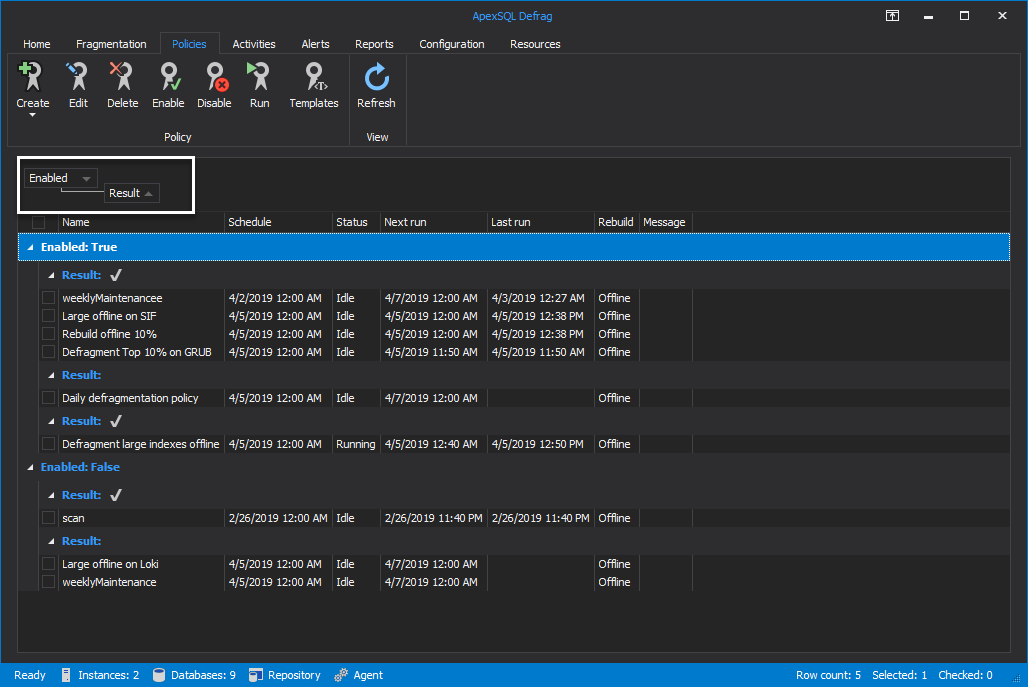
To further filter policies we can group them by any of the available grid columns. For the sake of this demo let’s group them by Enabled and Result columns respectively:
-
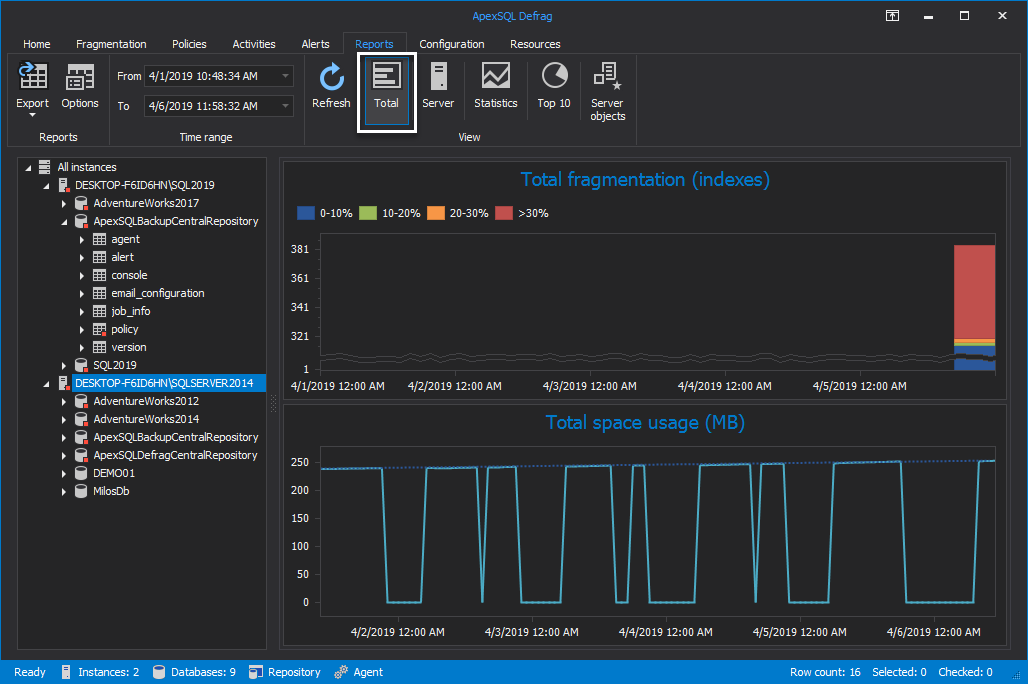
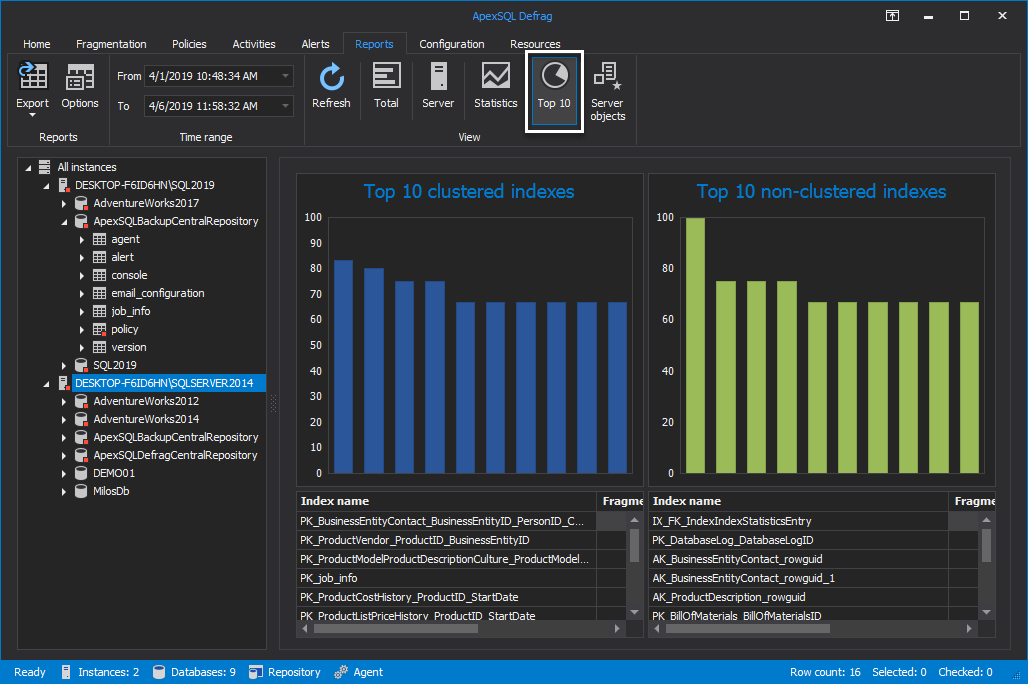
By entering the Reports tab we can view the total fragmentation and total space usage reports from the server level, database and even from an index level:
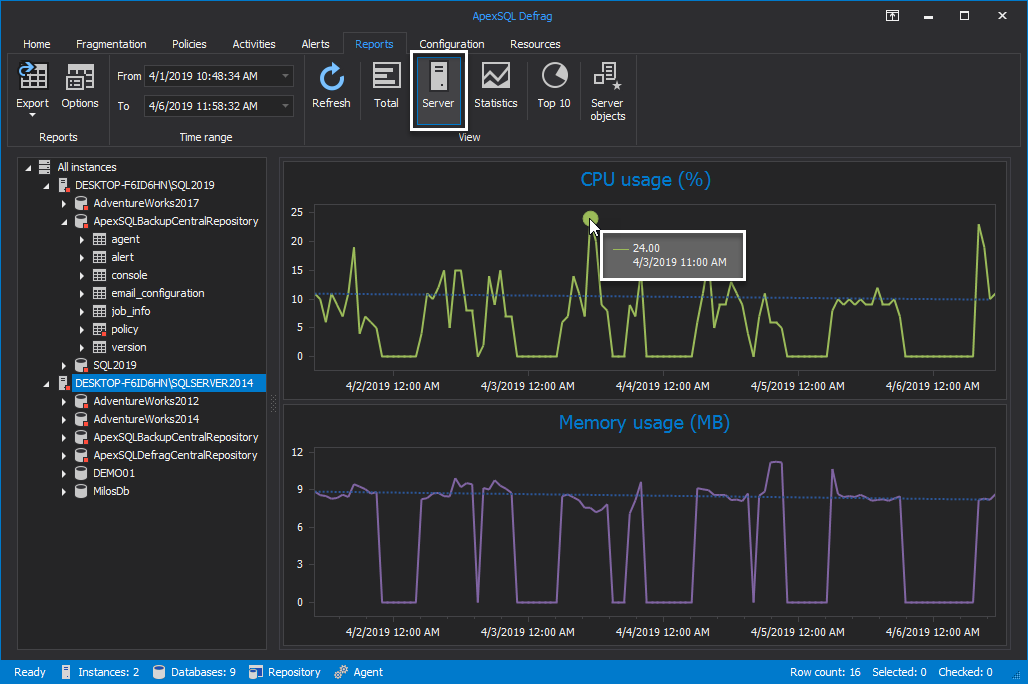
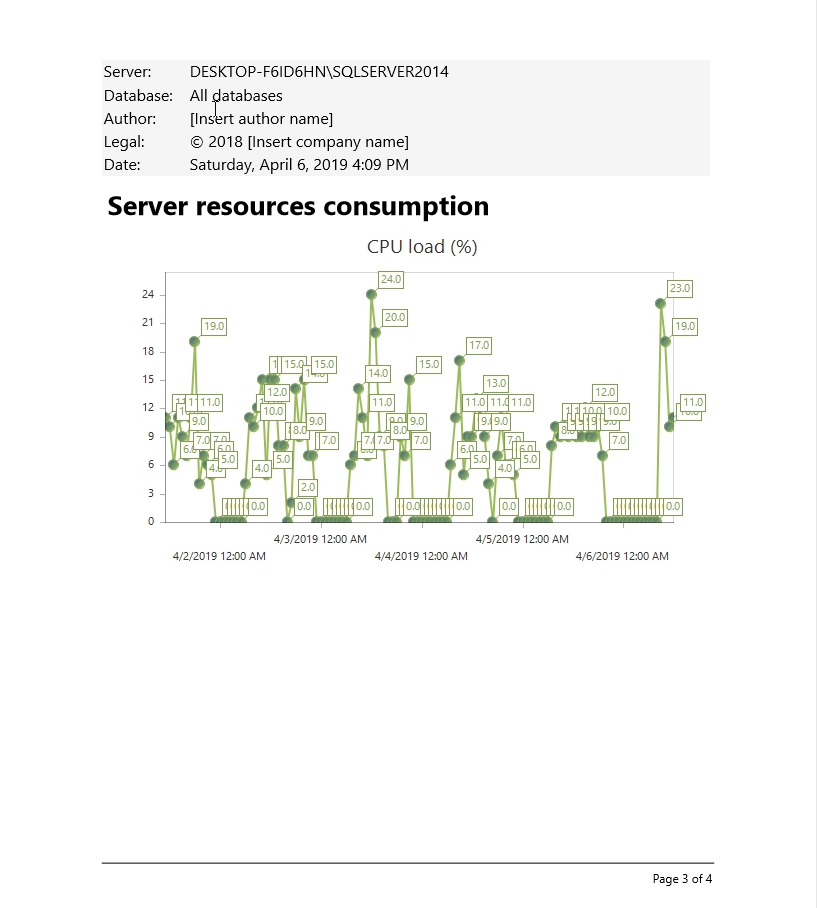
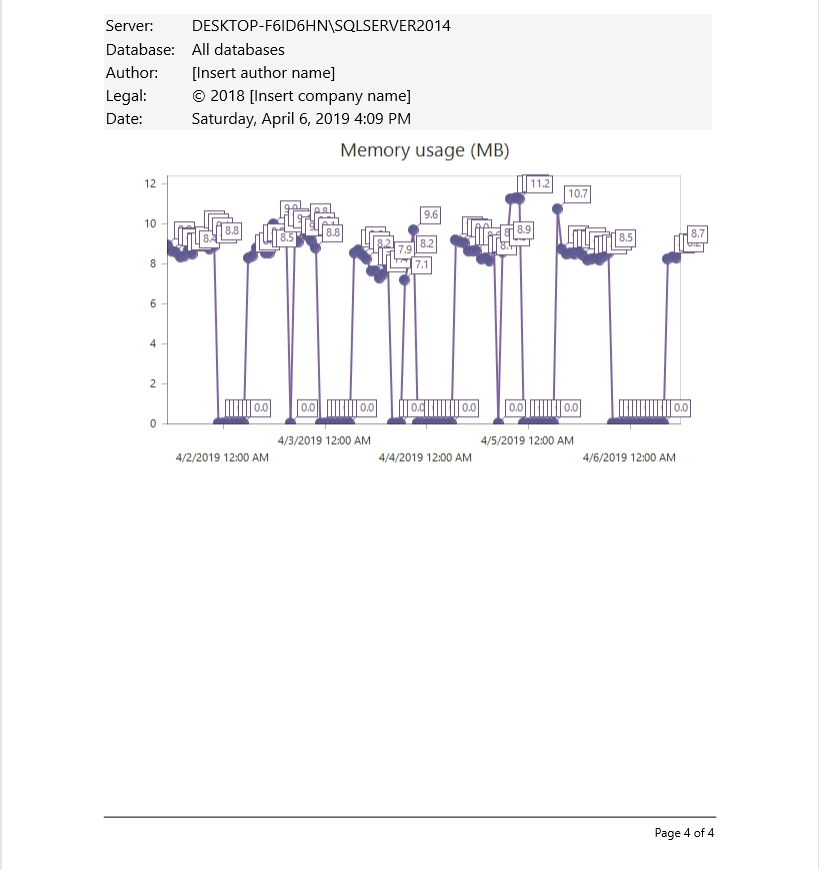
One may also be interested to know the CPU and Memory behavior while index maintenance operations are running. We can get this useful information and keep an eye on the system resources as well by selecting a SQL Server from the server panel and clicking on Server button from the View section:
One simple click on the Top 10 button give us a nice view of the top 10 clustered and non-clustered indexes of any previous selection from the treview explorer on the left:
We can export all the reports and even configure the export options. ApexSQL Defrag gives us the option to choose what information to include into our report:
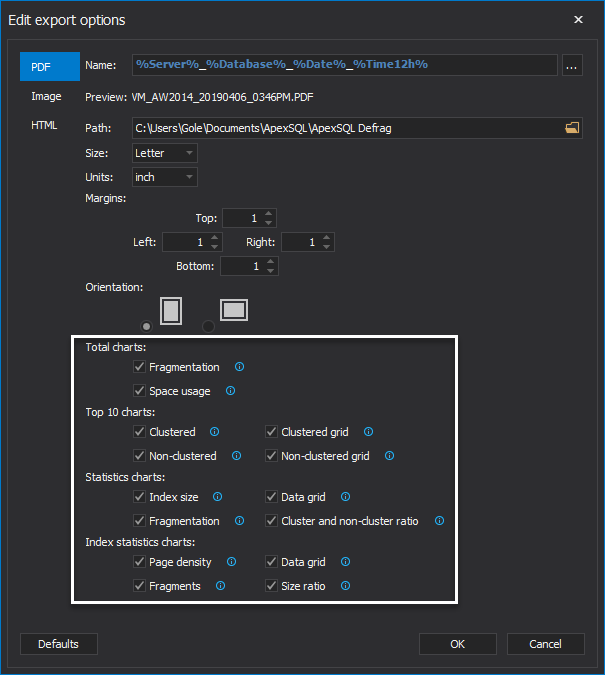
Reports can be exported to PDF, IMG, HTML, CSV or XML file formats. To export reports to PDF format, make any selection from the treview explorer and click on the Export button and select PDF:

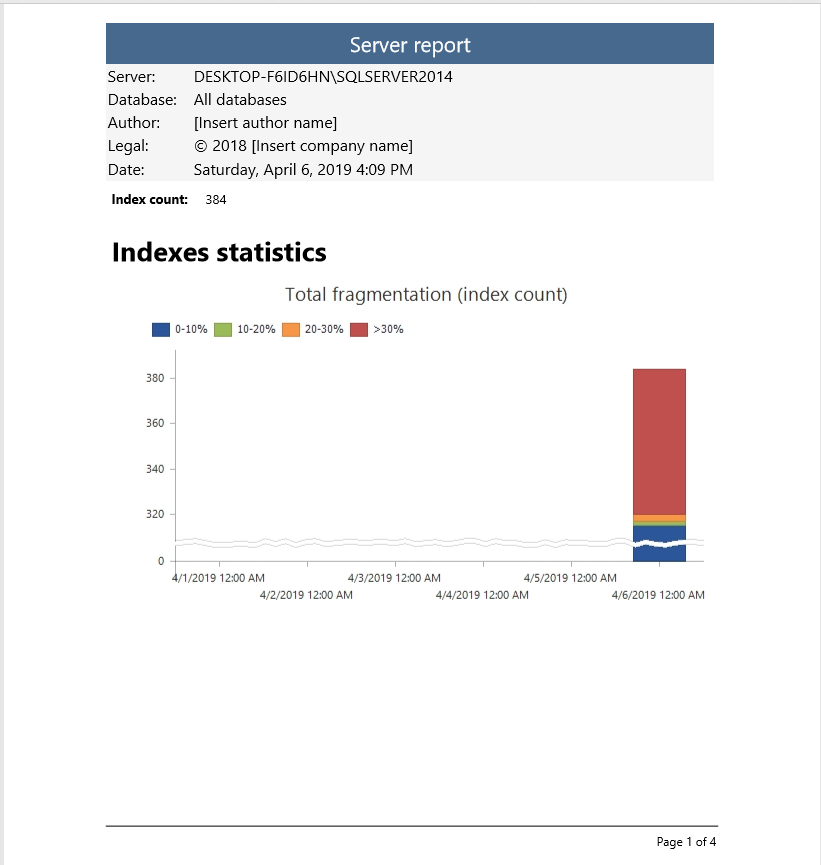
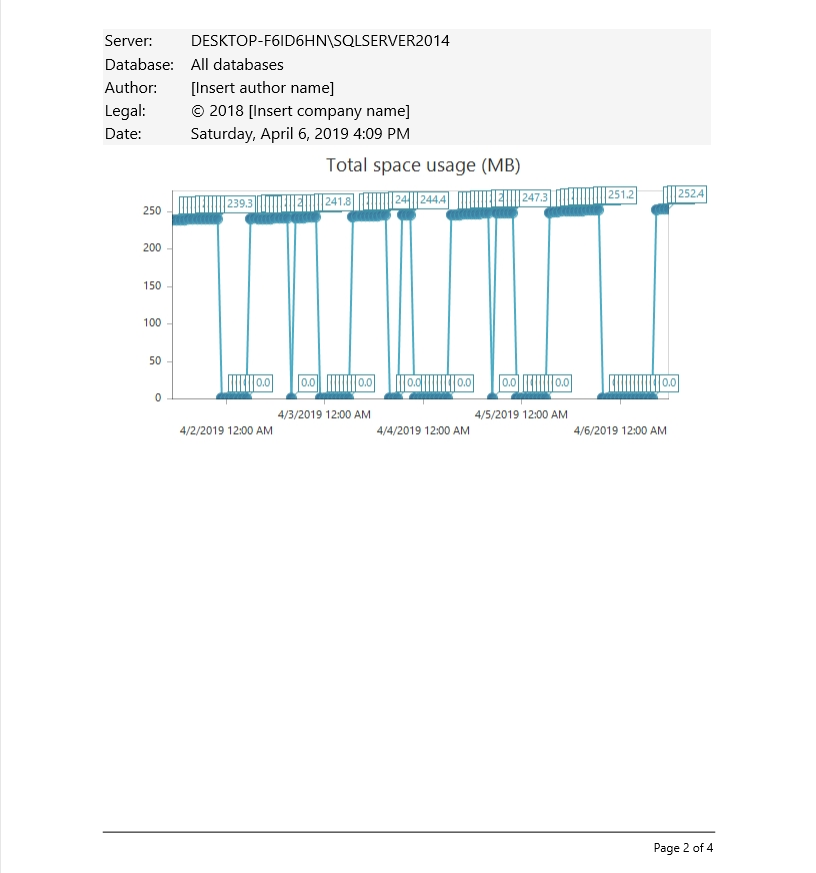
Immediately upon saving the file you will be asked to open it. The end result will look like this:
Thanks for watching. For more information, please visit apexsql.com


