


This video shows the core features of ApexSQL Data Diff, a SQL Server development tool that is capable of performing comparison and synchronization of data stored in tables or views, between different data sources.
Transcript
Hello and welcome to this ApexSQL Data Diff general overview video. ApexSQL Data Diff is a SQL Server development tool that is capable of performing comparison and synchronization of data stored in tables or views, between different data sources. Data sources include SQL Server databases, backups, source control projects and script folders. ApexSQL Data Diff also supports data synchronization for SQL Azure databases and SQL Server on Amazon RDS.
ApexSQL Data Diff can also:
- Automate and schedule data comparisons and synchronizations using the Command line interface, also known as the CLI)
- Propagate data changes from one environment to another
- Identify and repair lost and/or damaged data
- Perform row level recovery from backups without restoring
- Compare databases from SQL Server Management Studio (SSMS)
- and much more
In case something goes wrong, as part of creating a synchronization script, ApexSQL Data Diff can reverse any changes made by automatically creating a backup or a rollback script prior to synchronization. It also supports creating executable installation packages that user can run without installing any other software.
ApexSQL Data Diff consists of three main components:
- GUI – a Windows application used for manual comparison and synchronization, selecting specific objects and rows and various options for comparison and synchronization processes
- CLI – a console application which allows users to schedule and automate data comparison and synchronization, along with creating reports, and to run everything unattended
- SSMS add-in – a SQL Server Management Studio add-in that allows to initiate comparison of databases (or other data sources) directly from SSMS with a right-click on desired databases in Object Explorer, set them as source and destination, and click the Compare button
Please note that SSMS add-in is an optional component that can be selected/deselected during the installation of ApexSQL Data Diff in the integration step.
Upon starting the application, the Project management window will be shown where a new project can be created or to open a previously saved project from the list. To initiate a new project, click the New button:

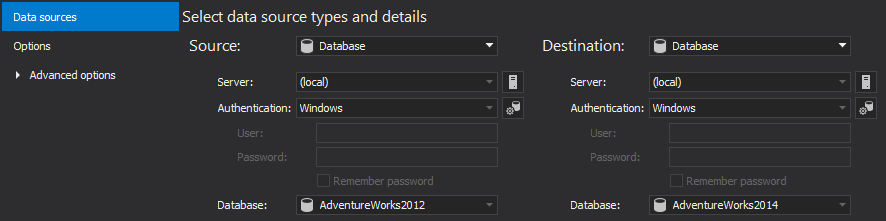
In the first tab of the New project window, the Data sources tab, source and destination data sources should be set. You can choose between four different data sources for both source and destination: backup, database, script folder, or source control. For the purpose of this video, databases are set for both source and destination, where a destination database will be synchronized with data from the source database:
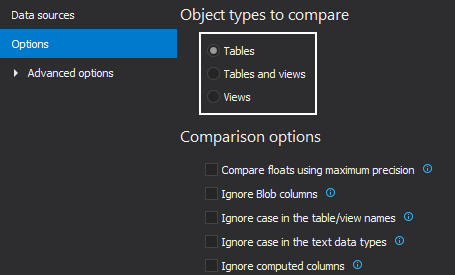
In the Options tab, you can choose which objects types you want to compare and to set specific comparison or synchronization options:
For more options, expand the Advanced options and five additional tabs will be shown.
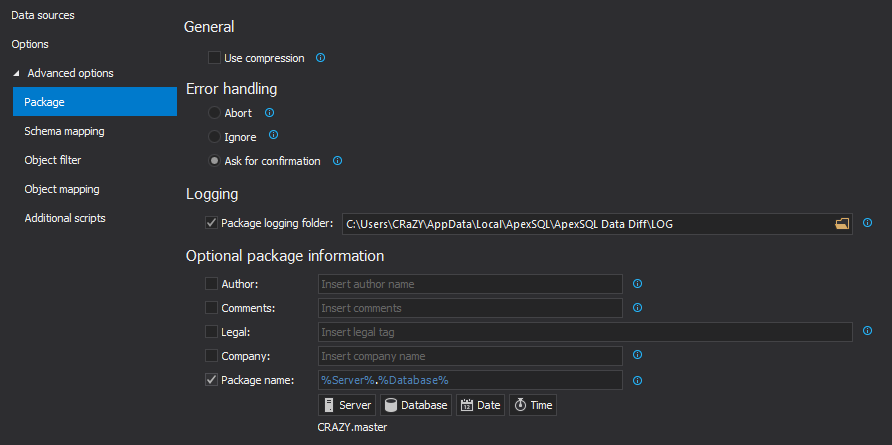
The first one is the Package tab, in which a few options can be set for the executable installation packages, such as compression, error handling, logging, and optional package information.
The next tab, is the Schema mapping tab, that by default matches schemas with the same names in source and destination, but it also allows for customizing schema mapping pairs. For example, if you have differently named schemas, Report schema in source and Reporting schema in destination database, just pick them from the drop-down list in the first row, click the Add button, and all objects that have these two schema names will be paired:

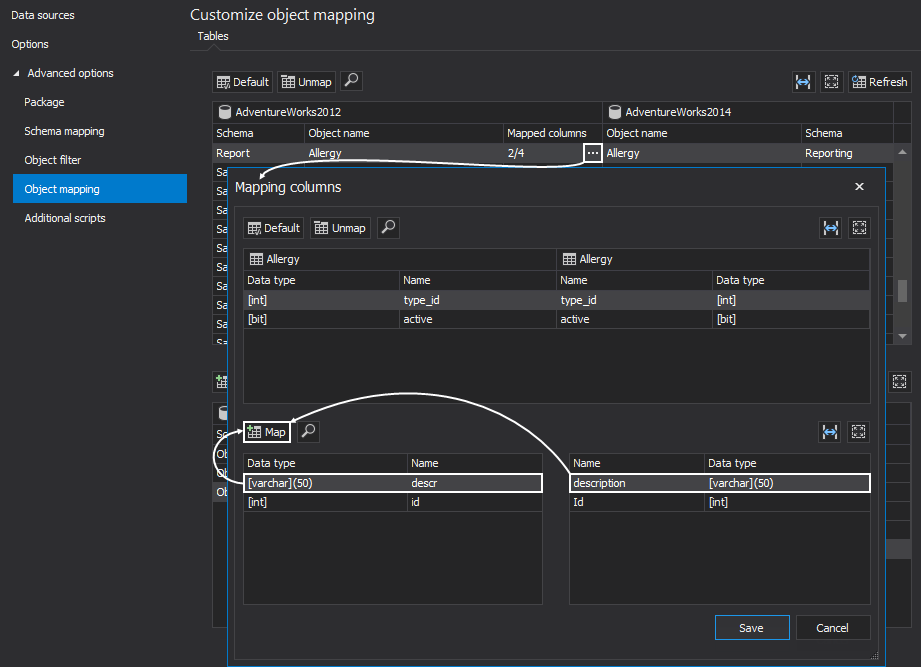
All objects that have schemas with the same schema and object names or which were customized in the Schema mapping tab, will be shown in the Object mapping tab:
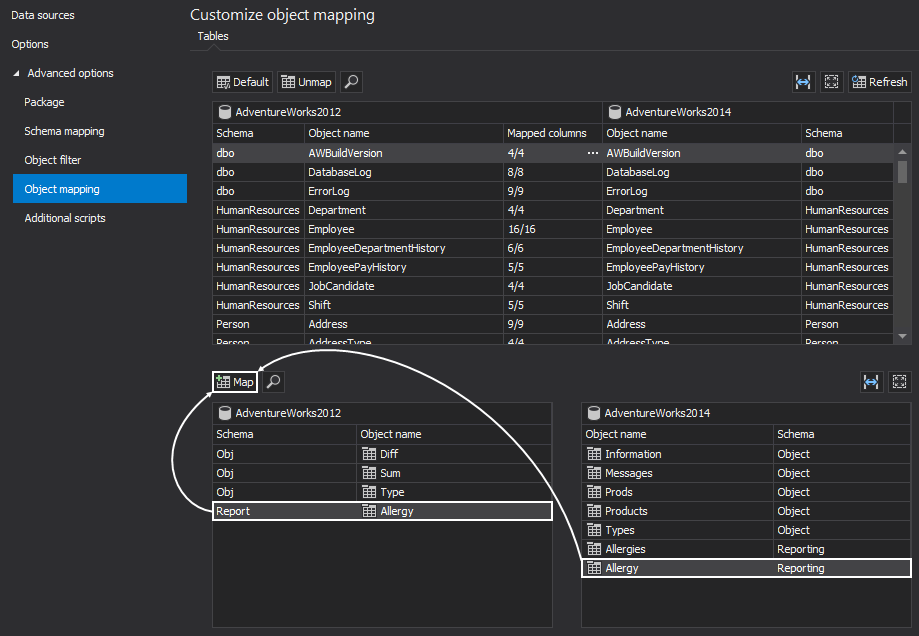
If there are any objects with different schema and/or object names, those will be shown under the unmapped objects list. In this example, these two tables already have been mapped by schema, but they differ in the object name. However, if the structure of these objects is the same, select the source and destination object and click the Map button. Also, if there are differences in column names, select mapped objects and click the ellipse button to open the Mapping columns window. Here, you can easily map columns in the desired way and custom mapped object along with its columns will be included in the comparison process:
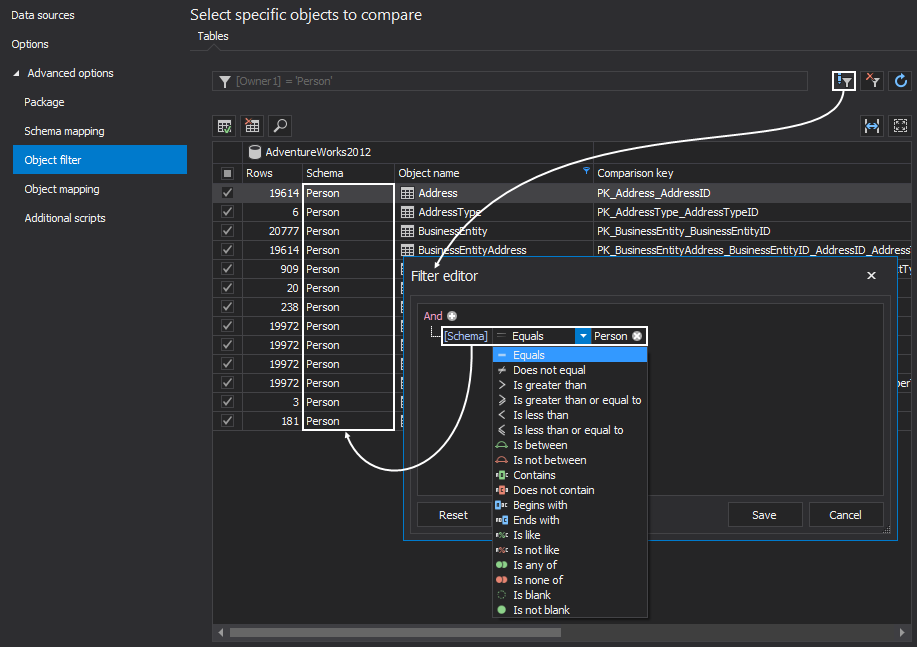
Once you switch to the Object filter tab, by default, all automatically mapped objects are checked. The Object filter tab allows various filtering options for tables and views:
The Filter editor allows specifying conditions for schema and object name in order to filter the list of objects that will be compared. To initiate the Filter editor, click the Edit filter button in the top-right corner and provide a desired condition. In this example, objects are filtered by schema name, so that only objects with schema name Person are shown:
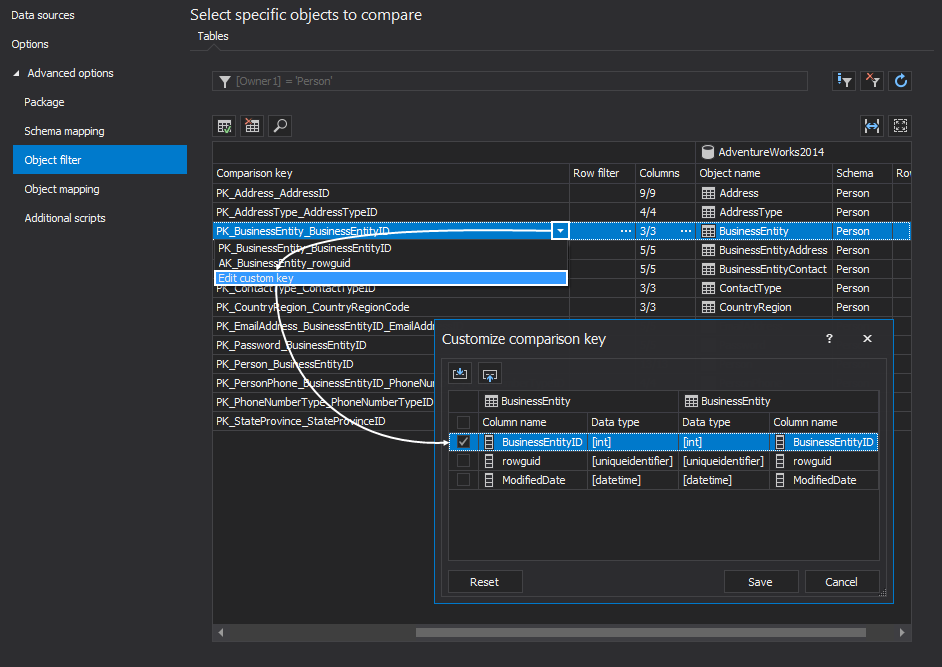
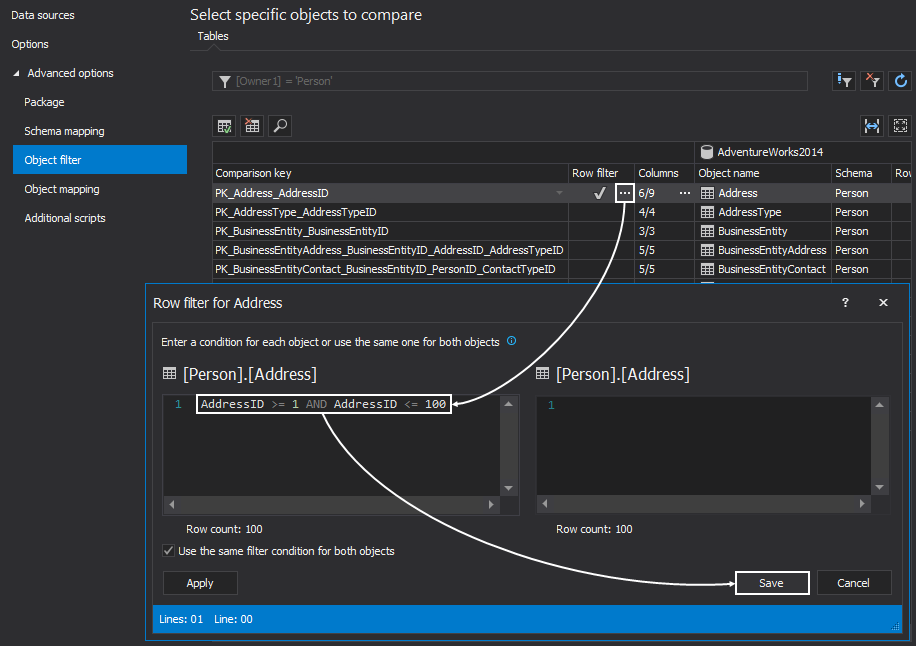
The Custom comparison key allows the user to set the comparison key when there is no primary or foreign key. In order to set the customer comparison key, click the arrow button for the selected object under the Comparison key column and pick a column that will become the custom comparison key:
The Columns filter allows the user to include/exclude specific columns for the selected object, by clicking the ellipse button under the Columns column:
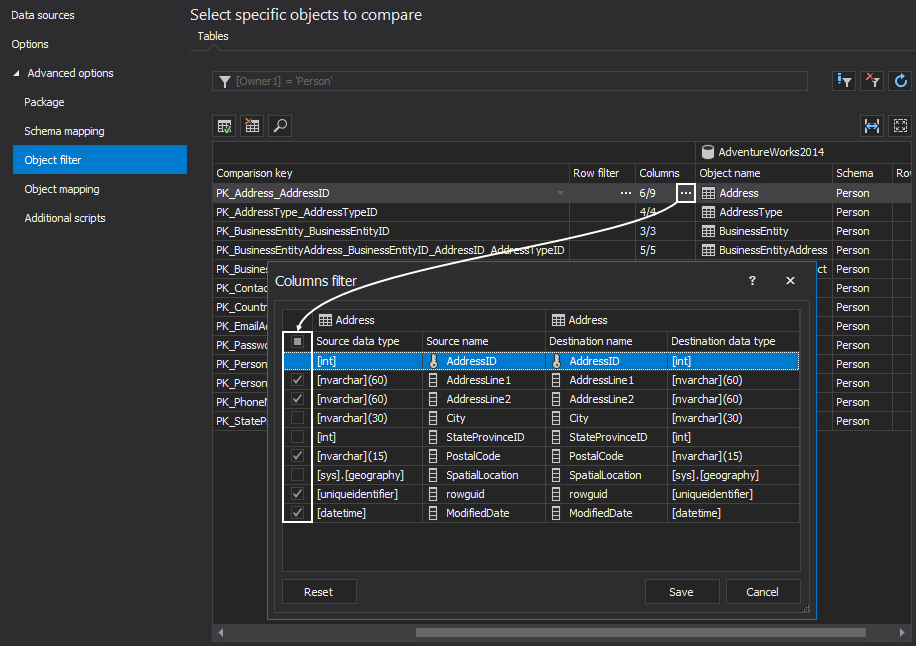
The Row filter allows specifying a condition for the Where clause, to limit the number of rows that will be compared. To set the condition, select an object from the list and click the ellipse button under the Row filter column. In the Row filter window, specify a desired condition, and in this example and check/uncheck whether to apply the same condition on both source and destination objects. In this example, the condition for the Person.Address table set, so instead of comparing all rows, the condition AddressID >= 1 AND AddressID <= 100 limited the number of rows to a subset of just one hundred:
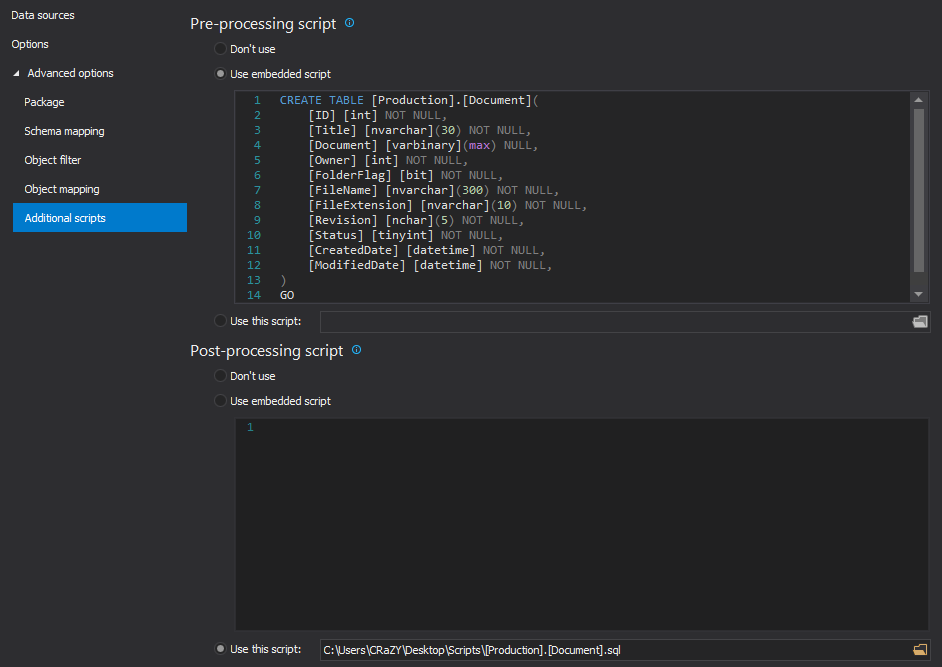
The last tab is the Additional scripts tab, in which Pre or Post processing scripts can be configured, that will be executed before or after the synchronization process. In this example, the Embedded script option is used as the Pre-processing script and a script to create a table is written, while for the Post-processing script an already created script that will create another table will be loaded using the Use this script option:
Once everything is set up, click the Compare button from the bottom-right corner of the New project window and the comparison process will be initiated.
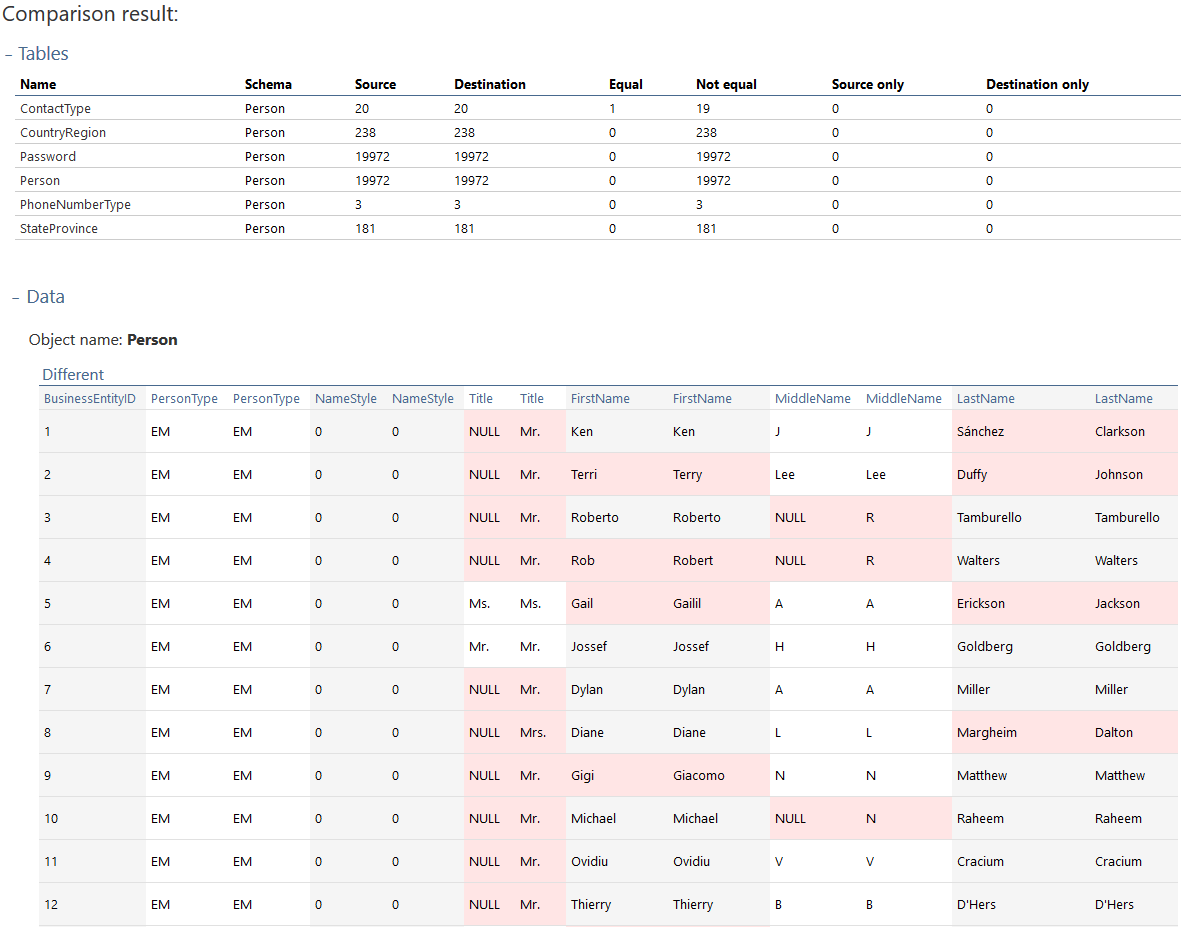
After the comparison process is done, the comparison results will be displayed in the Results grid:
- In the first Compared tab, all objects that have missing, different and additional rows will be shown along with the exact number of rows.
- The Equal tab contains objects that are fully equal – all rows are equal
- The Incomparable tab contains unmapped objects – the ones with different schema and/or object names that weren’t mapped or that exist only in the source or in destination
In the Results grid, you can additionally filter objects and their corresponding rows, by manually checking or unchecking them:
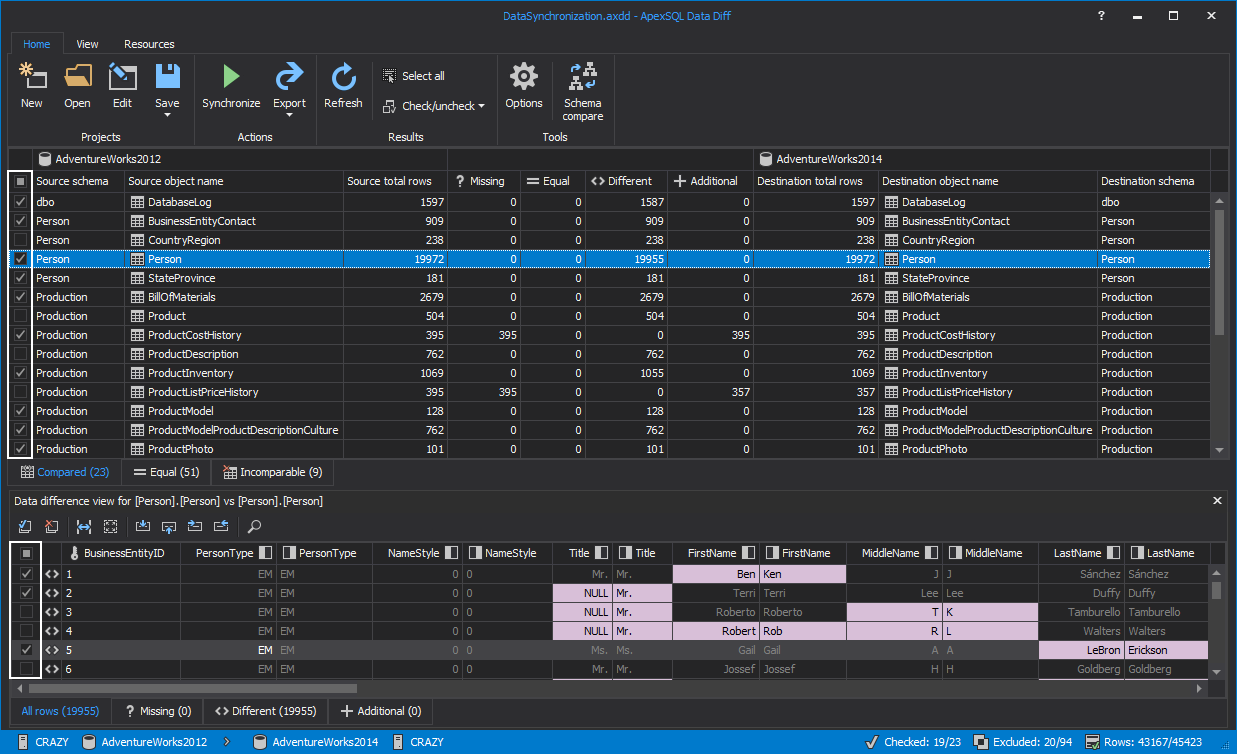
For each object, rows are sorted in 5 tabs: all rows, missing, different, additional and equal.
Since ApexSQL Data Diff handles data differently, based on whether it is the same, different, added or missing let’s clarify what each row means and what will be its action in the synchronization process:
- Equal rows – it does nothing in this case
- Missing rows – these rows exist in source but not in the destination database, so they are copied
- Different rows – these rows exist in both, source and destination, but they are different, so they will overwrite data in destination database
- Additional rows – these rows exist in destination, but not in source database, so in order to have a “copy” of source database these rows will be deleted
Each difference in the rows is highlighted in the data difference view panel.
By clicking on the Export button from the Home tab, the comparison results can be exported into 4 different outputs: HTML simple and interactive report, Excel report and CSV data export:
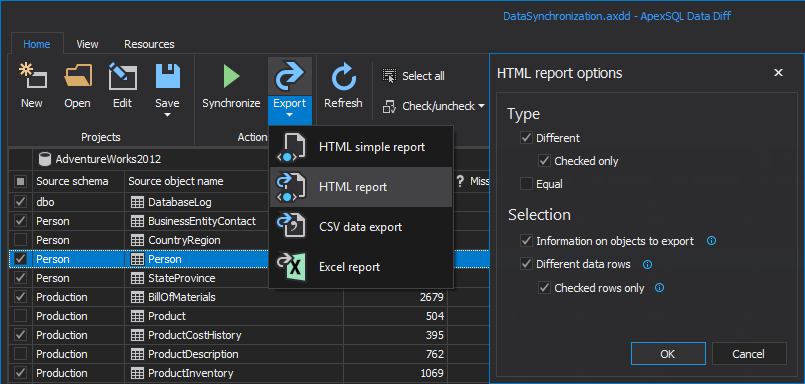
Let’s choose the interactive HTML report and set the report options of what should be included in it. Once the report is generated, open it in a browser and navigate to the expandable parts: Tables and Data.
If both of these are expanded and the desired object is clicked, all data differences for the selected object can be reviewed:
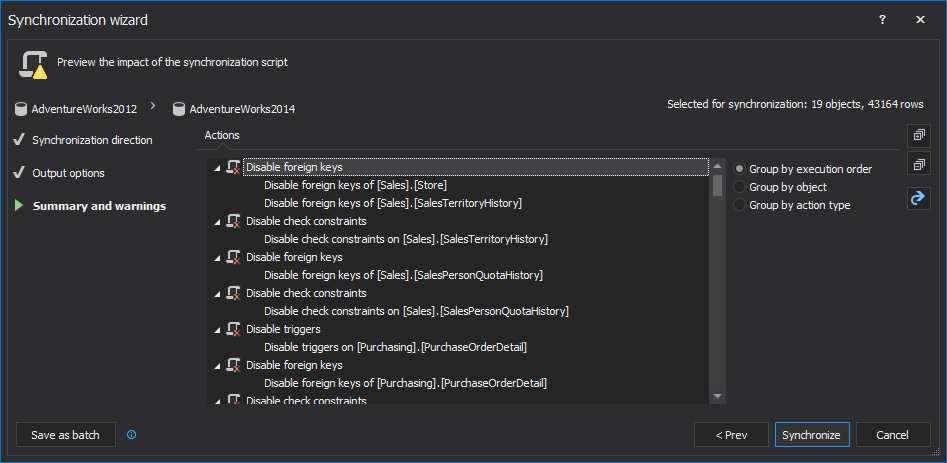
If all desired objects and rows are checked for the synchronization process, click the Synchronize button from the Home tab to initiate the Synchronization wizard:

The first steps in the Synchronization wizard is to confirm the set direction or to change it with a click on the direction button.
The second step is the Output options step, in which the action can be chosen from the drop-down list, along with its corresponding options. Four different actions can be chosen:
- Create a synchronization script
- Synchronize now
- Create a C# solution
- Create an executable installer
In this example, the ‘Synchronize now’ action is chosen that will perform a direct synchronization on the destination database and options to save a copy of the synchronization script and to create a rollback script as a backup option are checked:

In the last step, any Warnings and Actions can be reviewed in their separate tabs, as the last checkup before executing the synchronization:
If this project needs to be repeated, it can be easily automated by creating a batch file that can be scheduled via SQL Server Job or Task Scheduler. To create and save the batch file, click the Save as batch button in the bottom-left corner of the Synchronization wizard:

As displayed, the batch script will contain all CLI switches for options that were set along the way, as the project was constructed. Additionally, you can automatically create a project file that will replace all project options and encrypt any passwords that you might have for SQL Server authentication or for the source control system. Once you reviewed and set everything that you need, click the Save button from the bottom-right corner of the Save as batch window and provide the location where it should be saved.
After the batch script is saved, you’ll be brought back to the last step of the Synchronization wizard and upon clicking on the Synchronize button, a prompt will be shown in order to notify you that changes will be made on the destination database:
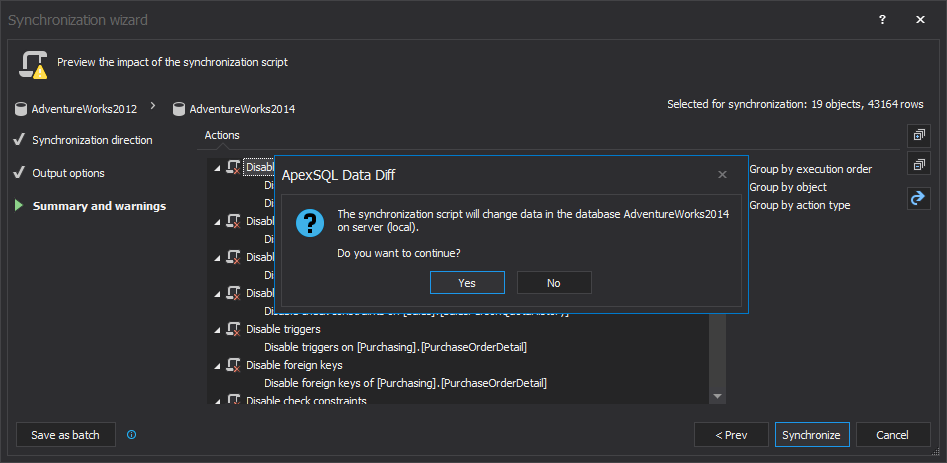
Click the Yes button and the synchronization script will start with execution. Once the synchronization process is done, the Results window will be shown along with all information messages about taken actions:
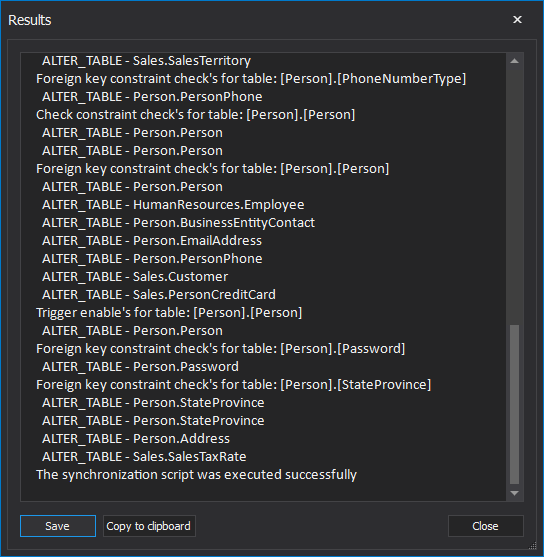
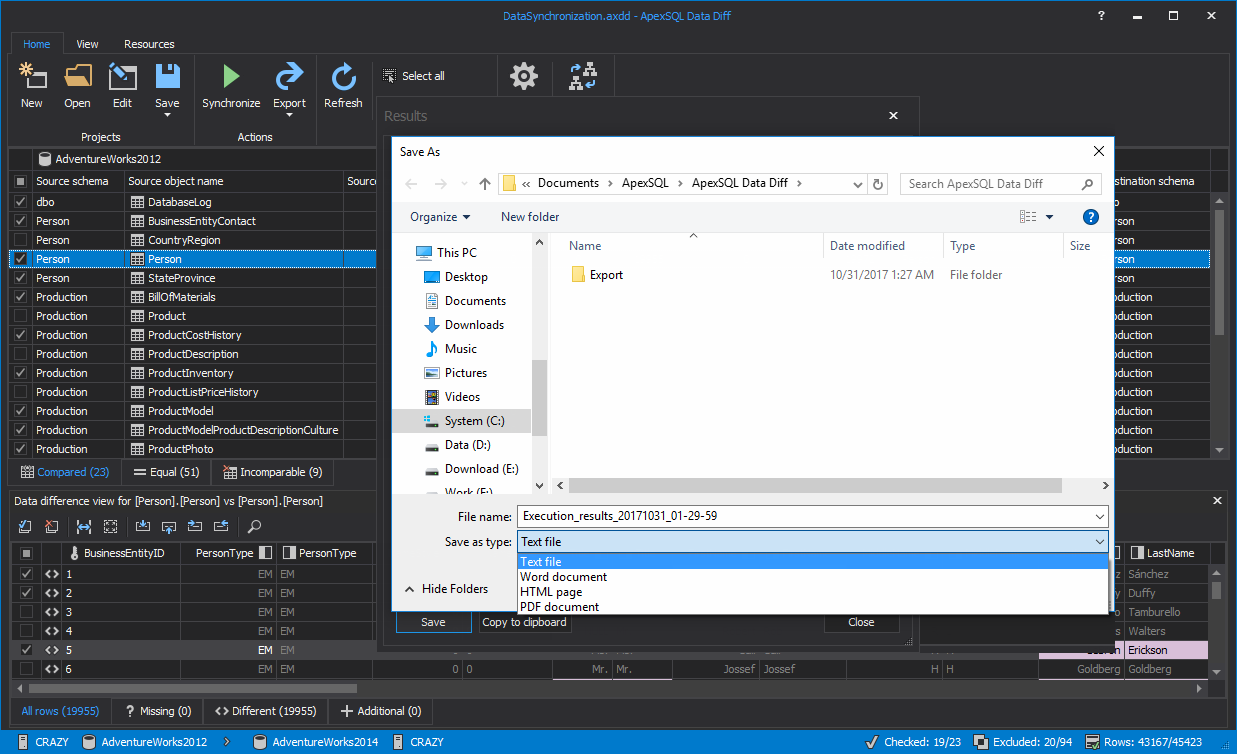
The execution results can be saved into four different output types: text file, Word document, HTML page and PDF document:
Once the execution results are saved and the Close button is clicked in the Results window, the re-comparison of data sources will be done and you can check if everything was properly synchronized.
Thanks for watching. For more information, please visit apexsql.com


