


In this article, we will take an overview of some main features in ApexSQL Compare.
Transcript:
Hello and welcome to this ApexSQL Compare general overview video. ApexSQL Compare is a standalone SQL Server development tool, as well as a SQL Server Management Studio and Visual Studio add-in, that is capable of performing comparisons of:
- SQL files
- file folders
- SQL Server database objects
- SQL Server database objects for SQL Azure Databases and Amazon RDS
ApexSQL Compare can also:
- Perform two-way comparisons and merges
- Compare lines character by character
- Automate and schedule comparisons
- Integrate into SQL Server Management Studio and Visual Studio
- and more …
ApexSQL Compare consists of three main components:
- A Windows application used for visual comparison and synchronization, selecting specific comparison options, comparison modes and ignore options for comparison and synchronization processes
- A console application which allows users to schedule and automate comparison and synchronization and also create HTML reports via a command line interface
- Add-ins including both a SQL Server Management Studio and Visual Studio add-in that enables the user to initiate file comparison directly from the respective host system
Please note that the SSMS and Visual Studio add-ins are optional components that can be selected or deselected during the installation.
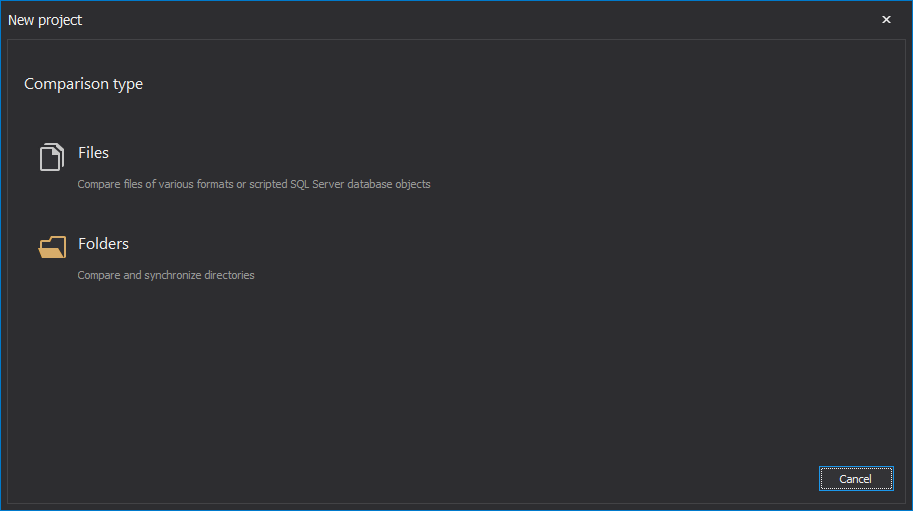
Upon starting the application, the New project window will be shown where two comparison types can be chosen, Files or Folders:
First, let’s choose the Files comparison type:
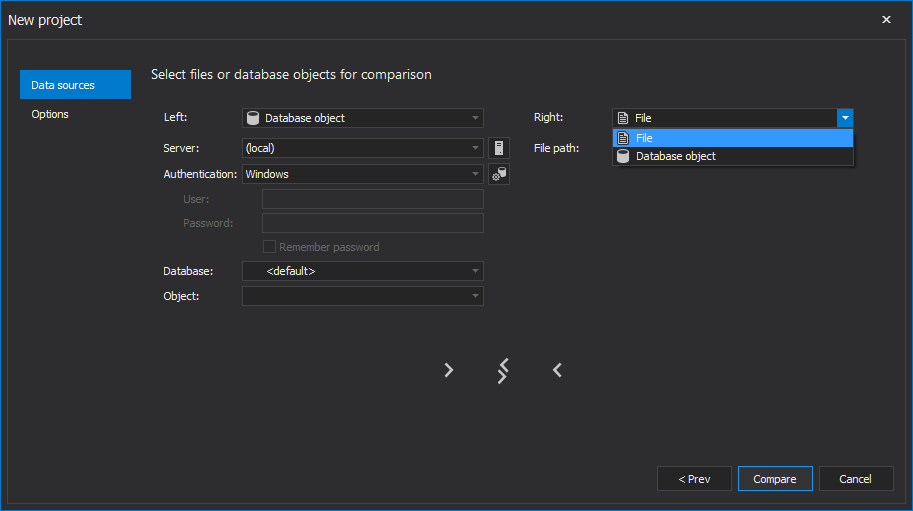
In the New project window, select the Data sources tab and the view for selecting objects for comparison will show. There are two types of data sources that can be chosen for comparison from this view. Using the first type, the file can be chosen for comparison. For example, on the left side of the view, a SQL script with some changes can be chosen to compare it with some previous version of the script, selected on the right side. Let’s use one new version of a database build script and compare it with the previous version:

Next, we can switch to the options tab where there are two sets of options. The Comparison mode, to choose the way the changes are marked and Ignore options to set which common SQL script differences will be ignored with comparison.
In this case the differences, like scripted permissions or comments, which are not crucial for the comparison of two script versions will be ignored. The ignored differences will not be highlighted after the comparison to reduce unnecessary visual noise:
When everything is set up, click the Compare button and the comparison process will be initiated.
After the comparison process is done, the comparison results will be shown in the main window:
For the other type of compare, in the Data sources view of the New project window choose database object. In that way, two versions of one or more database objects can be compared for analysis:
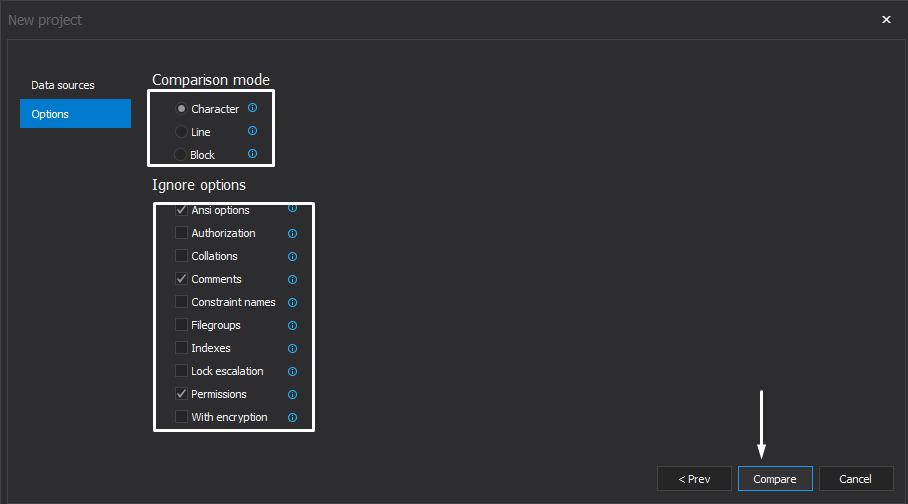
When the data sources are specified switch to the Options tab to choose between comparison modes and set specific ignore options.
Let’s choose the Character comparison mode and the options to ignore differences such as ANSI options, Comments and Permissions:

When everything is set up, click the Compare button and the comparison process will be initiated.
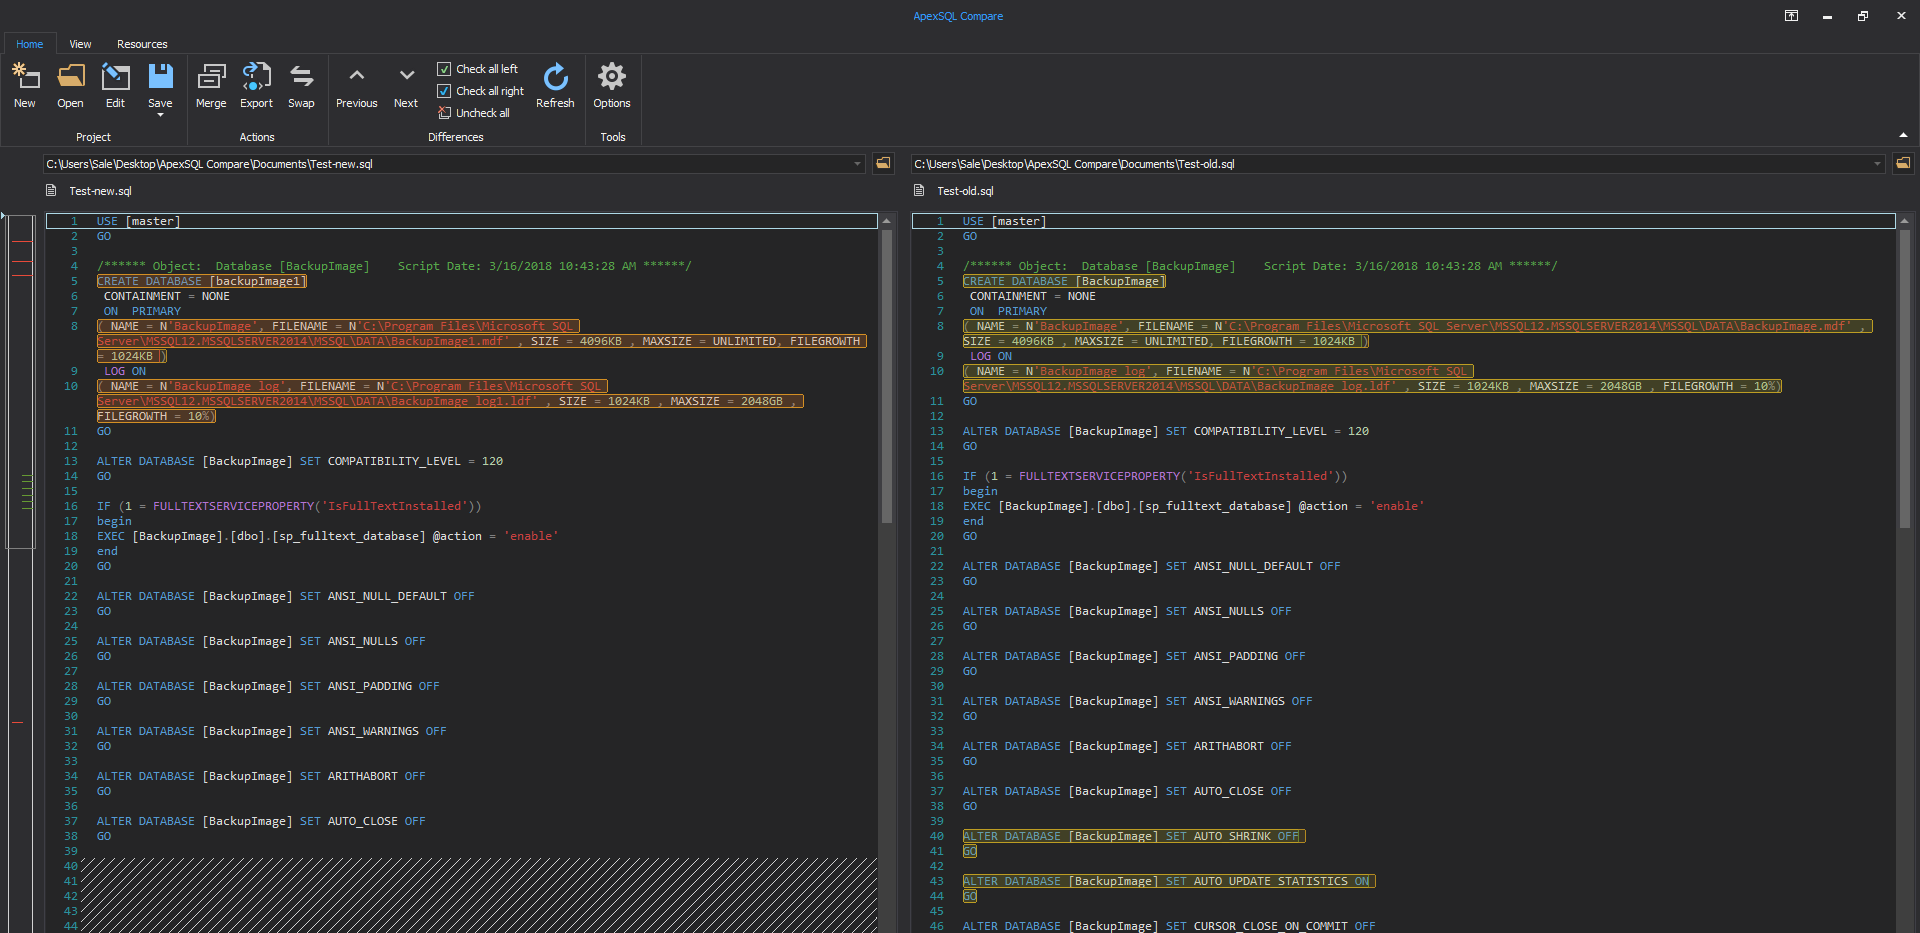
After the comparison process is done, the object’s DDL script will be compared will be displayed in the main window with all differences highlighted
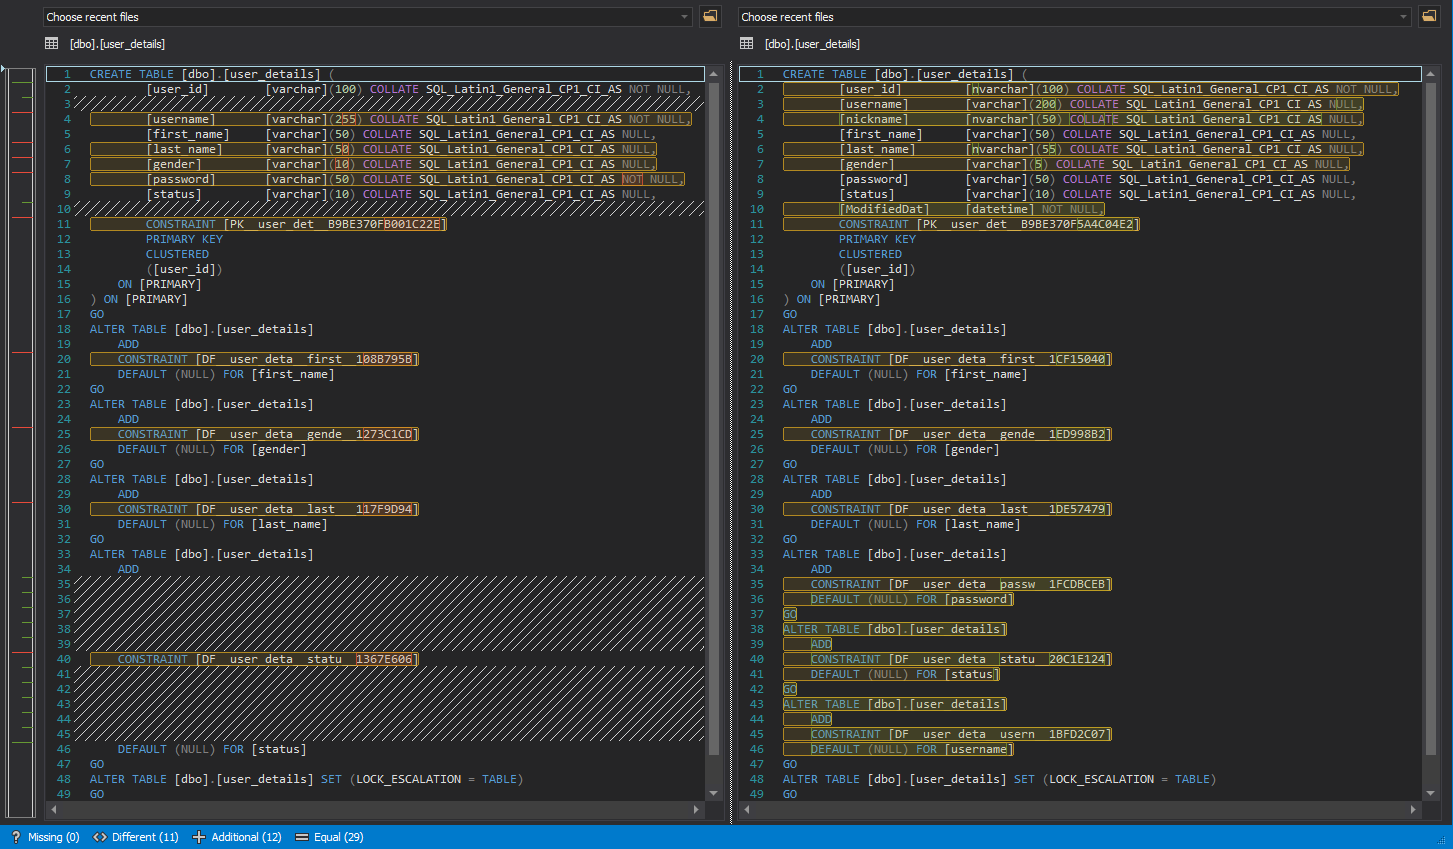
Since Character comparison mode was used, different rows along with all individual character differences are highlighted.
Because the objects are compared in their scripted form, it is possible to compare a SQL script file with the corresponding database object, on an apples to apples basis, to review changes before any updates.
The differences can be viewed at the bottom of the main application window, in the Status bar. Four types of differences are shown including:
- Missing – The number of lines that exists only on the left side
- Different – The number of lines that exists on both sides, which have differences
- Additional – The number of lines that exists only on the right side
- Equal – The number of lines that exists on both sides, which are equal

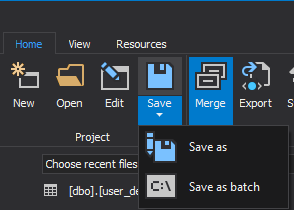
Under the Home tab, there is a Merge view option that shows selected differences from both left and right panels. The Merge script can be copied to a clipboard or saved as a file:

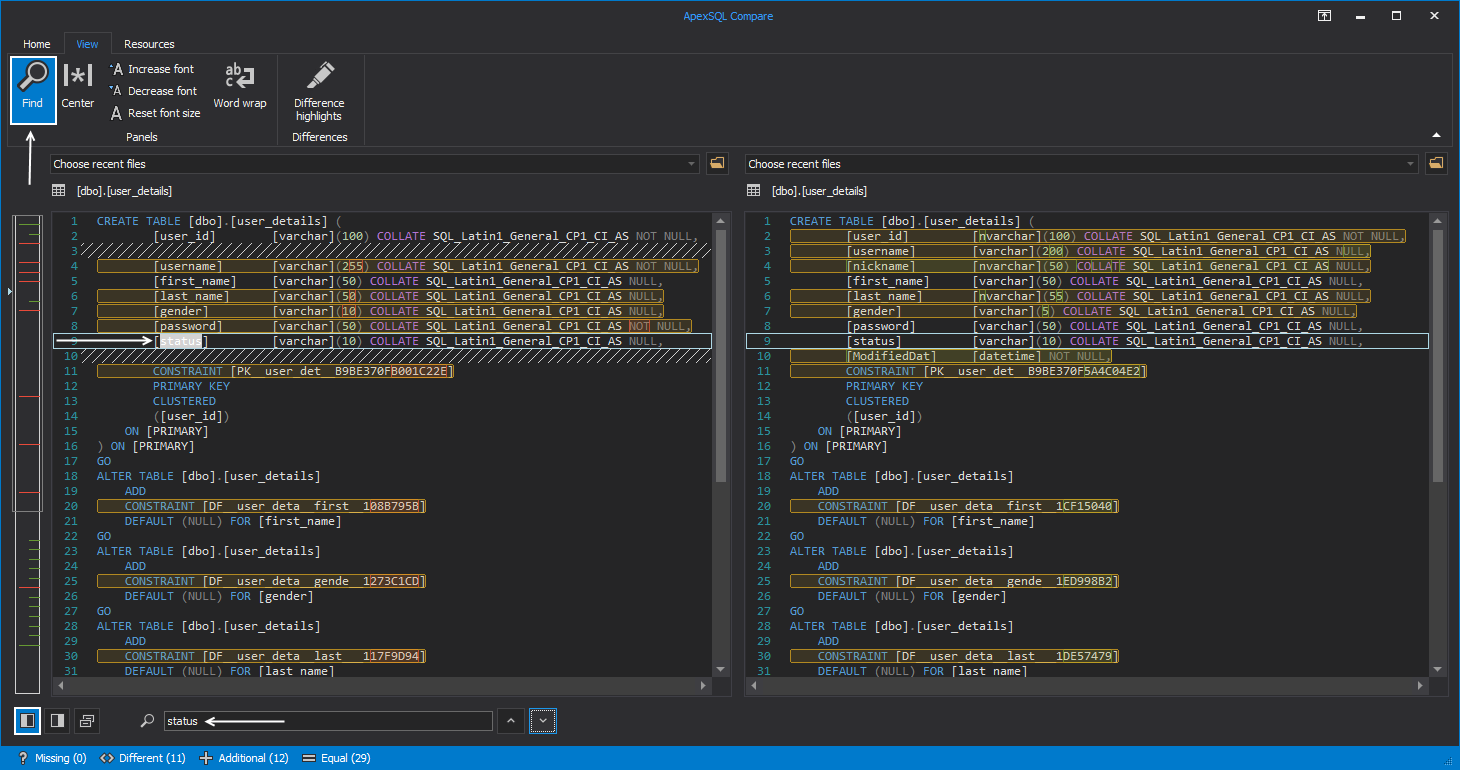
If there is a need to locate a specific word or change, under the View tab in the main window, click the Find button, it will show the Find panel, where panel is selected, in which search should be conducted, and enter a desired search term.
In this example, the word status is entered, chose and found on the left side in the comparison object:
Now, let’s initiate a New project and choose the Folders comparison type:
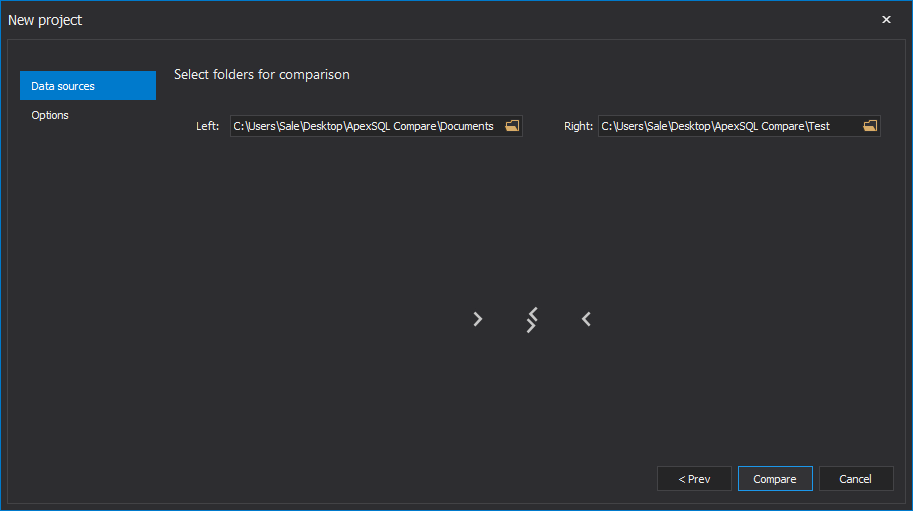
Select specific folders for comparison on the left and right side.
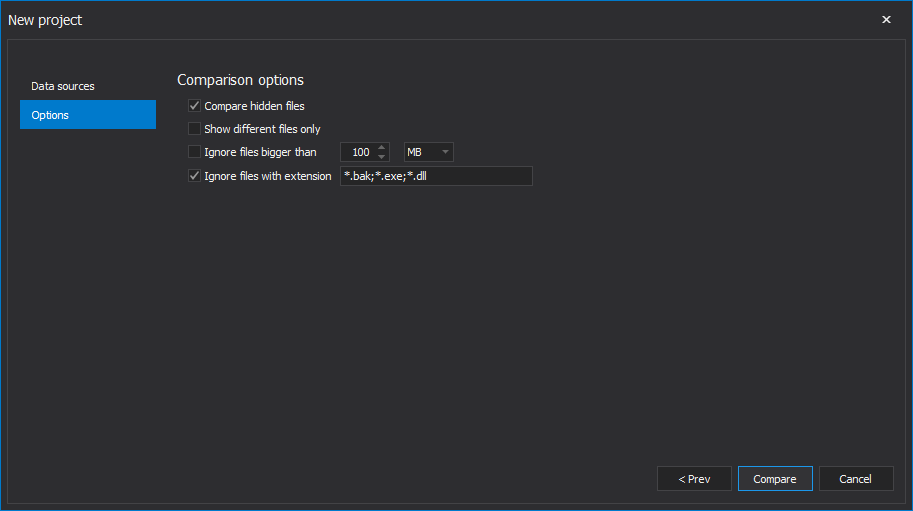
In the Options tab set the desired comparison options. For this purpose of the video, two options are checked, Compare hidden files and Ignore files with extension:
Once everything is set, click the Compare button. After the comparison process is finished, the results are shown side by side:
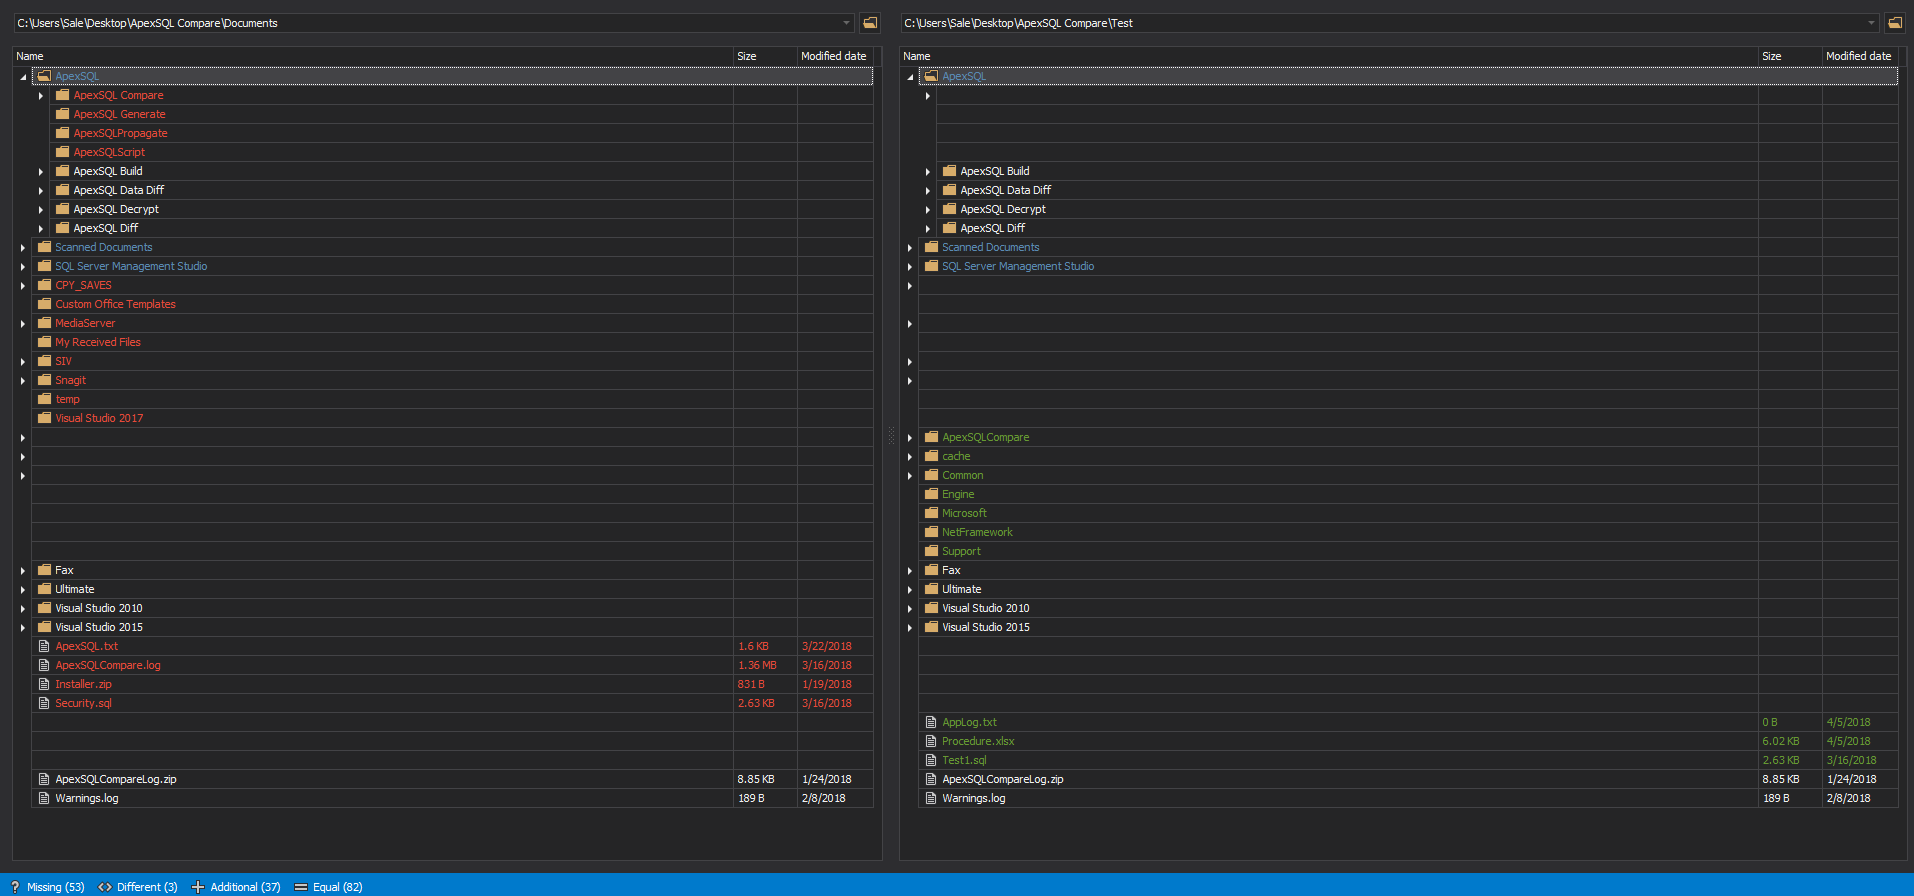
Differences are highlighted by type:
- Missing files and folders existing in left, but not in the right folder are red
- Different files and folders existing in both, left and right folders, but files are different are blue
- Additional files and folders existing in right, but not in the left folder are green
- Equal files and folders existing in both, left and right folders, and they are equal are white
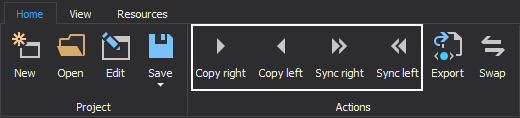
The chosen files and folders can be copied or synchronized from one side to another:
- The Copy option will copy only selected files from one to another side
- The Sync option will synchronize all files from one to another side
Depending from which side will be copied or synchronized, click on one of the Copy/Sync buttons from the Home tab:
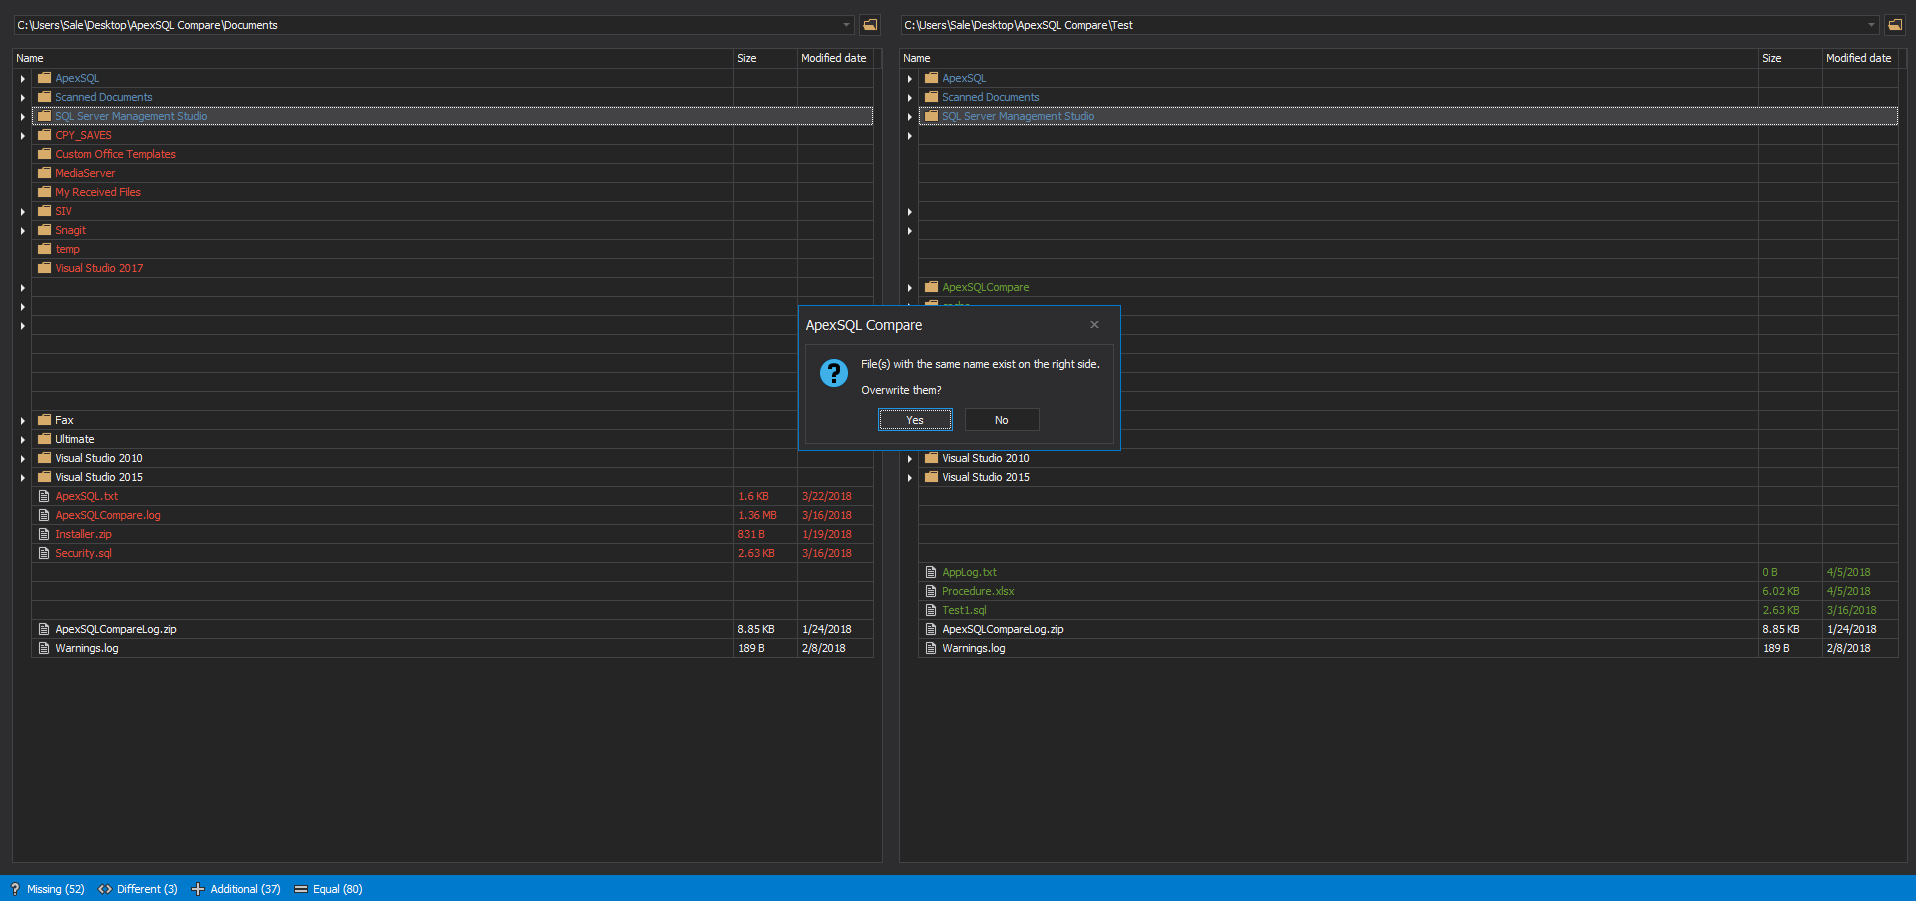
In this video, synchronization is performed from the left to the right side, and the prompt message will be shown upon clicking on the Sync right button and it will ask the user confirm the synchronization and to overwrite the existing files on the right side:
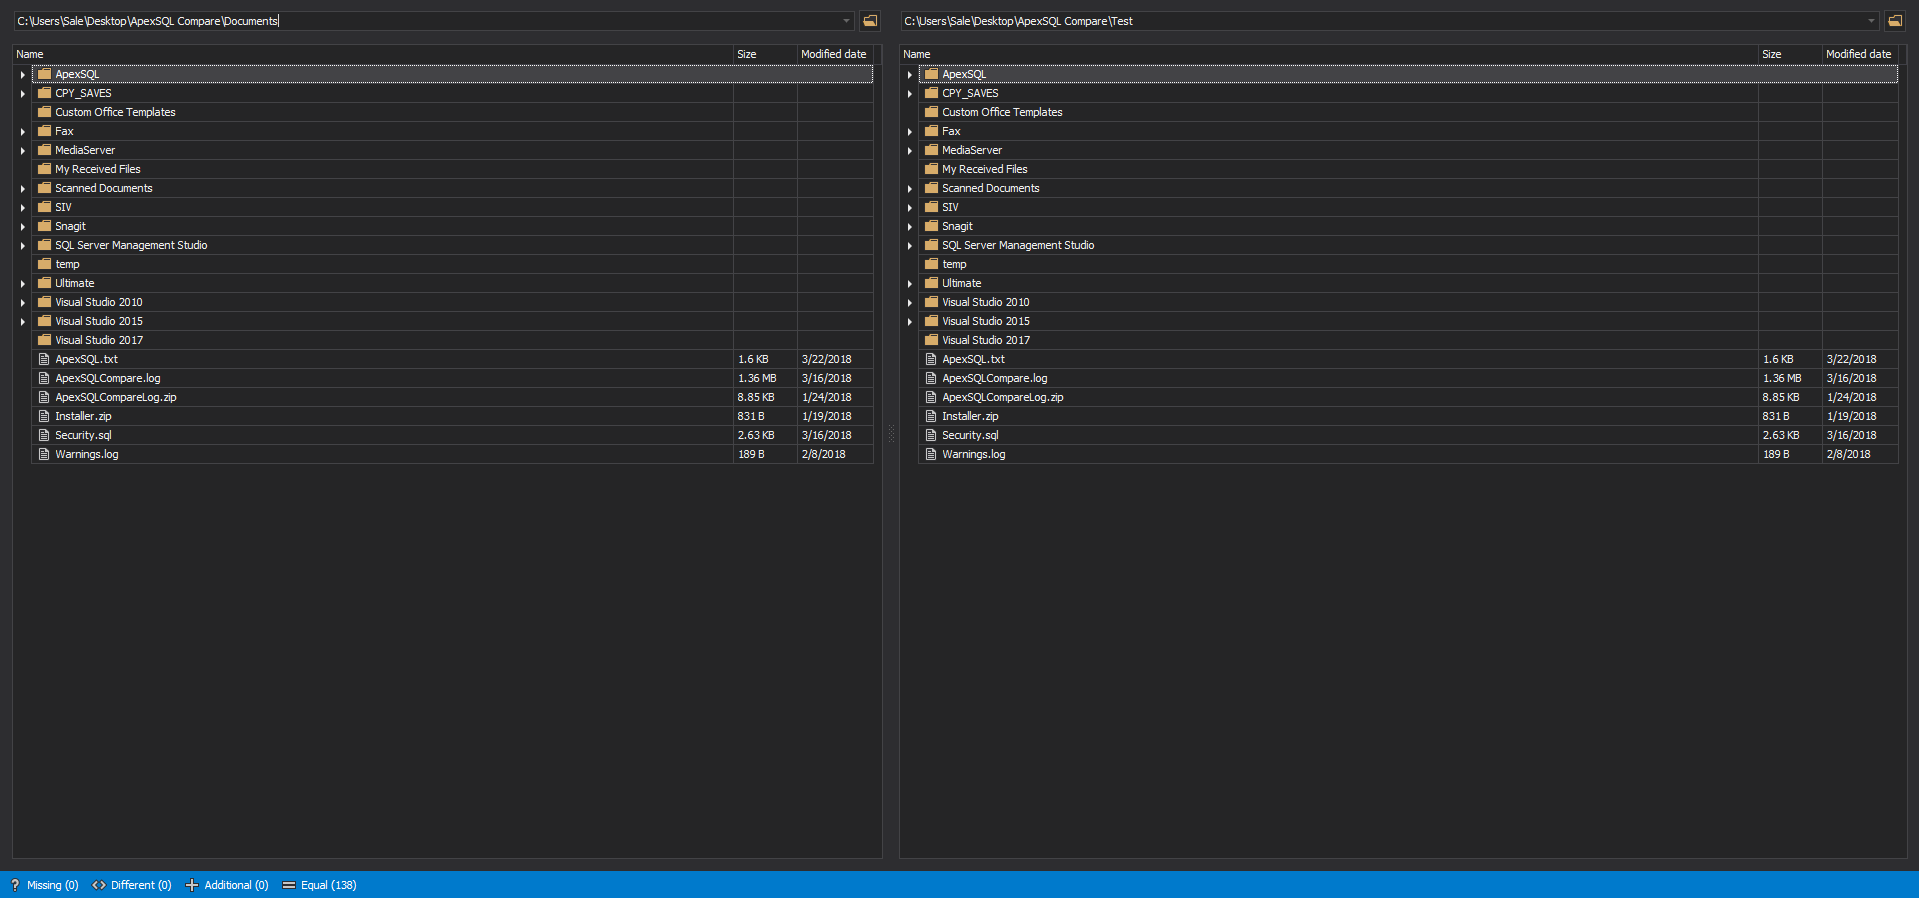
After synchronizing from the left side to the right, in the results grid, both sides should have equal number of files and folders:
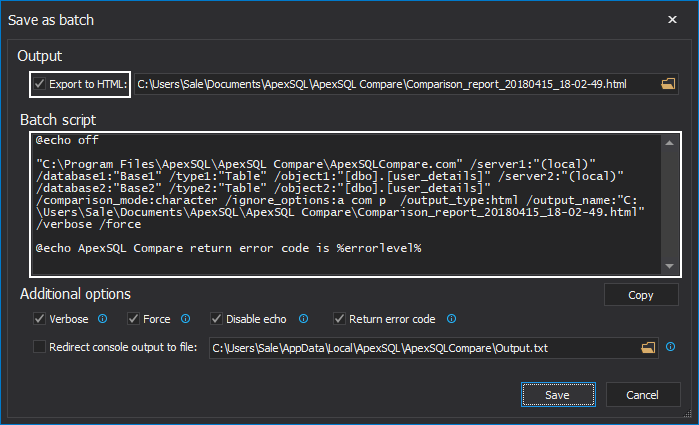
The set of options used for comparison can be saved as a project file and be used for automated comparison reporting for QA purposes:
To prepare the comparison reporting for automation, a batch or PowerShell script can be saved with the set of Command Line option switches that correspond the options set used in the project. Those explicit switches and values can be replaced with the project file, which essentially encapsulates them, in the context of the automation script. The project file can be updated with changes made, and the automation script wouldn’t need to be changed.
In that way, it is possible to save the project file with the source folder for comparison, for example a network share with the option to compare only different files. Then include it in the batch script and add the option switches for the destination folder and to sync files from source to destination. With the set of scripts like that, multiple folders can be updated from single source and that can be processed on a schedule with a generated report of differences:
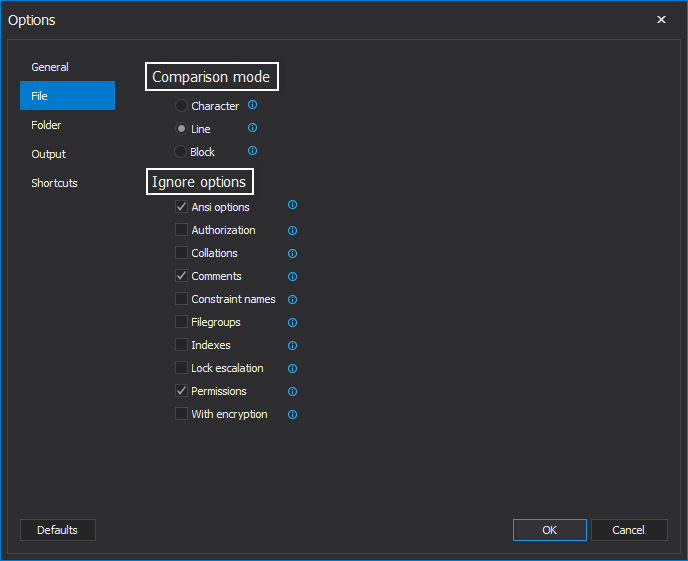
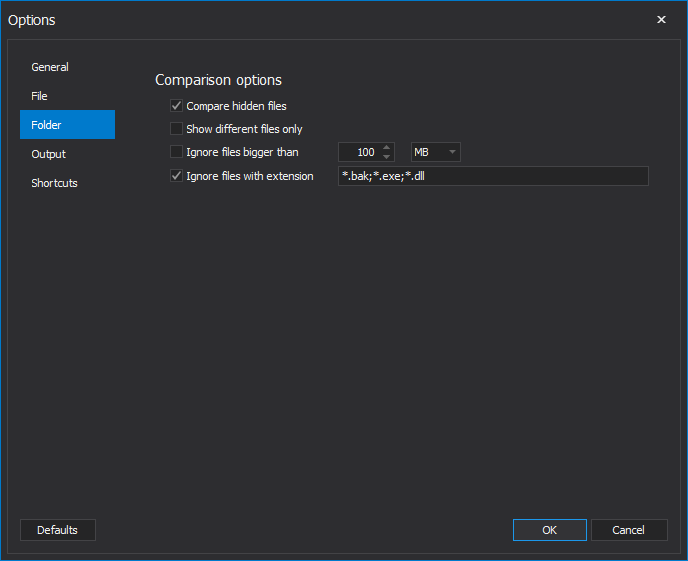
The Options window is divided in five tabs.
The General tab has options for visual settings, application startup and recent files.
In File tab the default Comparison mode and Ignore options for file comparison can be set:
Also, in the Folder tab the default Comparison options for the folder comparison can be set:
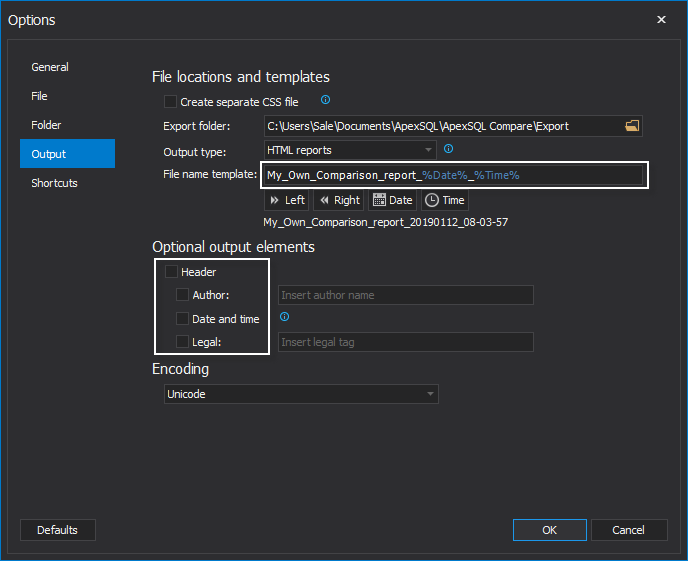
Under the Output tab the report File locations and templates can be set and changed including Optional output elements for labeling:
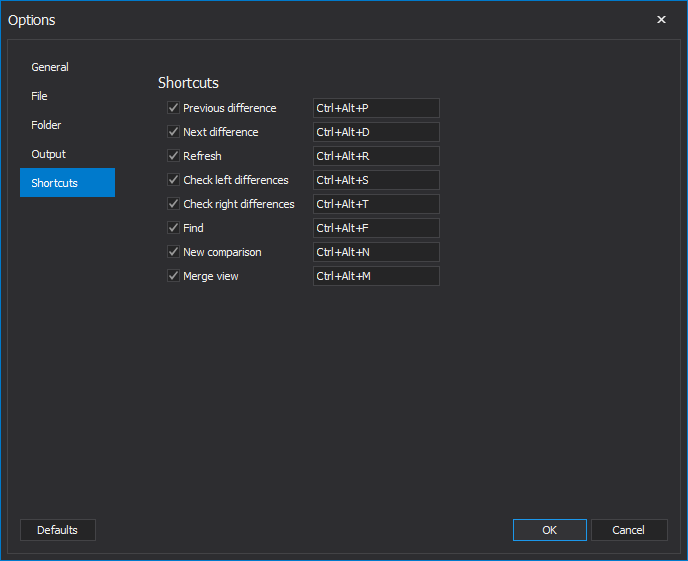
The last option set is the Shortcuts tab where default shortcuts can be changed for commands such as Refresh, Find, Merge View and so on:
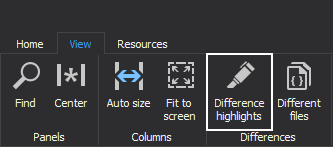
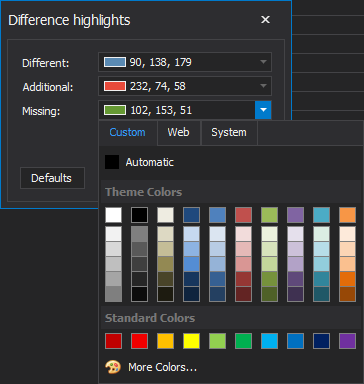
Under the View tab, click the Difference highlights button, and from this dialog, default colors can be changed based on user preferences:
Thanks for watching.
For more information please visit www.apexsql.com


