


This video shows how to recover dropped tables in SQL Server database using ApexSQL Recover and ApexSQL Log.
Transcript:
Hello, and welcome to another video in ApexSQL disaster recovery video series. In this video we are going to show you how to recover structure and data lost due to drop operation using ApexSQL Log and ApexSQL Recover tools. While both tools can perform a recovery of table structure lost due to drop operation, only ApexSQL Recover can also recover the data from dropped tables. The tools utilize different mechanisms to perform the recovery. While ApexSQL Log reads only online transaction log or transaction log backups to perform the recovery, ApexSQL Recover also utilizes information stored in the database MDF file to perform the recovery. Regardless of the recovery type and difference in sources and output, both tools utilize the same approach and create a recovery script which will rollback changes and recreate dropped table in the SQL Server database.
In order to simulate undesirable drop table from which we’d like to recover, we’ve prepared a database with a simple table and inserted some data. Our database is in the full recovery model which ensures that the transaction log contains full information on transactions which occur on the database which is used as a source for the recovery.
Now, let’s quickly drop our table:
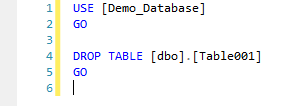
And confirm that the table has been dropped along with all the data within.
First, let’s assume that the drop occurred as a mistake, and that the user only wanted to delete the data from the table and not the structure, basically, the user has executed DROP operation instead of the DELETE operation. This means that we would like to recover only table structure, which we can achieve with both ApexSQL Log and ApexSQL Recover. To perform a recovery in this example, let’s first use ApexSQL Log, a Microsoft SQL Server transaction log reader which allows users to view the information stored within the transaction log files and backups and enables them to roll-back any changes found during the transaction log auditing.
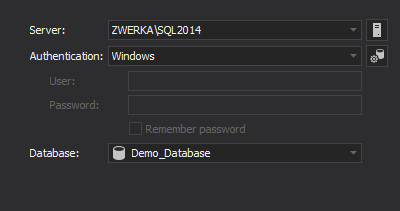
To get the process rolling, start ApexSQL Log and select the SQL Server, choose authentication method and provide valid credentials and finally choose a database on which the recovery will be performed in the first step of the session wizard:
In the Data sources step of the wizard, ApexSQL Log automatically adds online transaction log file for auditing. In case we are creating regular transaction log backups, or a transaction log backup has been created since our table was dropped, these should also be added for analysis.
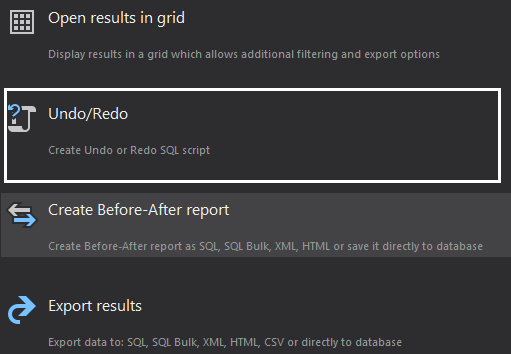
In the next step of the wizard, the user needs to choose an output of the recovery process. For the recovery of dropped table, there are two options. The results can be shown in a comprehensive grid via “Open results in grid” option, which is particularly useful for the situations where user needs to examine the content of transaction log file before fine-tuning the audit results and selecting only specific operations for the recovery. The second option named Undo/Redo allows users to skip the analytical grid and to immediately perform recovery at the end of the wizard. Let’s choose the Undo/Redo output:
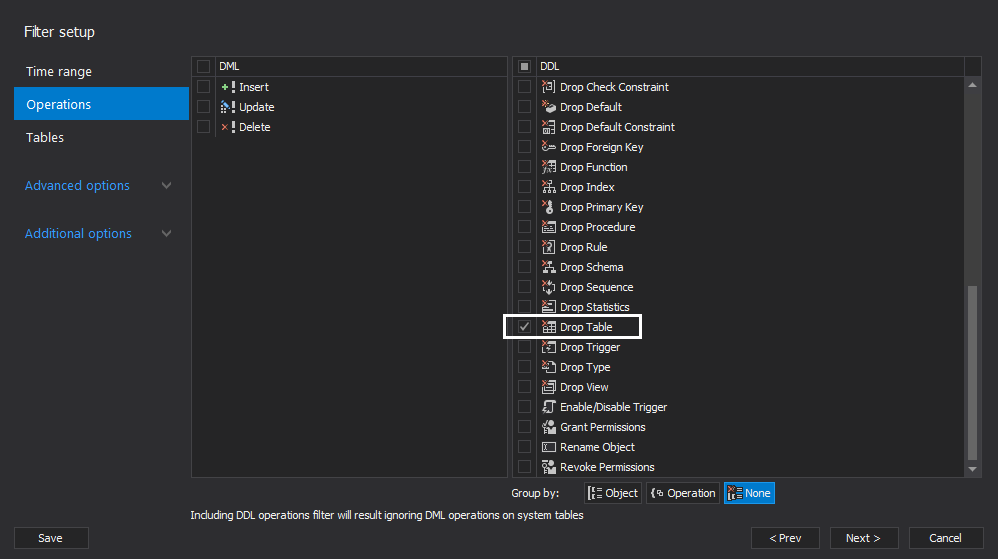
The Filter step of the wizard allows us to utilize various filters to narrow down and fine-tune the auditing information we are extracting from the transaction log files. There is a plethora of various filters available to the user including date-time filters, operation, table, transaction, user, field values, server process ID and transaction description filters. Since we are aware of the exact moment when our drop operation has occurred, we can setup a custom date/time filter to only audit this exact point in time. Furthermore, we need to exclude DML operations from the auditing, and include the ‘drop table’ operation from the DDL list in the ‘Operations’ tab:
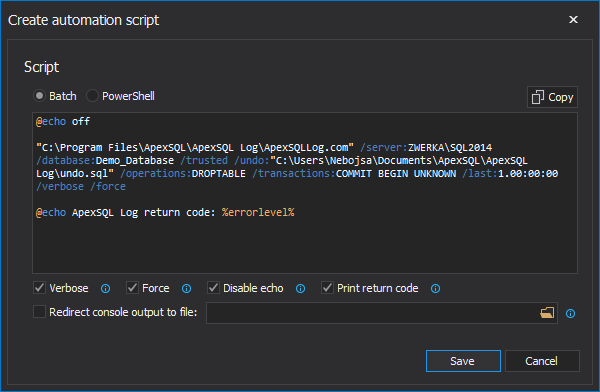
Once all the filters are in place, we can advance to the final step of the session wizard, where ApexSQL Log has automatically chosen ‘Undo’ script as output. As an additional convenience, the batch script for command line interface which resembles session settings inputted by the user during the session wizard is automatically created by ApexSQL Log in case user wants to schedule the recovery job or perform it via CLI:
After clicking on the ‘Finish’ button, ApexSQL Log will perform a short processing, and once this is completed, auditing statistics will be shown in addition to the created rollback script. To open the script, simply click on the open file link, and ApexSQL Log will open it in the designated editor which can be chosen in the application options. In our case, we are opening our undo script in the ApexSQL Log built-it internal editor.
The only remaining task is to connect the script to our database, and to execute it to recover our dropped table ApexSQL Log will confirm that the recovery was successful, and we can check and confirm that our table structure has been recovered by inspecting it in the SSMS:

Now that we’ve shown how to recover table structure lost due to the drop operation, let’s focus on recovering both the structure, as well as the old data that resided in the dropped table. For this purpose, we’ll use ApexSQL Recover, a powerful SQL Server tool which enables users to recover database structure and data lost due to rogue delete operation, drop and truncate operations, recover deleted blobs, or extract blobs from the databases or tables from backups without the need to restore those backups on the SQL Server itself.
The starting point for this recovery is the same as with the ApexSQL Log – after the table has been dropped, but in this case, we are going to recover dropped data in addition to the dropped table structure.
Once we start the ApexSQL Recover, we need to choose the proper recovery, which is in our case to ‘recover from Drop table operation’.

First, similar to ApexSQL Log, we need to select our SQL Server instance, provide valid credentials and select the database from where our table was dropped.
The next step of the wizard offers user a choice on the data sources which will be used to recover dropped table. If the user is not sure how to proceed here, the ‘Help me decide’ option can be chosen where application will lead user through a quick algorithm in order to choose the best possible option. Since we did not create any additional sources, we’ll not opt for the ‘Add transaction logs’, but we will choose the ‘No additional transaction logs are available’ option.
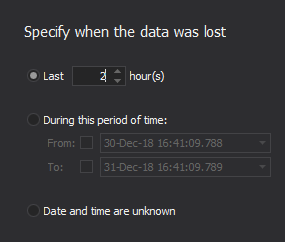
The next step of the wizard allows user to specify the date/time period for the recovery. Let’s choose the ‘Last 2 hours’ option, since our drop operation has occurred in that time window and proceed further through the wizard:
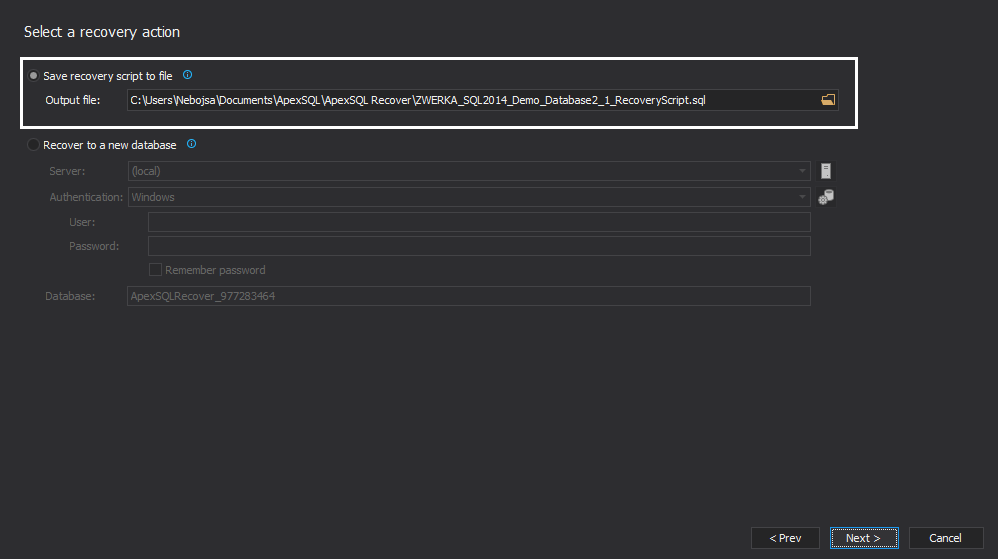
In the recovery action of the wizard, the user can make a choice between recovering the dropped table directly to the new database, or creating a recovery script which can later be executed against the original database to complete the recovery. Let’s go with the option to create a recovery script:
The final step of the wizard allows us to choose between recovering only structure, only data, or both together. Since we want to recover both structure and data, let’s simply proceed. After several moments, ApexSQL Recover will complete the processing and provide information on recovered objects and data rows, and allow us to inspect created script by clicking on the ‘View script’ link. ApexSQL Recover has the same built-in editor for the created script as the ApexSQL Log it should be used in the same manner as the one previously used. So, once again, connect to our database and execute the script. When ApexSQL Recover confirms that the recovery has been completed and script execution has finished, a quick glance on our database and table in the SSMS shows that the table structure and data have been completely recovered.
Thanks for watching. For more information please visit www.apexsql.com


